


Okta Workflows is a no-code platform for automating identity processes.
Suspend user flow
This step-by-step tutorial will show you how to build a no-code workflow that sends a notification when a user is suspended in Okta.
You will learn:
- How to build your first flow
- How to trigger a flow when a user is suspended
- How to send an email when a user is suspended
- How to test individual cards and the flow
The flow you will build looks like this:

User suspended notification flow
What is Okta Workflows?
Okta Workflows is a no-code platform that allows you to build automation to help with identity processes. For example, you can build the following workflows without asking IT or developers for help:
- Reset password end user sessions when suspicious activity is detected.
- Give or remove user access to applications.
- Send notifications (Slack, email) when events occur in your Okta organization.
- In this tutorial, you will run a low when a user is suspended event occurs.
- Create basic reports.
This is a short list of what is possible.
Getting access to Okta Workflows
To complete this tutorial, you need to have access to Workflows.
There are two ways to access Workflows:
- You might be entitled to Workflows if you already use some Okta products.
- Access to Workflows as part of the WIC (Workforce Identity Cloud) trial.
Workflows when using other Okta products
If you have Okta SSO (Single Sign-On) or Okta UD (Universal Directory), you might be entitled to Workflows. Check if you can access Workflows by going to Okta organization > Admin > Workflows > Workflows console.
If you use these products but don’t have access to Workflows, please get in touch with your account manager. Or, contact me, and I will try to help you 🙌.
Okta Workflows as part of the WIC (Workforce Identity Cloud) trial
To sign up for a Workforce Identity Cloud trial:
- Go to the Okta Workforce trial page.
- Register for a WIC trial to access Workflows.
Opening the Okta Workflows console
To access Workflows:
- Sign in to your Okta org
- If you are using a trial, your org URL can be found in an email with the Activate your Okta account subject.
- It has the following format:
https://trial-<ID>.okta.com. For examplehttps://trial-6093533.okta.com.
- Click Admin (upper right) to access the Admin console.
- Click Workflows > Workflows console to open Workflows on the right-hand side menu.
You will see the Workflows home page:

Workflows home page
Building the flow
Building the flow has the following steps:
- Creating a new flow
- Setting up an event to run the flow
Creating a new flow
To create a new flow:
- In the Workflows console, click Flows.
- Click + New Flow in the Default Folder to create a new flow.
- Click Unnamed (upper left corner)
- For name, enter User Suspended Notification
- For description, enter This flow sends a notification when a user is suspended.
- Also, check the Save all data that passes through the Flow? checkbox. You will be using this capability at the end of this tutorial.
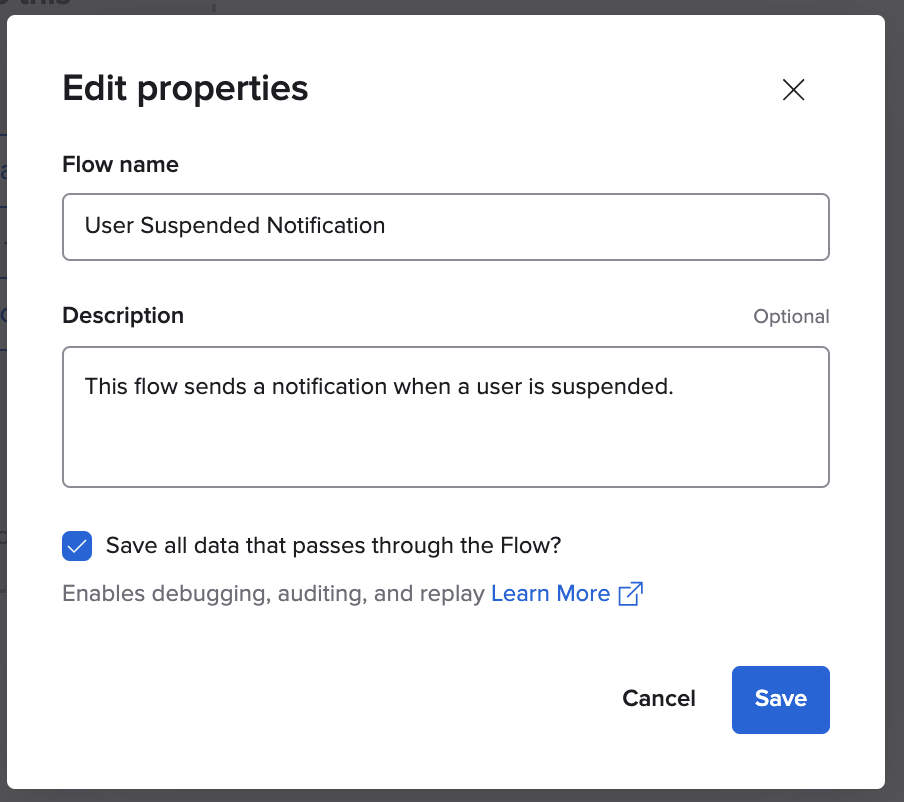
- Click Save to save the flow name and description,
You created your first flow!
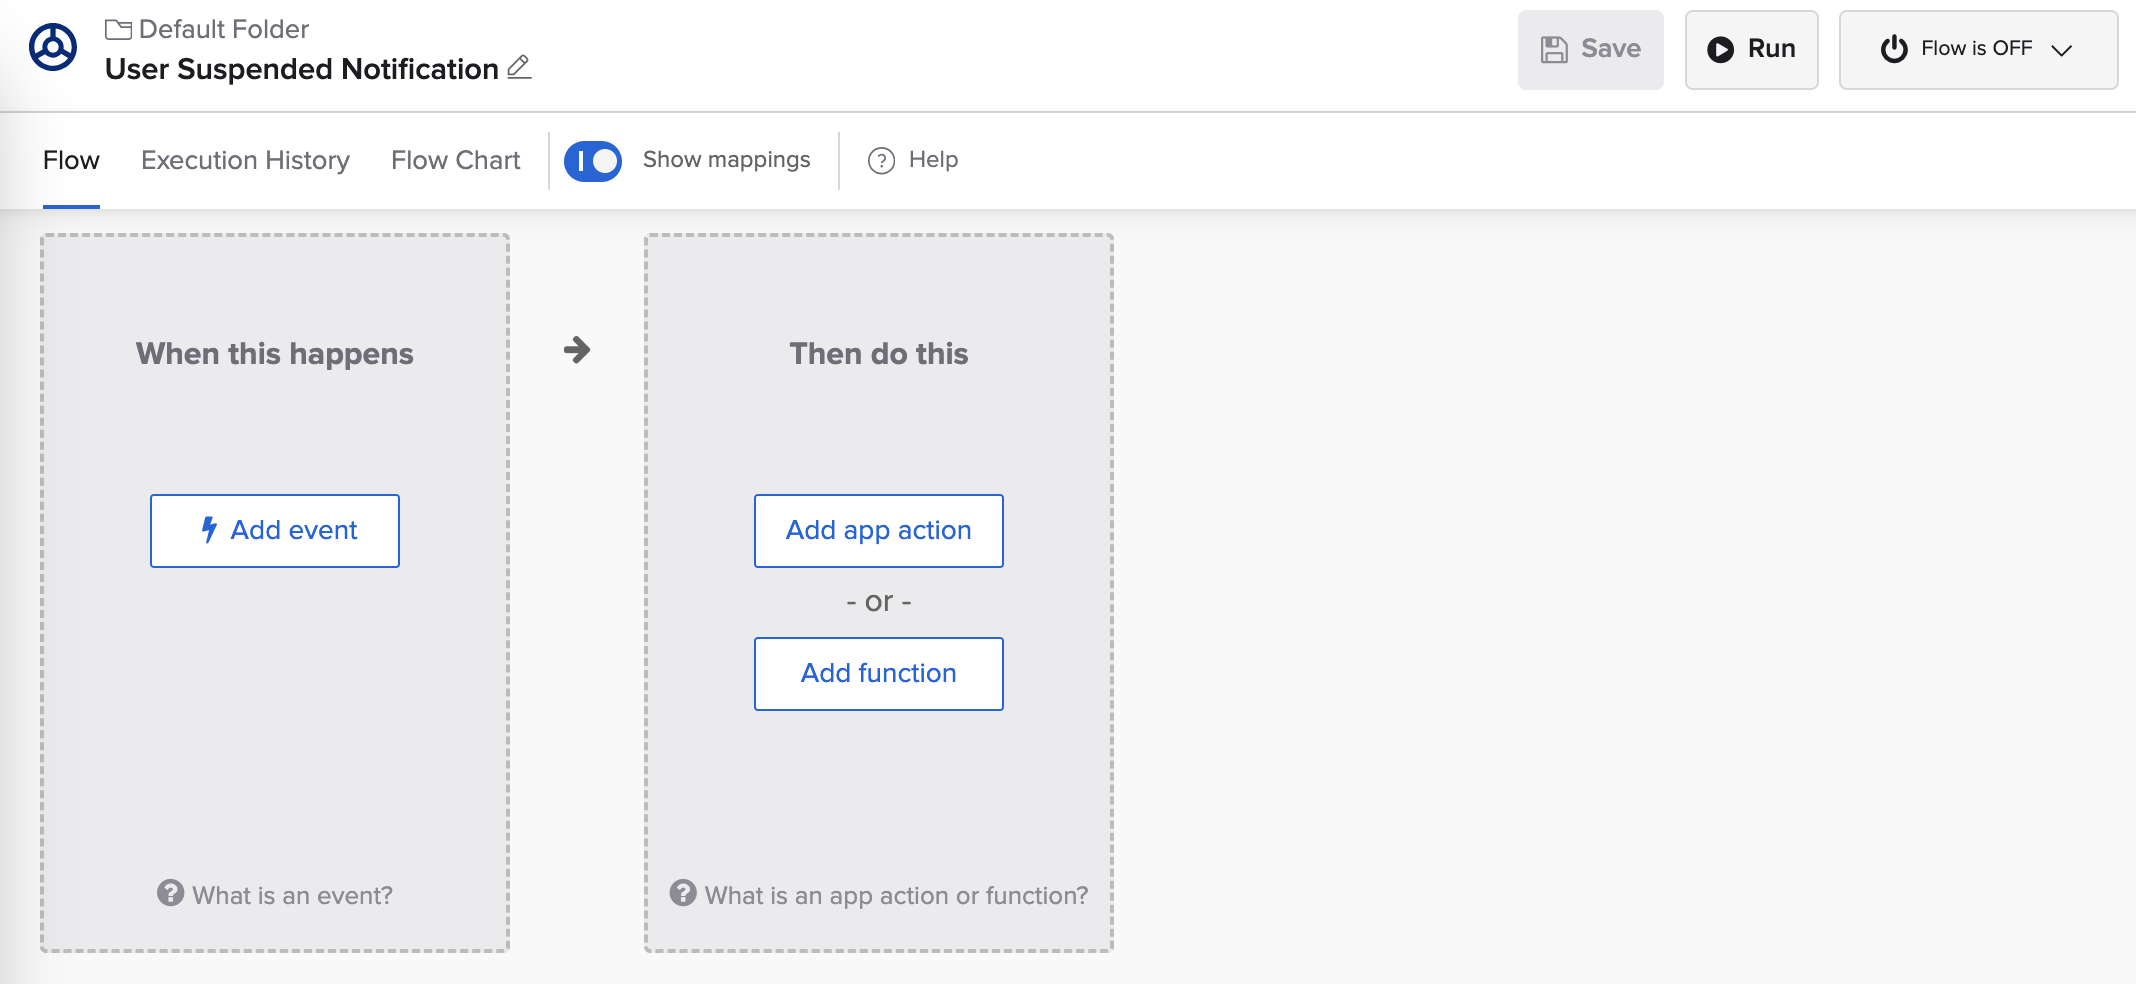
New flow
The following section will teach you how to invoke a flow when a user is suspended.
Setting up an event to run the flow
You want to run the flow when a user is suspended.
To add an event to run the flow:
- In the box where it says When this happens, Click Add event.
- Select Okta from the apps list.
- In the Okta events menu, look for and select the User Suspended event (you can search for the event).

Selecting an event to run the flow
If this is your first flow or you don’t have a connection to Okta, you will see the following and need to create a connection to Okta.

Connect to Okta
If you already have a connection to Okta, use it, and you may skip to the next section.
Setting up a connection to Okta
- Click +New Connection.
- For Connection Nickname, enter Okta Connection.
- For the Domain field, enter your domain name without the http://
- For example, trial-6093533.okta.com.
- Open the Okta Admin Console in a new browser tab and go to Applications > Applications.
- Click on Okta Workflows OAuth.
- Click on the Sign On tab.
- Copy the Client ID.
- Return to Workflows and paste it into the Client ID field.
- Copy the Client secret.
- Return to Workflow and paste it into the Client Secret field.
- Click Create to create the connection to Okta.

Setting up Okta connection
The flow with the User Suspended event
Your flow now looks like this:

Flow with User Suspended event
Workflows will monitor for this event (user suspended), and when a user is suspended in an organization, this flow will be invoked.
The output fields that you see in the User Suspended card are the information that the card makes available (when the event is fired). You can use any of the fields in other flow steps.
In the next section, you will create a message to be shared via email.
Creating the message for email
To create a message, you are going to use the Compose card.
In the previous section, you learned how an event invokes a flow. Other flow components are app actions and functions.
- App action – a step that controls services such as Gmail, Slack, and others.
- Function – a step to interact with, change, or control the data in a flow.
To add the Compose card:
- Click Add function.
- Select the Text category, then choose the Compose function.
- In the Compose card, type the following:
Hello,User with the following username was suspended: - From the User Suspended card, find Okta User > Alternative ID.
- Drag and connect the Alternate ID field from the User Suspended card and place it after the suspended: word in the Compose card.
- Click Save to save the flow.

Passing data to a card
Your flow will look like this:

Suspend user flow
Testing the Compose card
One neat feature in Workflows is the ability to test a card individually.
Using the Compose card, click the play ▶️ button at the bottom of the card. You will need to enter sample data for the second field and then click Test to see the card output.

Testing a card
Testing each card individually as you build a flow is good practice.
In the next section, you will add a card to send email notifications.
Sending email notification
In this step, you will add the Gmail card to send an email.
Sending mail with the Gmail card
Steps to add the Gmail – Send Email card:
- Click Add app action.
- Find the Gmail app.
- Find and click on the Send Email action.
- If this is your first time using the Gmail card, click + New Connection and follow the steps to authenticate your Gmail account.
- You need access to a Google Workspace account to use this card (not a personal Gmail).
The Send Email card looks like this:

Gmail Send Email card
Next, you need to set fields on the Send Email card.
- For the Email field, enter your email (or any other email that you can check)
- For the Subject field, enter User suspended.
- For the Body field, drag and connect the output field from the Compose card to the Body field in the Send Email card.
- All other fields are optional.
- If you prefer to hide them, click ⚙️ > Choose fields on the Gmail card.
- Click Save to save the flow
The flow now looks like this:
Suspend user flow with Gmail card
Testing the Gmail – Send Email card
To test the Send Email card:
- Click the play ▶️ button.
- The To and Body will be pre-filled with data from the card. Enter the sample Body field and click Test.
- Check the email you entered in the To field.

Testing Send Email card.
You can use another email provider if you don’t have access to Google Workspace.
Sending mail with the Office 365 Mail card
This section is optional.
If you don’t have access to Google Workspace Gmail, you can use the Office 365 Mail card.
- Click Add app action.
- Find and click on Office 365 Mail app.
- Find and click on the Send Email action.
- If this is your first time using the Office 365 card, click + New Connection and follow the steps to authenticate your Office 365 account.
- Fill out card fields as shown in the screenshot below.

Suspend user flow with Office 365 Mail card
The following section will teach you how to test the entire flow.
Testing the flow
You are ready to test the flow.
Turning the flow on
- Click Save to save any changes.
- The flow needs to be on to run. Open the Flow is OFF button menu and slide the toggle to turn the flow on.

Turning the flow on
To see a flow execution, go to the Execution History tab. It is empty now, but this is where you will see the flow running once a user is suspended:

Flow execution history
If you see Execution history is not enabled for this Flow message in the Execution History tab, slide the Save all data that passes through the flow option to on:
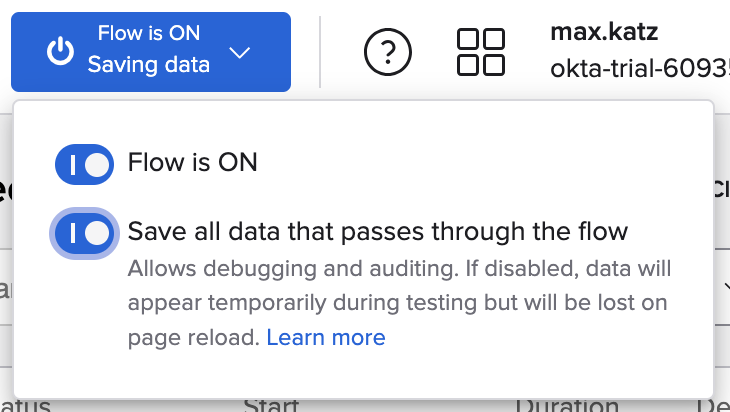
Saving flow data option
Suspending a user
To test the flow, you need a user in your organization whom you can suspend.
- In another browser tab, go to Okta organization > Admin > Directory > People
- Click Add person to add a new person. You can also use an existing person. Fill out the required fields and click Save.
This is the People page:

People page
To suspend a user:
- Click a user.
- Choose More Actions > Suspend to suspend the user.
Checking the flow execution history
Switch to the Workflows browser tab and open the Execution History tab. You will see a flow execution suspending peter@atko.email user:

First flow execution
If you select another user to suspend, another flow execution will be added. In this flow run, the user maya@atko.email is suspended:

Second flow execution
Looking closer at the Execution History tab, you see how data is passed from card to card. When you build more advanced flows, use the Execution History tab to monitor execution and see what data is passed between cards.

Flow execution with data connections
This is how the email looks:

User suspended email
Flow chart
To see the flow at a high level, go to the Flow Chart tab:

Flow chart
What you learned
In this tutorial, you built a no-code workflow invoked when a user is suspended and sends an email. You learned:
- How to build your flow
- How to trigger a flow based on event (user suspended)
- How to send an email when a user is suspended
- How to test an individual card and the flow
More resources to help you learn
-
🍫 Get help from Workflows specialists during weekly community office hours.
-
📺 Learn from Workflows videos.
-
🛟 Get help from support: discuss a Workflows topic or ask a question.
-
🙋🏻♀️ Get help from the community: join the #okta-workflows channel on MacAdmins Slack.


