Oktane18: Using OAuth and OpenID Connect in Your Applications
Transcript
Details
Aaron Parecki: Alright, thanks everybody. Thanks for coming out. Looks like people are still filtering in, but I think we should jump in so we don't lose time here. Welcome to using OAuth OpenID Connect in your application I'm Aaron Parecki, I'm on Development Advocate team. I do a lot of talks about OAuth. I've written a book about OAuth as well. We have some of them down in the developer lounge and I have little stack up here to give out at the end. I'll let Padma introduce herself.
Padma G.: Hi everybody. My name is Padma. I work with the Development Advocate team at Okta and I deal with a lot of OAuth and OpenID Connect use cases.
Aaron Parecki: So, before we get into how OAuth and OpenID Connect work, I want to start with a little bit of background about why we have them at all and how they came to be. Before we had OAuth, you would see this sort of pattern happen a lot, where you would sign up for a new app, like Facebook. This was actually a screen shot from Facebook back in 2010. As soon as you were finished signing up, it would be like hey, let's figure out if any of your friends are already using this app. How are we going to do that? Well, probably your biggest existing friend network, is your email. It would ask you to type in your email address and then type in your password to your email address and it would actually go ... This was actually real. Facebook would go log into your email and then download all your contacts and see if any of them were already signed up for Facebook. Hopefully, everybody understands this is a terrible idea for many, many reasons. Many reasons like for in order for this to work, this app needs to store your email password in some sort of reversible plain text format. This also means this app would have complete access to your account. Anything you could do with your password, this app could do with your password. There would be no way to revoke access to this app, except by changing your password. And, if the app was compromised, then it would, of course, expose your password as well.
Thankfully, a lot of smart people understood this was a problem and started working on ways to get around this, while still accomplishing the same goal. The goal being that there are third party applications that want to access data in existing applications. This community got together and developed, what eventually became, OAuth, which is a framework to allow users to authorize applications. Now we see this pattern all over the place. Where, you log into something by clicking the log in with Twitter button, you see the Twitter page, you type in your password on Twitter and you're not typing your password into a third party app. I'll give another example, when you're signing into an app that uses your media account, it will now tell you which parts of your account you're granting access to. The interesting thing about OAuth specifically, is it doesn't actually tell the app who logged in. It just grants access to this app. In order to do that, we need another piece. OAuth is more like the hotel key car, but for applications. Imagine that when you check into a hotel, you get this key card and then you go to your room and you use the key card on the door. You don't tell the door who you are, you just present this access token. In order to tell the app who logged in, we need something more, and that's OpenID Connect.
Padma G.: Thanks Aaron. Before diving deep into OpenID Connect let's talk a little bit about the terms authentication and authorization. When I say authentication, you must have encountered this multiple times every day. For example, when you want to access a website, you will be presented with this little log in screen where you would be entering the username and password. The system is going to verify your username and password and then let you in. This is exactly what authentication is all about. It's a process of verifying the identity of the user and making sure the person who's trying to enter into the application is the same person who they claim to be. In order to achieve this, your application might to store the users password and manage the password. When I say storing password, it's not storing the plain text password anymore. You might want to hash the password, add salt on top of it and store it securely. Well, that's a lot of work. When I say manage passwords, you might want to manage the lifecycle of it. What if the password expires or the user wants to change the password? That's a lot of work and that's where OpenID Connect comes to rescue.
When my application makes use of OpenID Connect protocol, it can delegate the whole process of authentication to an OpenID Connect provider. Let's see some of the analogies for identification and authorization. What happens when you check into a hotel? When you first checked in, you were asked to show your proof of identity. The most common proof of identity is driver's license. The front desk person might have checked the identity and then they might have let you in. This is exactly what authentication is all about.For authorization, like we already saw, it's like getting the access key card to your room. The key card does not really tell you who you are, but then it gives you the permission to log in or to enter into the hotel room. This is like authorization. When you see the analogies, it looks like you're really clear about these two terminologies, but in practice, in the real time, there is still a lot of confusion going on between these two terminologies. Let's see some of the simple use cases. Common use cases. The first one is simple log in. Like we already saw, when you want to enter into an application, you'll be asked to enter the username and password. This is authentication.
The next one is single sign on or SSO. When you log into one of the applications, it is going to automatically log you into a bunch of other applications and this is single sign on. For example, when you log into accounts.google.com, you will be automatically logged into your Gmail, your google docs, etc. This is a use case for authentication. When you want to log in from a mobile app, again this is authentication. When I say delegated authorization, that is, you give permission to an application on behalf of the user to access the users resources. That is authorization. For the first three use cases, we make use of OpenID Connect protocol and for the last authorization use case, we make use of OAuth. I'll pass it down to Aaron to talk more about OAuth.
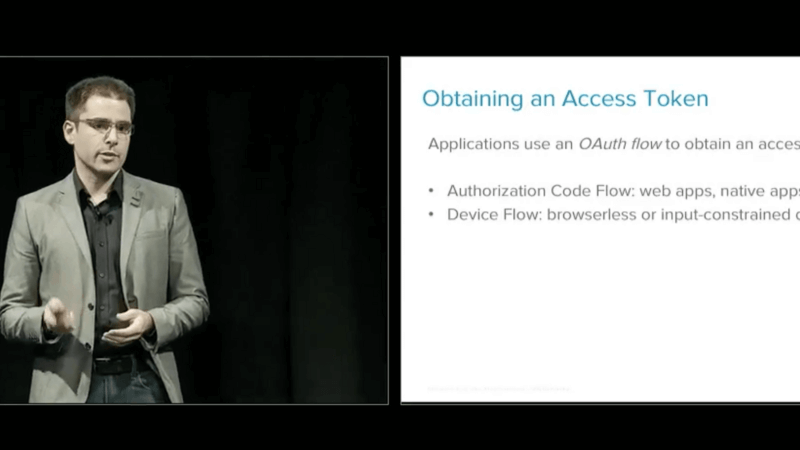
Aaron Parecki: In OAuth the end goal of all the OAuth flows is obtaining an access token and the application is going to end up getting an access token. We talk a lot about flows, OAuth flows, which is basically different use cases and different ways an application can use an OAuth server to get an access token. The access token is the end goal of that flow. We have a few flows that we're going to walk through very briefly today, to give you a sense of how they work and why they're different. The most common one is authorization code flow for web apps and native apps. We have the device flow, which is a really interesting one for devices that don't have a browser or necessarily a keyboard. There's also the password flow, which is not really OAuth, but it's still useful to talk about. The refresh token flow, which is for getting a new access token when the one the app has expires. Once the app has an access token, this is what it looks like to actually use it at an API. You'll set it in the http header and just pass the string along in the request. The access token itself doesn't mean anything to the application using it, it's just a string that passes in the header. Before we can even start, we have to register an application at the service. Registering the application, you'll go make a developer account somewhere and then go log in and create an application and it'll give you a client id, which identifies the application and if the application is not a public client, which we'll get to in a minute, then it was also get a client secret. These identify the application to the service during the rest of the process.
A public client is an application where if the client can't keep strings confidential, so that's going to be things like Java Script Apps, where the user can just go view source and then browse through the source and find every string the application uses. The same is true for native apps because you can decompile native apps and extract strings out of there. For those applications, we don't use a client secret, since there's no way for it to actually be secret. We'll start with web server apps, which use the authorization code flow. The web server apps have a way to keep strings confidential, so we use the client secret. To start, the application will craft a log in link or the sign in with Twitter or sign in with Get Help link or whatever. We're going to put a bunch of parameters in the query string, which tell the authorization server what to do.We're going to start with response type with code, which tells the server that the application is expecting an authorization code and we're in the authorization code flow. We will give it the public identifier of the application. We will give it the redirect URL, which is where the authorization server should send the user back to after they finish the log in. Usually there is one or more scopes requested, which is a way for the application to tell the authorization server what part of the account it wants access to.
There's also this parameter called state, which is intended to prevent certain attacks that would otherwise be possible. It's just a random string the app generates when it starts. The application puts these all together into a big long URL like this and then puts it into a button, click this button to log in to this app. The user will then be directed to the authorization server and the authorization server is going to show a prompt something like this that says, the app, whatever the apps name is, identified by the client id, would like the ability to access your basic information and access your photos or whatever the scopes say about that request. If the user clicks allow, then the server will redirect back to the application with a code in the query string and the same state that the application sent. If the user denies the request, then it'll redirect back with an error code.
The next thing the app does, is it verifies that the state matches the state that it set originally. Otherwise, it should abort, something went wrong and then exchange the code for the access token. This is the trick, because the application is now making a request to the server directly, it can use the client secret. We're going to make a post request with a bunch of parameters again and they're going to look very similar to the ones we saw before. The grant type will be authorization code. We'll include the code, which was in the query string. We're going to include the redirect URL and we're going to include the client id, as well as the client secret. We can do this because this is a web server app, so it has a secret, so it uses it. This authenticates this request to the authorization server. These will all get put into a post request, requesting an access token. And the response will be the access token. As well as the expiration time of the token and a refresh token. If there was something wrong like your forgot a parameter or got something wrong or if you took too long before you used the code you'll get back an error.
So that was the sort of step by step text version. I have a picture version of this as well so we'll just go through this really quick. Here, we're at the app it says connect with google which has all the parameters in the query string, that redirects the user to the authorization server where they log in, see the prompt, the app wants access to the account. And then redirects back to the application web code and stays in the query string. The application takes that code and then makes a post request back to the server for the token. So with JavaScript apps we're in an interesting situation where there's no ability for the app to maintain the secret, maintain it confidentially. So we don't use the client secret. Instead, we do something that looks almost identical. We just don't use the client secret. So, we're going to start with building that login link with response type is set to code was going to include the client ID which is public, we're going to include the redirect URL again, the scope that the application's requesting and state. And state's really important in this case because this is now basically the only security that is protecting the JavaScript app in this flow. Send the user to that URL, they'll see the prompt again. They'll get redirected back, same as before with the code and the state, or an error. And then the application exchanges the code for an access token. Again, building up the same parameters as we saw before, grant type, the code, the redirect URL, and only the client ID and not the client secret. Because it doesn't have a client secret.
So, in this case the thing that is protecting the server and the application in this case is the redirect URL which has to be registered at the time the app was created. So the server will only send the user back to the application's registered redirect URL and the state prevents other classes of attacks. Because this is a slightly more risky version the authorization servers usually don't return a refresh token for JavaScript apps. And instead they make the user click through that flow again. So you may have heard about the implicit flow when talking about JavaScript apps and this is a simplified version of the flow. It's so simple that it's not even worth stepping through all those steps again because there's only like two steps. You start by building the login link and the difference here is that response type is set for token and that indicates that you are doing the implicit flow and that you want an access token back directly.
Once the user clicks the approve button, they're going to come back to the app and there's a token not in the query string but in the fragment. This is obviously much simpler, it doesn't require CORS requests from the JavaScript app to the authorization server. But it's sort of riskier because it means that a browser is going to log the access token and its history. And things like that. So, we generally don't prefer to use this for pure OAuth because of the risks involved of having that access token just be in the URL. There is a blog post coming out tomorrow on the developer blog with a lot more detail about this if you're interested in it. So, mobile apps. Mobile apps are interesting because they also can't use a client secret. They are considered public clients. The other interesting thing about them is redirect URLs are not considered safe because on a mobile app any app can claim any URL scheme that it can handle. So you see this often with custom protocols. Where you'll have like Facebook:// and then the Facebook app says, "Hey I can handle this URL." But anybody can make an app. That says, "I handle that URL." So any app can pretend to be any other app very easily. There's no registration, there's no directory of these. Whereas with web apps we have a directory which is DNS.
So with the phone we just don't have this ability so we need something else to protect mobile apps and native apps. Beyond just using authorization code flow with no secret. So instead we have an additional step at the beginning that helps solve this and it's kind of like having a dynamic client secret, on the fly generated secret. It's all written up as an extension to OAuth called pixie. And the way this works is the application starts by generating a random string and we're going to call this the code verifier. It just generates a random string, hashes that string and then it includes the hashed value along with the initial request. So in the first authorization request. And then at the end of the flow when it's making a request for the access token it sends the plain text string.
So, we're going to step through this. This is the generating the string, hashing the string , and then URL encoding it, so you can send it over the wire easily. And then this is the same authorization request we saw before where the response type is code, has the client ID, this is all going into the URL that the user clicks and then this is the hashed value here. So that means that even if somebody has this string there's no way for them to know what was the original string used to create that value. They're going to see the prompt on their phone that says, "This application wants to access your account." They'll redirect back, this looks the same as before. Same code and the state or the error. Then this step adds the additional step again. Makes a post request with the grant type, the code, the redirect URL, the client ID, and then instead of the client secret we send the original string we used to generate the hash. And this way the authorization server can match up that hashed value with the one that it got in the URL. So I think it's a pretty clever solution, to the problem of not being about to rely on redirect URLs. And because it's secure again the servers will usually return a refresh token, in this case.
So, very briefly, I want to talk about password flow. Which is typically in the OAuth spec, although it's not really in the spirit of OAuth because the whole way this works is the application gets the password from the user and sends in the request. So this is really only appropriate for first party apps and by that I mean like when you're logging into a mobile app that belongs to a service it's totally normal to include your password. To type your password into that app. Like if this company had a mobile app you wouldn't be surprised if it asked you for your password. It's usually better to do something like open IDconnect or an actual single sign on flow but this is still part of the OAuth spec. Doing this, at least that means that the application doesn't have to store a password and it can use the same access token mechanism that all the other flows use. So the flow is just, ask for the user name and password, send it in the post, and then the access token comes back.
The other one that I want to mention briefly is the client credentials grant which is used for server to server and that is used without a user context. So, this is just an application accessing its own resources. So that is a very simple flow. It's just the client ID and the client secret get sent to the server and an access token comes back. There's no user in this, there's no user prompt there's no user ID in this request so this is not going to be able to access user data but it will be able to access application data or metadata about the app.
So there's another interesting class of devices that are supported in OAuth and those are devices with no browsers or no keyboards. You've seen this kind of thing when you log into like your Roku or Apple TV with your cable account and on your screen, on your TV, it says, "Go to this URL and enter these letters." So this is what's happening under the hood. So, the device is sitting there, and it has no ability to pop open your browser and no keyboard, so it first just makes a post request silently with its public identifier to the server and says, "Hey a user is going to start logging in, tell me what to do." The response comes back with a few things, it comes back with a very long device code, it comes back with a user code which is meant to be short, something the user will type in, a URL which it will show to the user. And then this interval is how often this device should pull the end point. And it tells it how long until this code expires.
So, this is an example of a hardware video encoder which will stream to YouTube. So, this will go and make that post request to google, show the URL google.com/device the user's going to go to the URL, type in this code. And then google says, "Hey. Now please sign in." You type in your email address, it'll do whatever authentication mechanism it does, like if it's tied to Okta it'll send a push notification to my phone. And then in the meantime, this device is sitting there, pulling the token end point. And it says, "Hey, here's this long device code, has the user finished logging in yet and authorizing the app?" Probably not yet. Still missing a few pieces so it's going to give back an error and it just tries again in five seconds. Meanwhile, I'm on my phone, choose the right account I'm logging into, choose a YouTube account and then I see the OAuth prompt. Which is, "This device wants to post to your YouTube account." Then I click allow. After I click that, all the phone does is just say, "Cool. Done. Go back to the device." Nothing else seemed new on the phone. And then the next time the device makes the post request with that device code it gets back an access token and now it can access my google account.
So, those are the variety of OAuth flows for different devices in these cases and to talk about OpenID connect, I'll give it back to Pamela.
Padma G.: Thank you. Well, we already saw that we make use of OpenID connect for authentication. In addition to authentication, my application might also want to know who just logged in. More information about the user, for example his user name, his email ID, his locality, etc. For instance, your application might want to personalize the application for each user, the way it looks, etc. And for this, you might want to know more information about the user, and again, OpenID connect helps us do this. When I say OpenID connect, it's not a protocol by itself. It's a thin layer on top of OAuth 2.0. Now you might ask me, "Why can't I use OAuth for authentication as well?" Well, in the earlier days, even before open ID connect existed, we had a lot of companies use OAuth for authentication. For example, Facebook. Facebook had their own proprietary protocol. I mean proprietary end point to get user's information. And similarly we had a lot of other companies having their own proprietary end point to get user's information. And this was confusing. Because there's no ....
Padma G.: And this was confusing. Because there is no standard way of getting users' information. And that's when people got together and created a separate protocol for OpenID Connect, which is built on top of Oath 2.0. Web page starts an identity protocol, built on top of OAuth 2.0. And the user's information is presented in the form of-
... Okay. It's a jar token. And getting more information about the user, we have the slash user info endpoint. And we have a standard set of scopes and OpenID connect, as opposed to OAuth 2.0. The first one being OpenID itself. This is a required scope. If you don't get this, then my authorization server is going to consider it as a OAuth request. Then we have standard scopes like Profile, Email, Address, Phone, and we'll talk a little bit later about Offline Access scope.
All right, so now my application wants to make user's OpenID connect. So I get rid of my login screen, which has the username/password fields, and I just make use of this simple button. Which says, "Connect with the OpenID provider." In this case, we have Auth 2. When the user clicks on this button, my application is going to construct a URL like this. It looks very similar to the OAuth request. The only difference is being, in the scope we have OpenID, like I already said. And we, in the response type, "We have ID Token." So then the user is going to click on the button. The user's browser is going to get redirected to the URL that we constructed, and the authorization server is going to authenticate the user. If he's already not logged in. And on logging in, he's going to be presented with a consent tile up like this. Because in the scope, I had a Profile scope.
So it would be asking that the application would like to access the profile on we have of the user. And when the user allows access, the user is redirected back to the redirect URL that is given in the request. Along with the ID Token. The ID Token is a long string, something like this. And if the user denies access, then an error is thrown back saying, "Consent required." Let's talk more about the ID Token. The long string, here. It has three parts, each separated by a period. The first part being header, and then we have the payload, and then the signature. The header, like you might all know, it has contains the metadata about the payload and signature. And the payload is the data itself, the information about the user. And the signature is the hashed content of the header and the payload. Here the header and the payload are actually basics different colored. And the signature is hashed content of the basics different colored header and payload. Why do we need signature? It's just to make sure the token is not tampered along the way.
So the decoded ID Token looks something like this. In the payload here we have all the base claims. The first one is the Subject, we have the version and the issuer. This is the authorization server who issued the token. And then we have the Audience, this is my application ID. For whom the token is generated.
And the Issued at Time, the Expiry time. And then the Nonce. Nonce is to make sure that this response is for my request. And then we have the Updated At, and Authenticated Time. This is a decoded ID Token, with the Profiles scope. So, I have all the profile information of the user, like his middle name, family name, ZoomInfo, et cetera. Okay, now let's talk a little bit about the OpenID Connect Grant types. They are very similar to the OAuth Grant types. We already saw about them. Just to reiterate, for web server apps, we have Authorization Code Flow. For single-page apps again, we have Authorization Code Grant. For mobile apps, it's Authorization Code with the extra PKCE. And for password Grand Flow it's password. And for Machine to Machine attraction, it's Client Code and Shells. Okay, now let's jump into session management in OpenID Connect. So, when my application uses OpenID Connect, it's going to rely on the OpenID Connect provider for authentication. And the OpenID connect provider, in addition to generating ID Token, is going to create a session for the user. In the authorization server. My application can rely on this session, created by the authorization server, or it can manage its own session. Which depends on the lifetime of the ID Token. When it depends on the lifetime of the ID Token, the session typically starts and the application validates the ID Token. So the ID Token validation can either be done locally, or remotely. What if the ID Token is expired but the user is still logged into the authorization server? In that case, my application can make another Auth request, with prompt equals none. So the user is not prompted again. If I want to validate the ID Token locally, then I need to take care of these steps.
First one is the ID Token. Next I will file the signature used to sign the ID Token. And then verify the claims that are present in the ID Token. When you talk about claims, the first one is the Issuer. So you have to make sure, if the token is generated authorization server. The next is the Audience. To make sure the token is intended for my application. And then we have the Expiry Time, it's just to make sure the current time has already not passed the expired time. And the Issued at time, to make sure that the current time is not too far from the Issued Time. And then we have Nonce. This is to match if the Nonce is the same as that passed in the request. So you might want to make sure that these claims are perfect. And when we see a remote validation, I can just make use of the introspect endpoint that my authorization server exposes. So this is the post request, with the parameters to can type in. In this case, we are going to, "validate ID Token." And then the token itself, and then I have the Client ID, and the secret.
So, if the token is valid, I get an invalid response like this. With the active parameter a strip. And false otherwise. I can also validate the access token in the same way. Again, we have to decode the access token, verify the signature, and verify the claims. The claims are similar, except one. We have the Issuer, Audience, and then the Client ID. You might also want to verify the application's Client ID's the one I'm going to handle. And then the Expiry Time. All right, so we were talking about ID Tokens, access tokens. And then we have another type of token, called Refresh Tokens. This is used if the access token has a really short lifetime, and you might want to get more access tokens. In this case, this is a Refresh Token. Is a special token which you use to get new access tokens. And this is requested along with the ID Token or access token in the initial step. And the scope used for this is Offline Access scope.
When I have the Refresh Token, I can exchange it for an access token. With the post request to the token endpoint. The grant type used here is called Refresh, and it's called token. And it has the Refresh Token, in the request. And then the response that I get back the new access token. All right, that's what I have for today. And I pass it on to Aaron for wrapping up the session.
Aaron Parecki: Thanks. So we have a few resources for you to learn more about this. Jsonwebtoken.io is a good place to learn about Jason web tokens. Oauth.com/playground is great place that will walk you through all the flows with the real server. I mentioned then that I have this book, which we're giving copies away of at the Developer Hub. And I have a few up here, if you want to come up and grab one as well. I also have this, which is very hard to see from back there, but this is an OAuth access token. It's actually a USB drive, and it's got an eBook of it of the book. So you're welcome to grab one of these as well. And I'll have them in the Developer Hub. We don't have time for Q and A. I do want to mention that instead of Q and A right now, since I'm sure you'll all anxious to get out of here ... I will be at the Developer Hub all day tomorrow. I got scheduled for all of the shifts. So I'll be there from seven until two-thirty. So feel free to come by any time, tomorrow at the Developer Hub, and I love to talk about this stuff. And grab a copy of the book or eBook. And I think that is it. So thank you very much.
Padma G.: Thank you.
OpenID Connect protocols are covered by author of 'OAuth 2.0 Simplified', Aaron Parecki.