


This tutorial is part of Okta Workflows with Microsoft series:
- Send an Email Notification for a New Okta Event
- Send a Notification to Microsoft Teams for a New Okta Event
- Send a Rich Message to Microsoft Teams for a New Okta Event Using Microsoft API
This step-by-step tutorial will teach you how to send event notifications to a Microsoft Teams channel when a new user is activated in Okta.
Things you will learn:
- Build a complete flow.
- Trigger a flow on a user-activated event.
- Read user information from Okta.
- Create a message and send the message to Microsoft Teams.
- Test individual steps and the flow.
You will build the following flow automation:
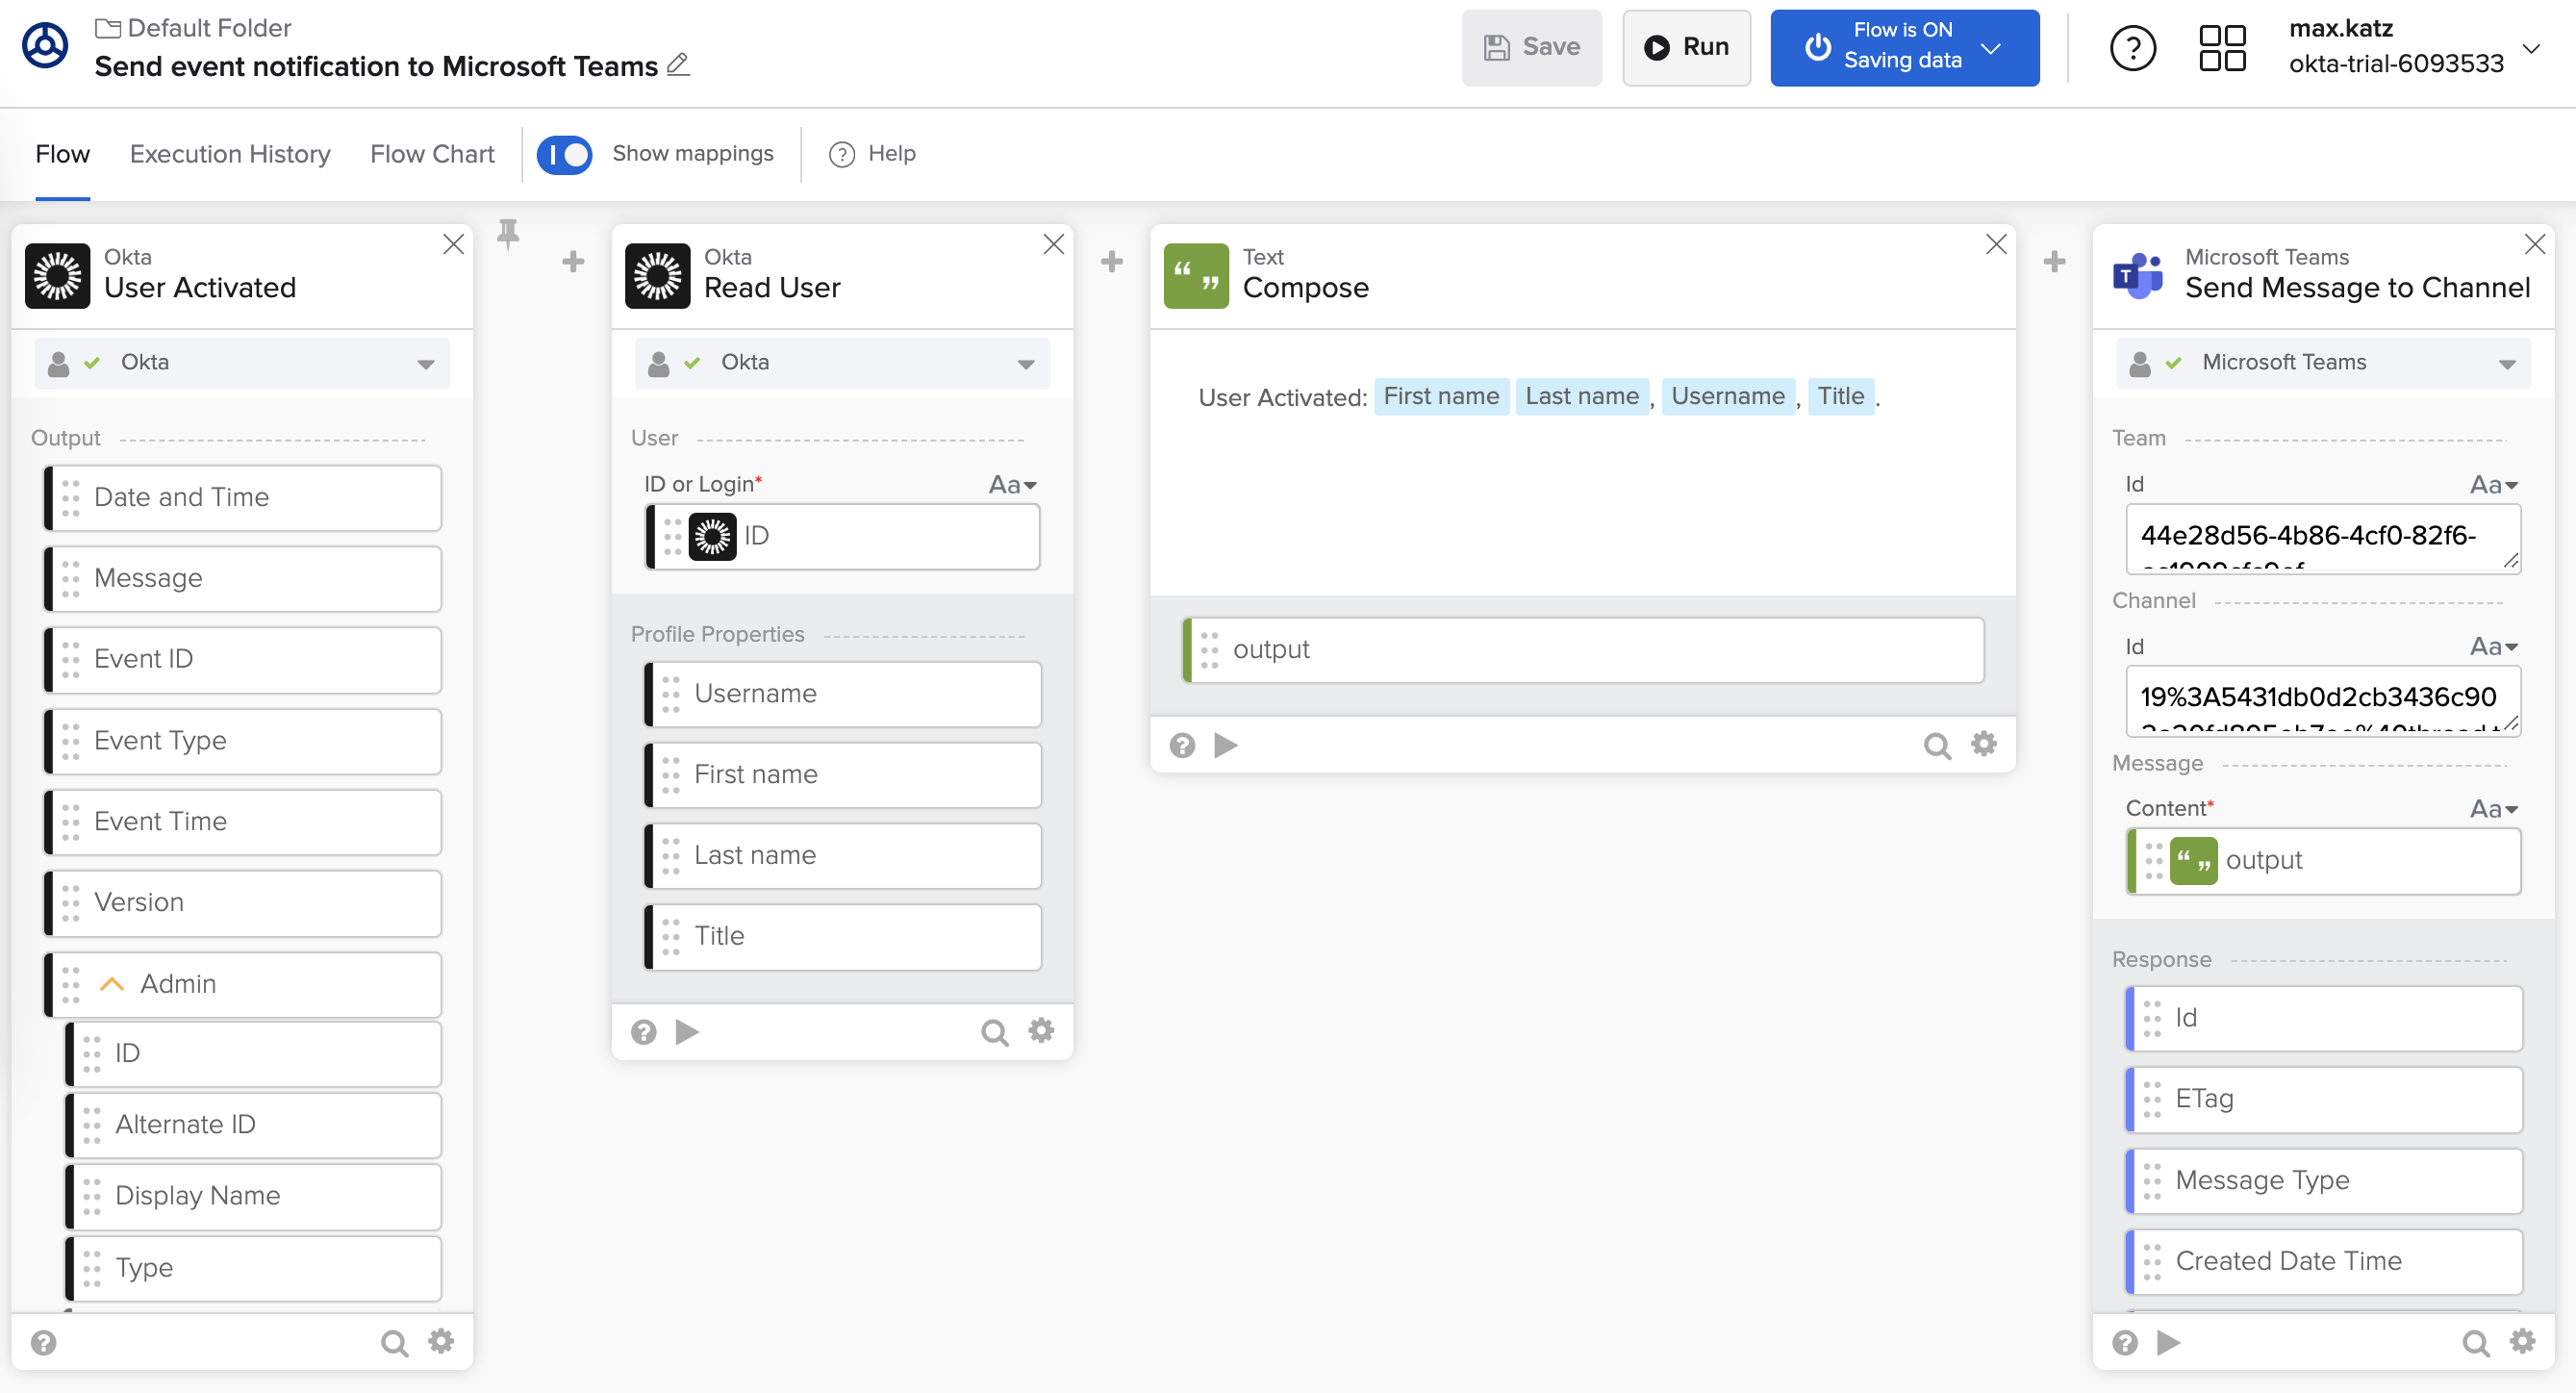
A flow to send event notifications to Microsoft Teams.
Introduction to Okta Workflows
Okta Workflows is a no-code platform for building identity automation.
What is Okta Workflows?
Read the Introduction to Okta Workflows blog post.
Get access to Okta Workflows
If you don’t have access to Okta Workflows, learn how to get access to Okta Workflows.
Build the send notification flow
This section will teach you how to build the send notification to Microsoft Teams flow.
Create a new flow
To create a flow:
- In the Workflows console, click Flows.
- In the Default Folder, click + New Flow to create a new flow.
- Click Unnamed (upper left corner).
- For name, enter Send event notification to Microsoft Teams.
- For Description, enter This flow sends an event notification to Microsoft Teams.
- Also, check the Save all data that passes through the Flow? checkbox. You will be using this capability at the end of this tutorial.
- Click Save to save the flow name and description.
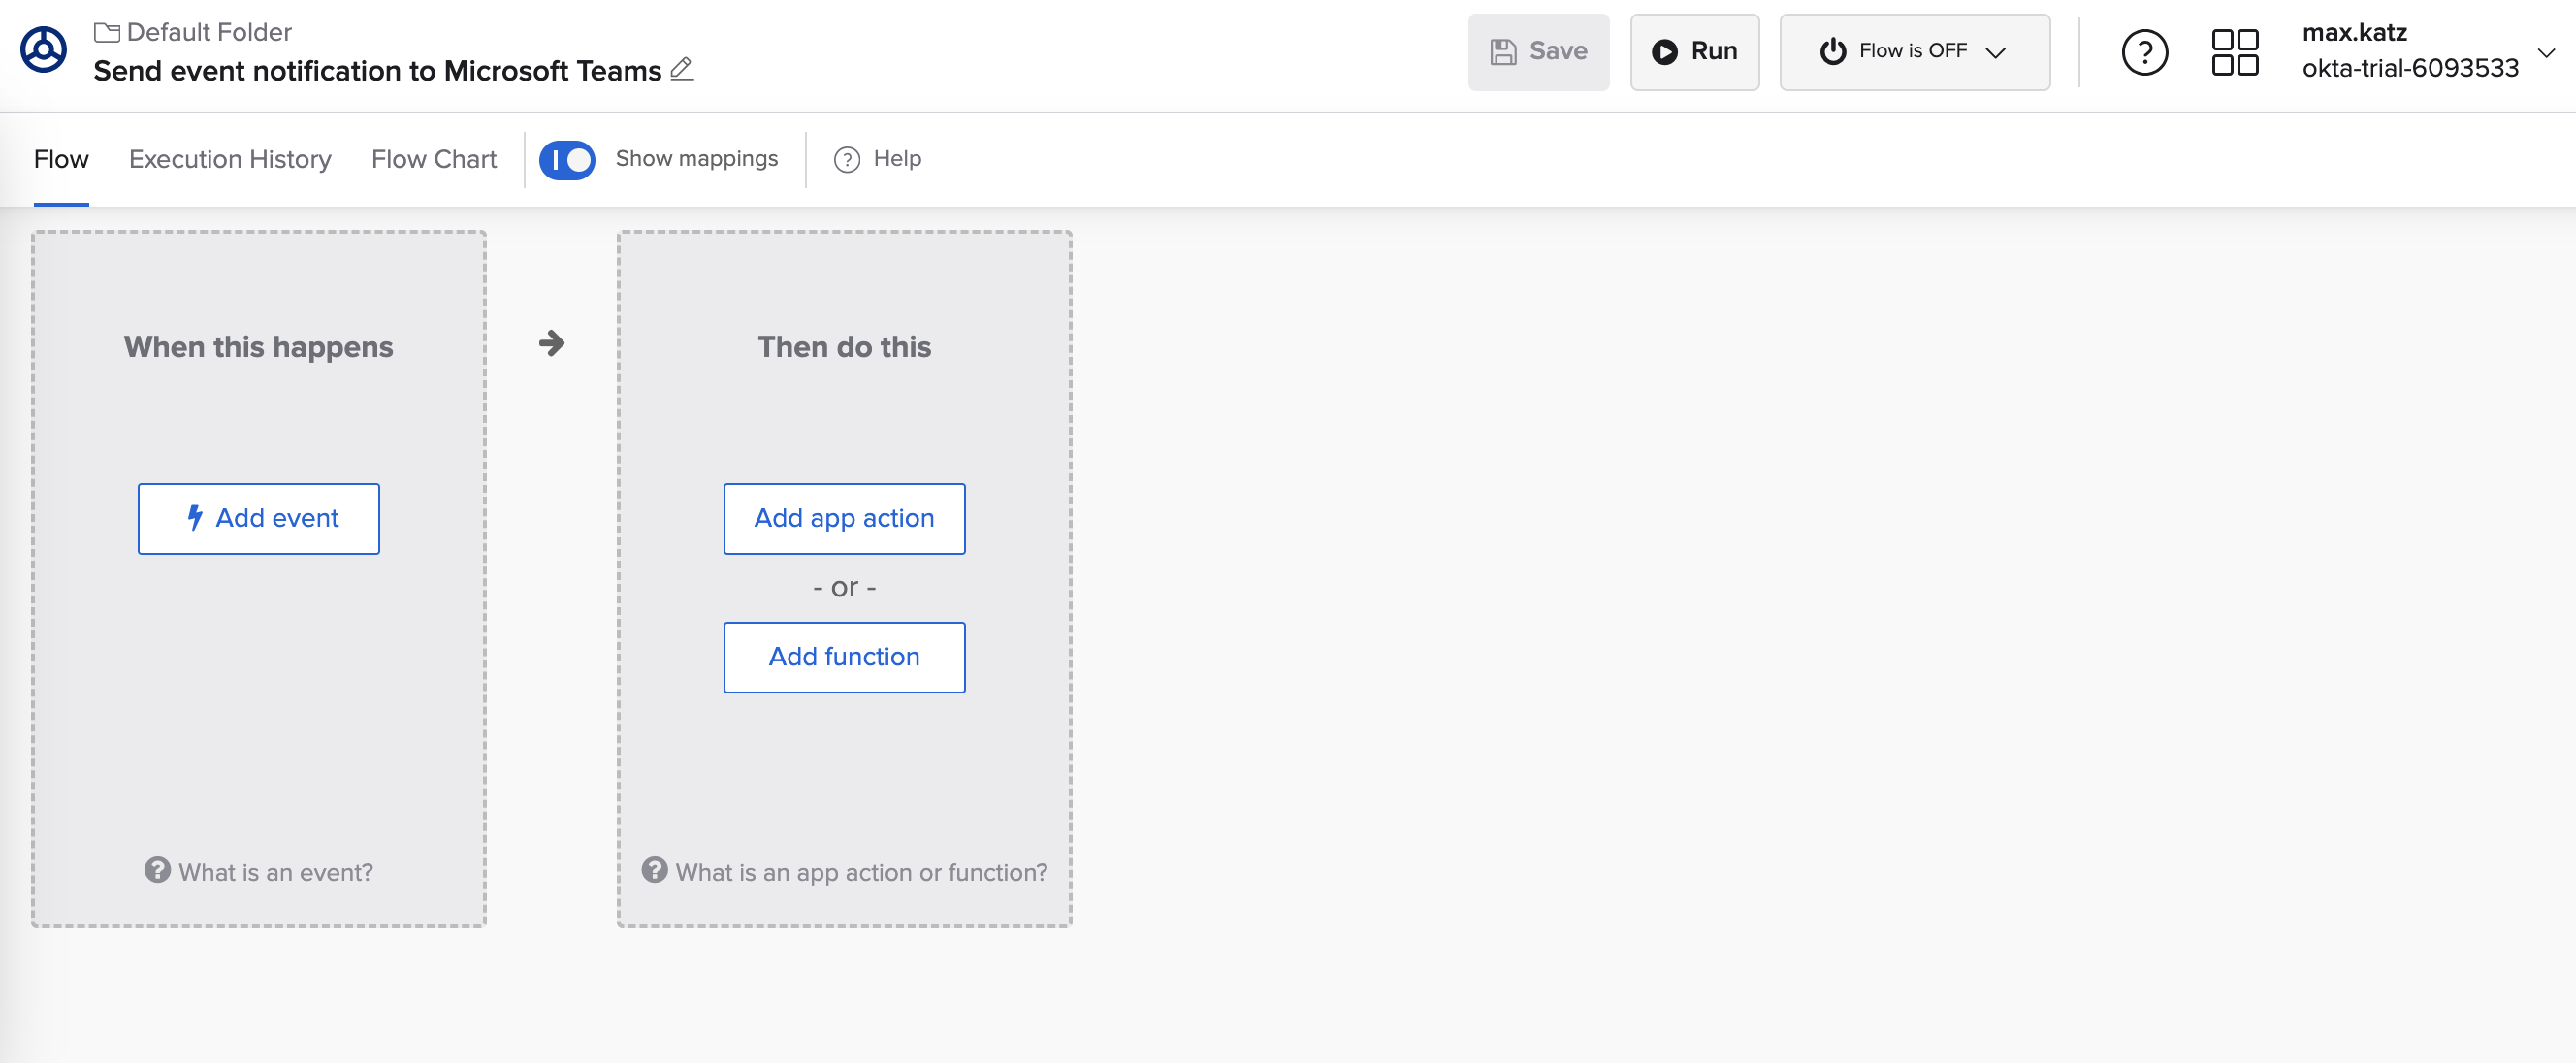
A new flow.
The following section will teach you how to trigger a flow and set up a connection to Okta.
Trigger a flow
You want to send a notification when a user is activated in Okta. You need to trigger the flow on the user-created event in Okta.
- Click Add event inside the When this happens step.
- Find and select the Okta connector from the connector list.
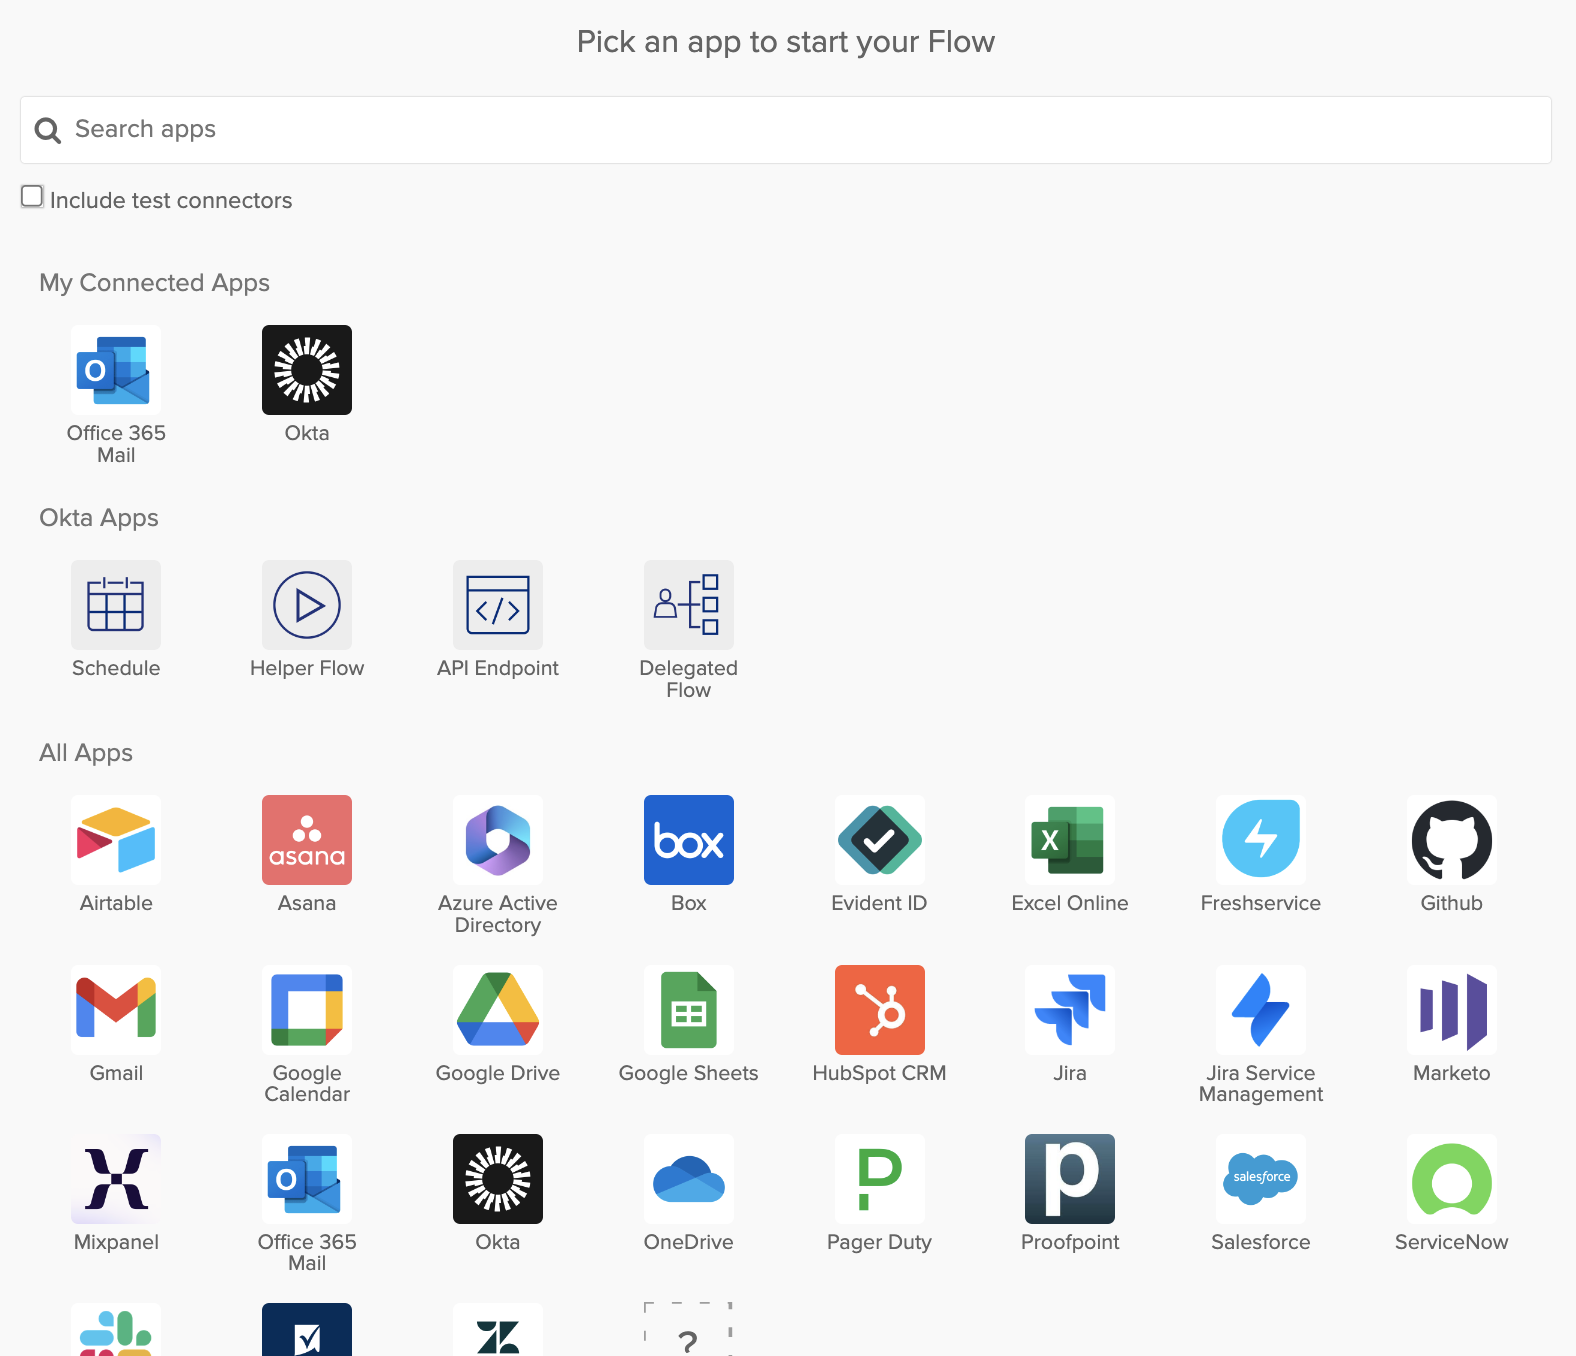
Okta built-in connectors to trigger a flow.
- Next, find and click on the User Activated event. You can search for the event at the top.
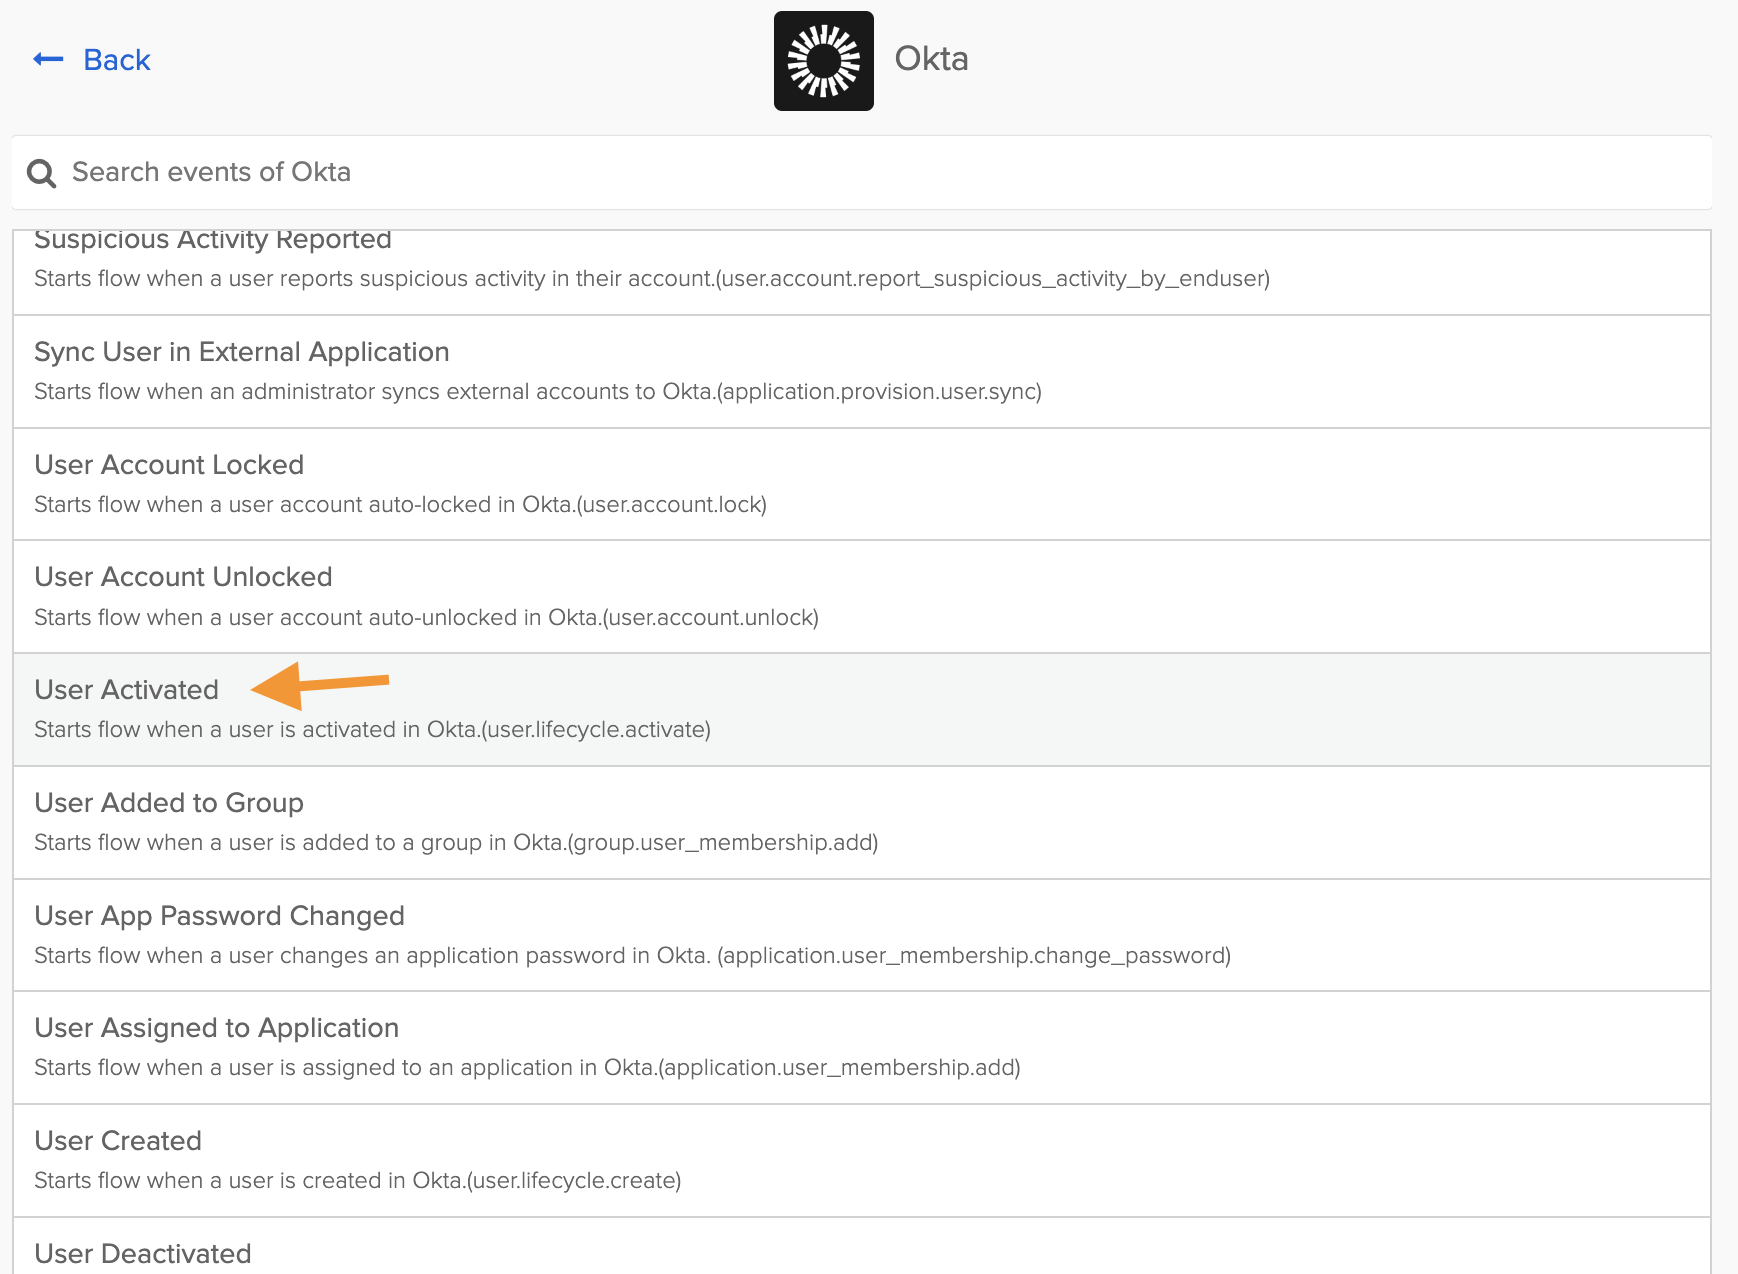
Trigger a flow when a user is activated.
If you have a connection to Okta, the flow looks like this:
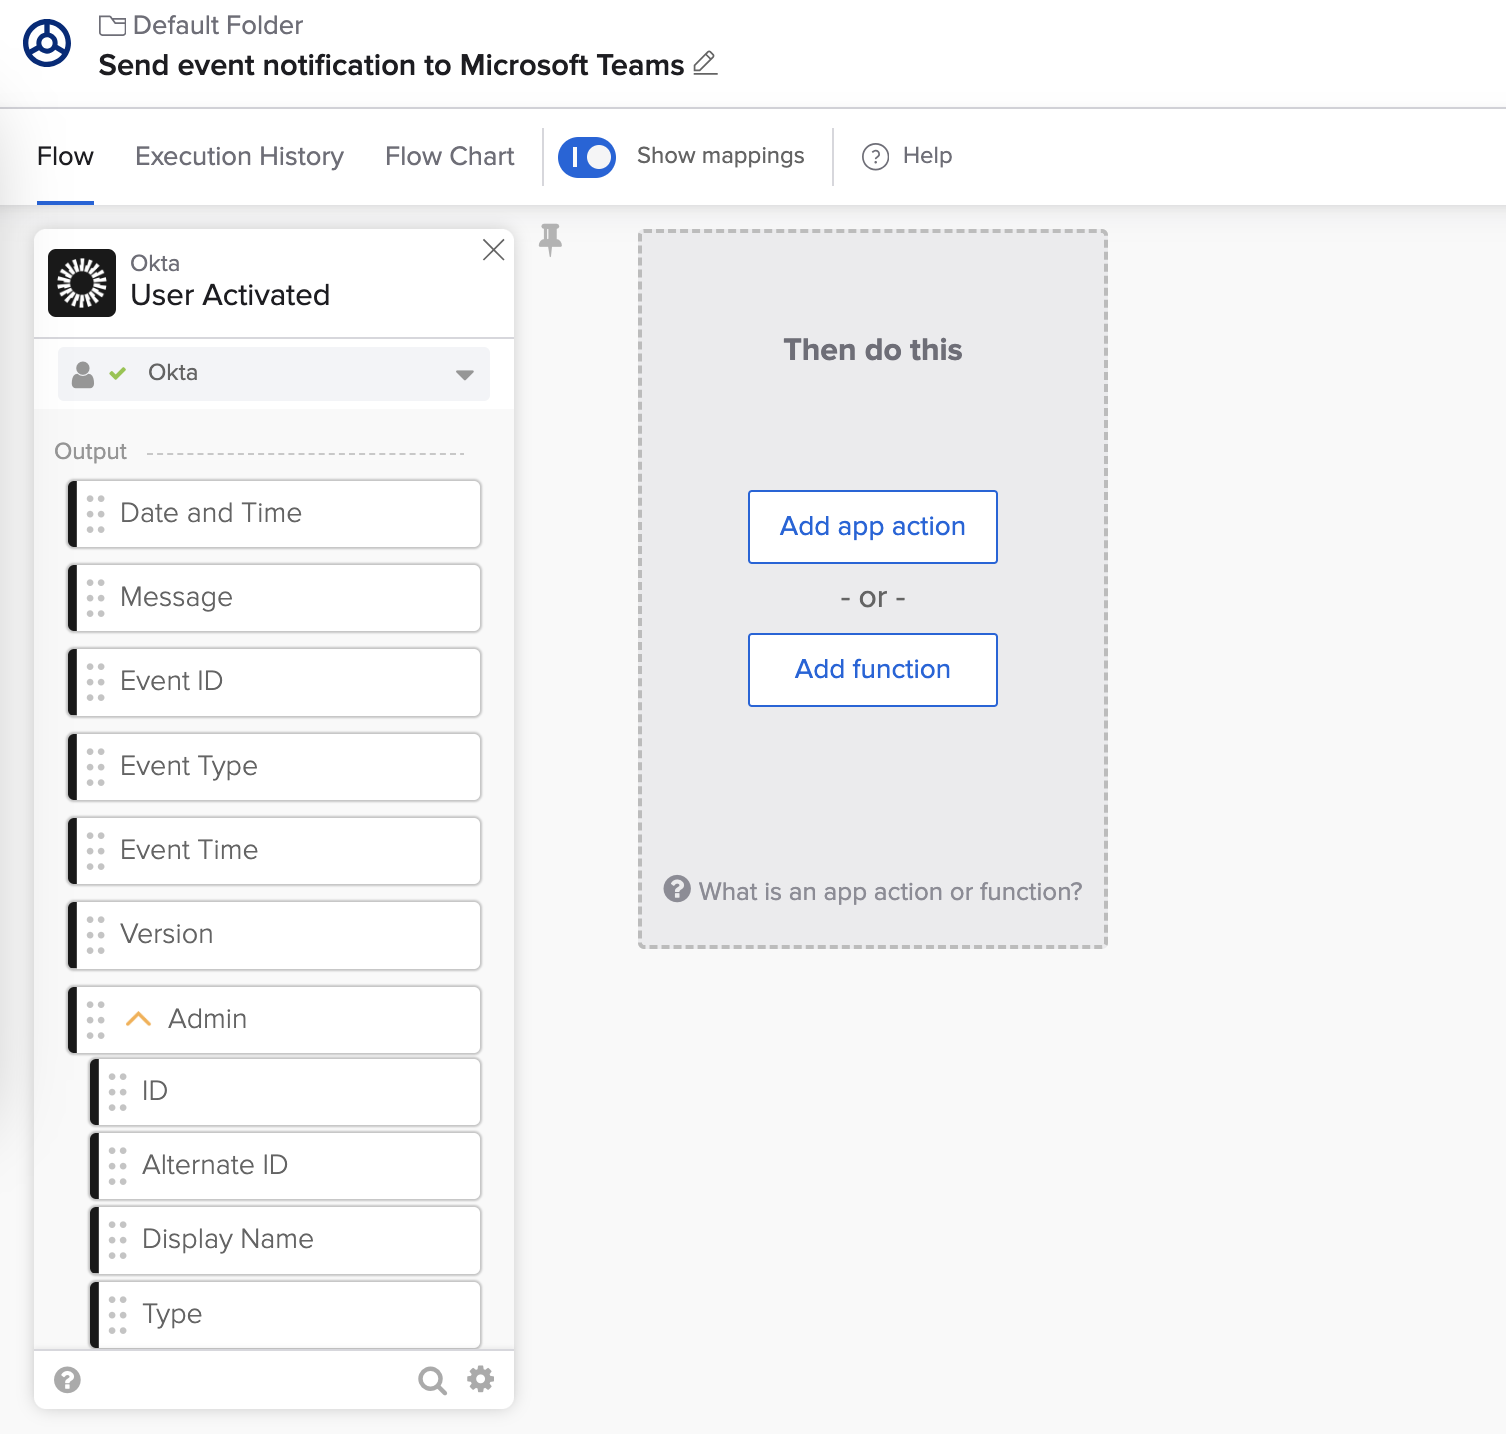
Flow with the User Activated event.
If you don’t have a connection to Okta, go to the next section to create a connection to Okta.
Create a connection to Okta
If you don’t have a connection to Okta, you will see the + New Connection button inside the card.
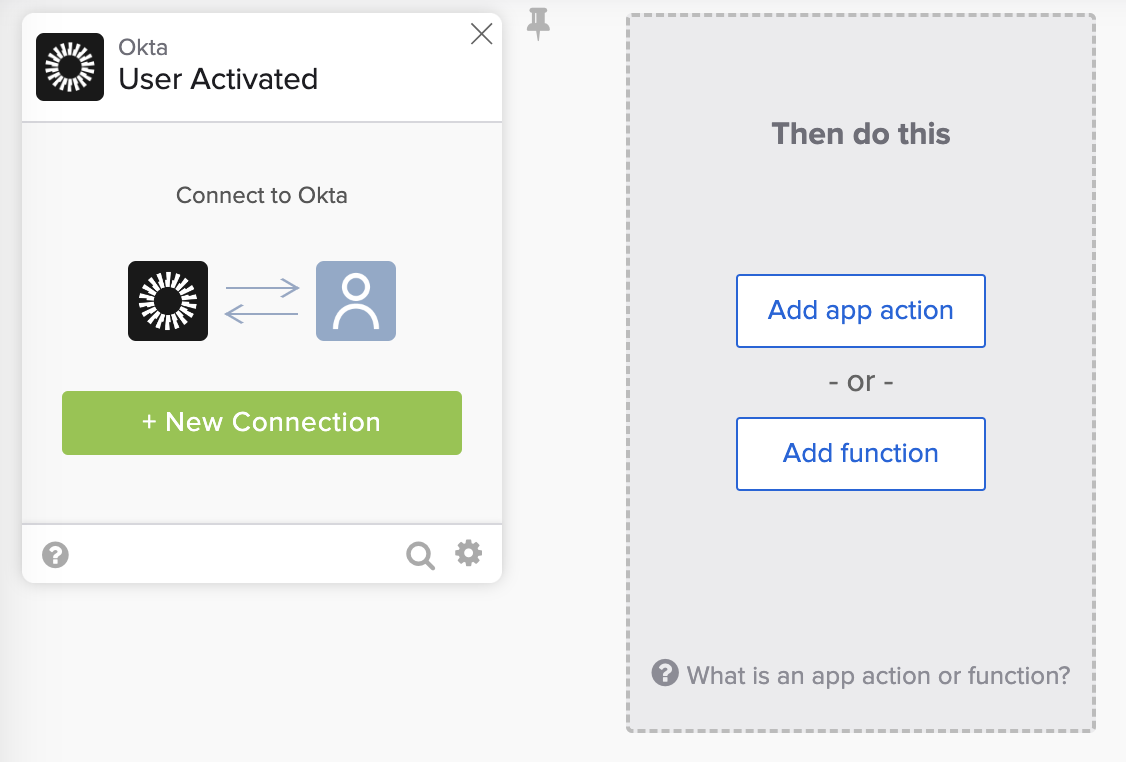
Creating a new connection to Okta.
- Click + Create Connection.
- Starting with step #4, follow the How to Authorize an Okta Connection in Okta Workflows KB to create a connection to Okta.
The flow after adding the Okta – User Activated card and setting the connection:
Flow with the User Activated event.
Test the User Activated event
The flow doesn’t do a lot yet, but you can test the flow that it runs when the user-activated event happens.
Turn the flow on
- Turn the flow on.
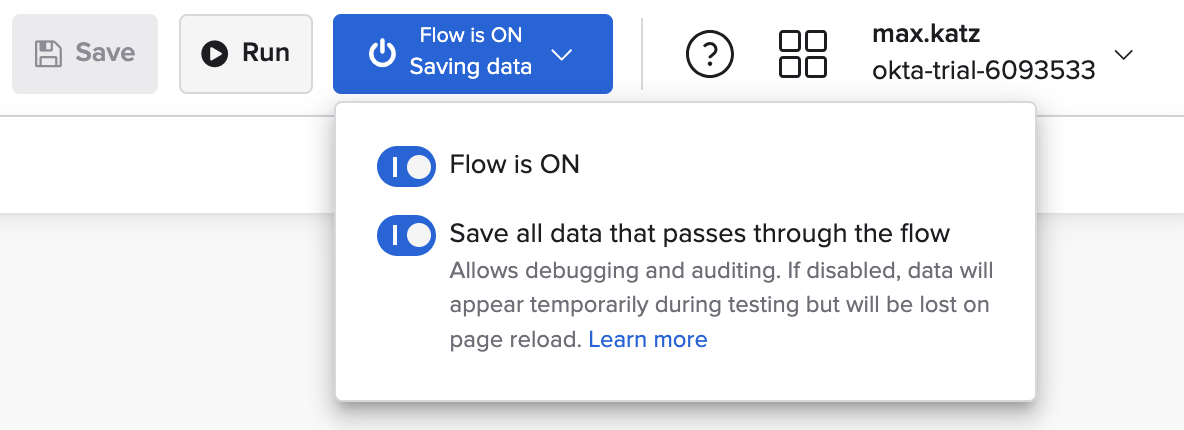
Turning the flow on.
Activate a user
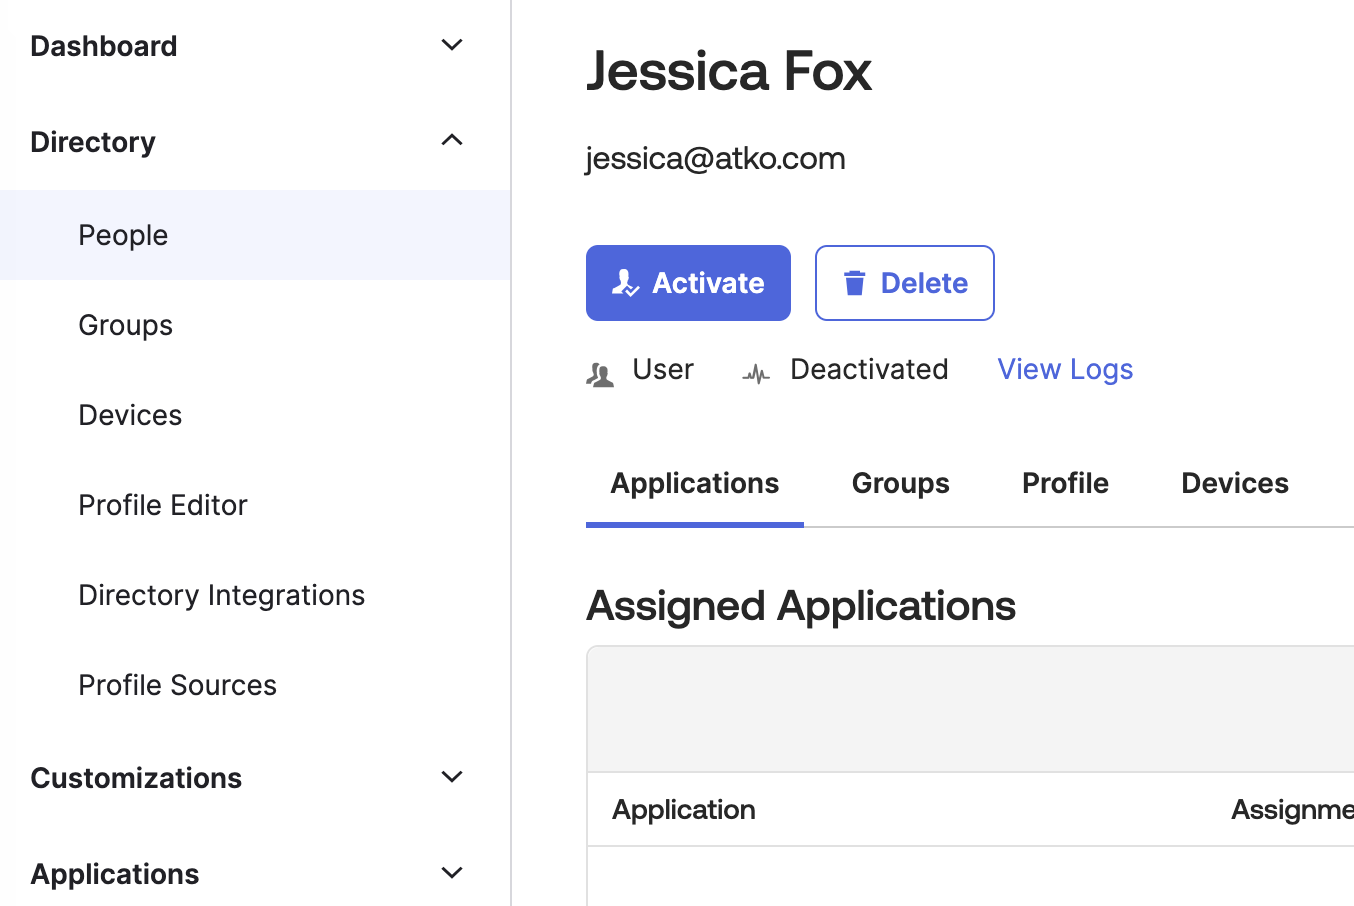
- Go to Okta admin console > Directory > People.
- Select a user to activate.
- If you don’t have an active user, to deactivate a user first:
- Click on a user to deactivate.
- Click More Actions > Deactivate.
- Click Deactivate to confirm.
- If you don’t have an active user, to deactivate a user first:
- Click Activate, then click Activate to confirm.
Check flow history
- Return to Workflows and open the Execution History tab. You will see one flow execution.
- If you don’t see the execution, go to the Flow tab and return to Execution History.

Flow execution history.
The card’s fields show various event information.
In the following section, you will compose a message to send to Microsoft Teams.
Compose a message
You will use the Text – Compose card to compose a message.
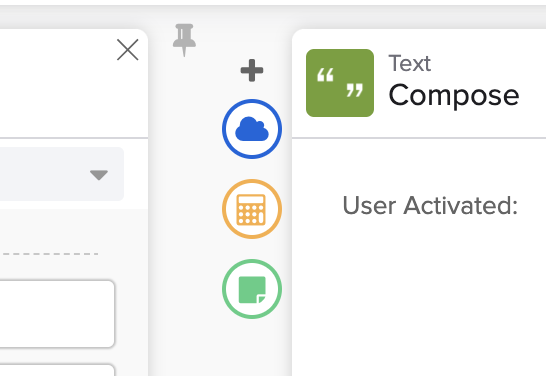
- Click the Add function to add the Text – Compose card.
- From the Most Popular category, click Compose.
- The Compose card is also listed in the Text category.
- Enter User Activated: into the Compose card.
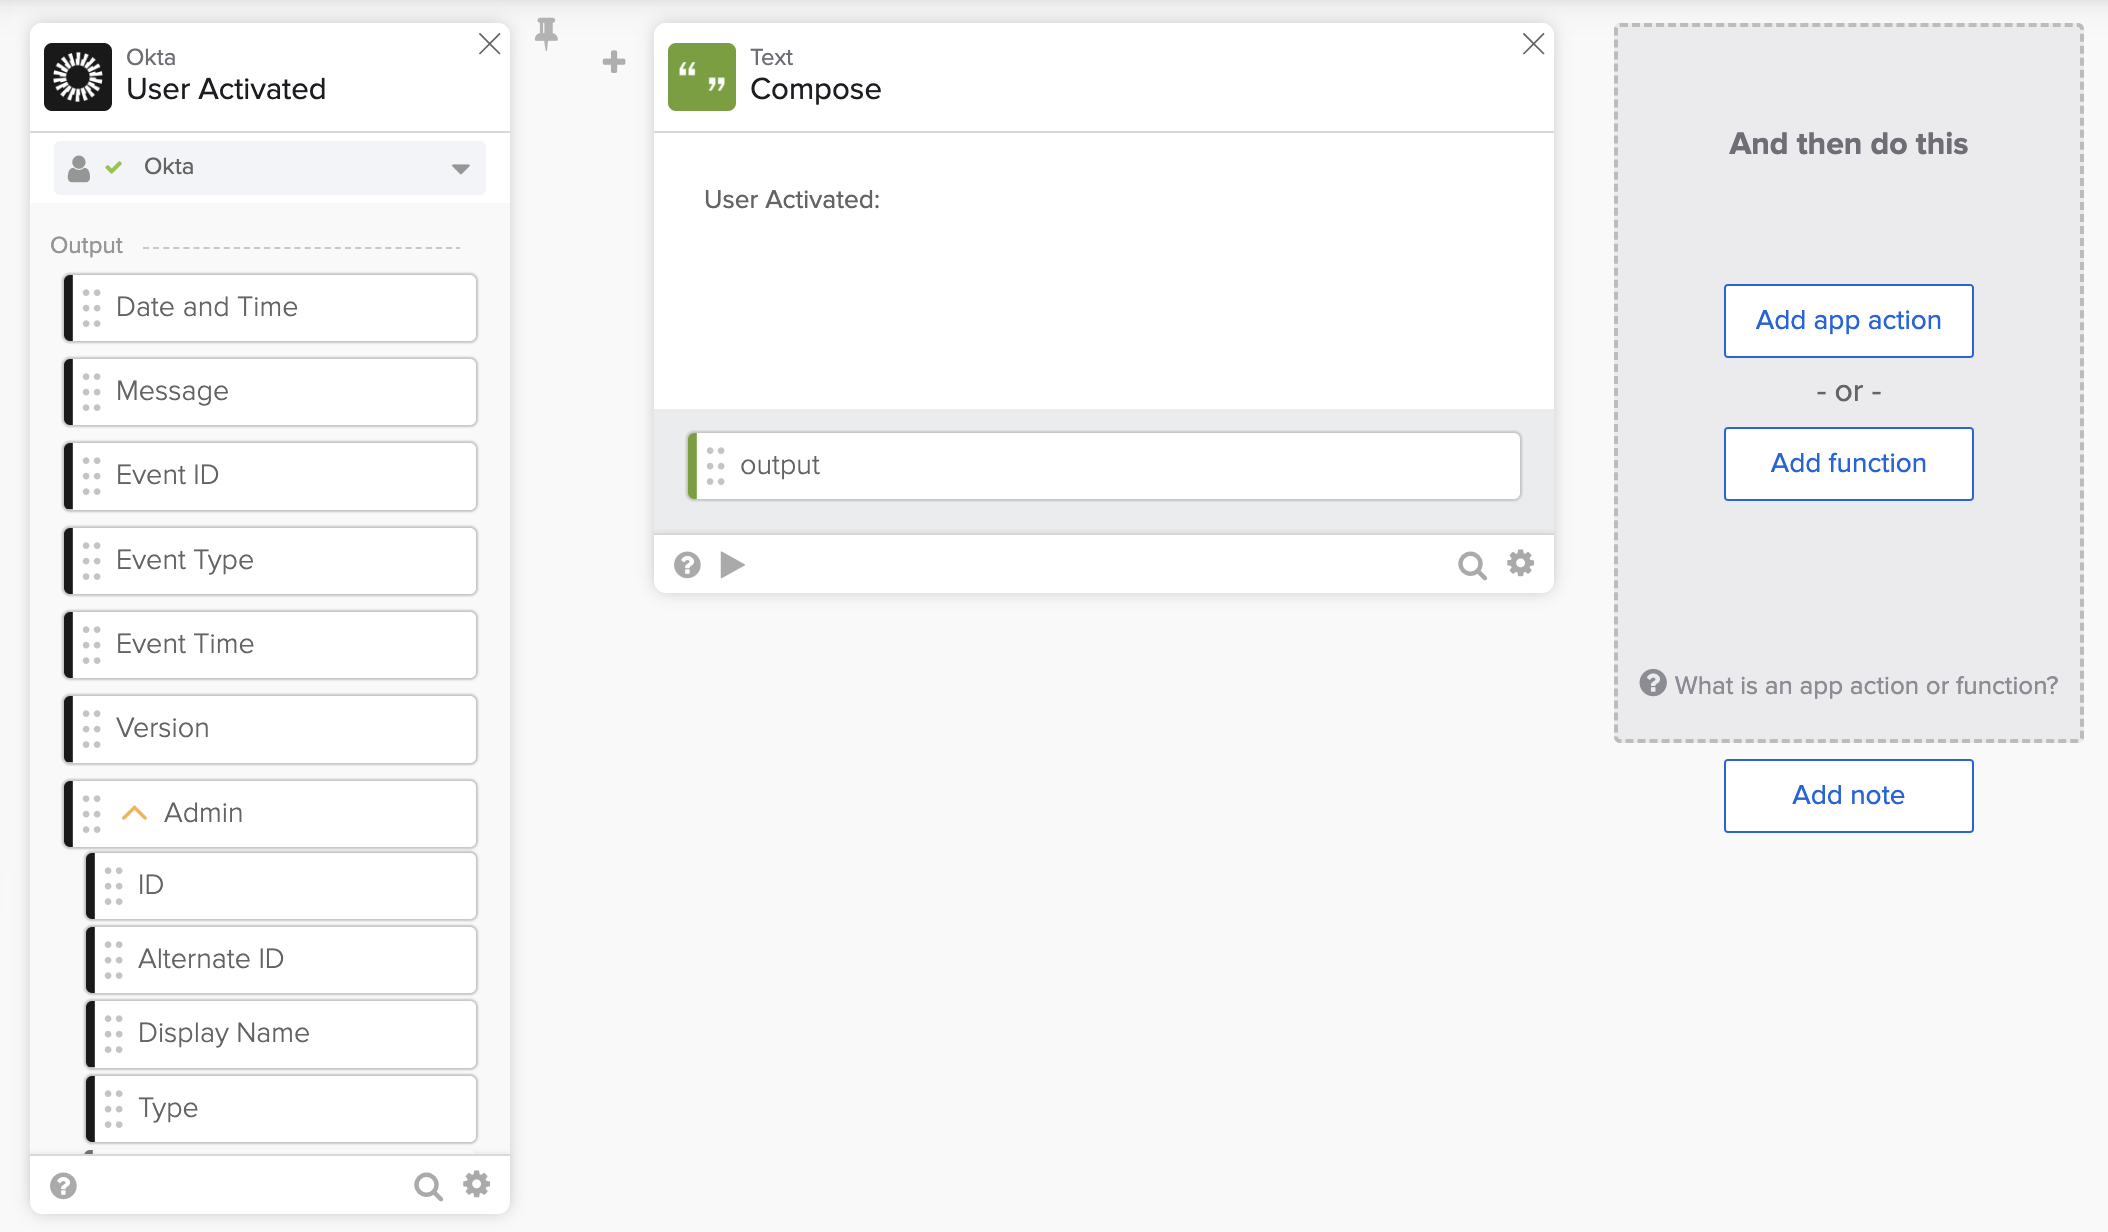
Adding the Compose card.
You would like to add the user’s login (email), name, and title to the message.
To check what fields the event makes available:
- Switch to the Execution History tab.
- Scroll until you see the Okta User field on the User Activated card.
- Click the arrows in the field’s upper-right corner to expand the JSON object.
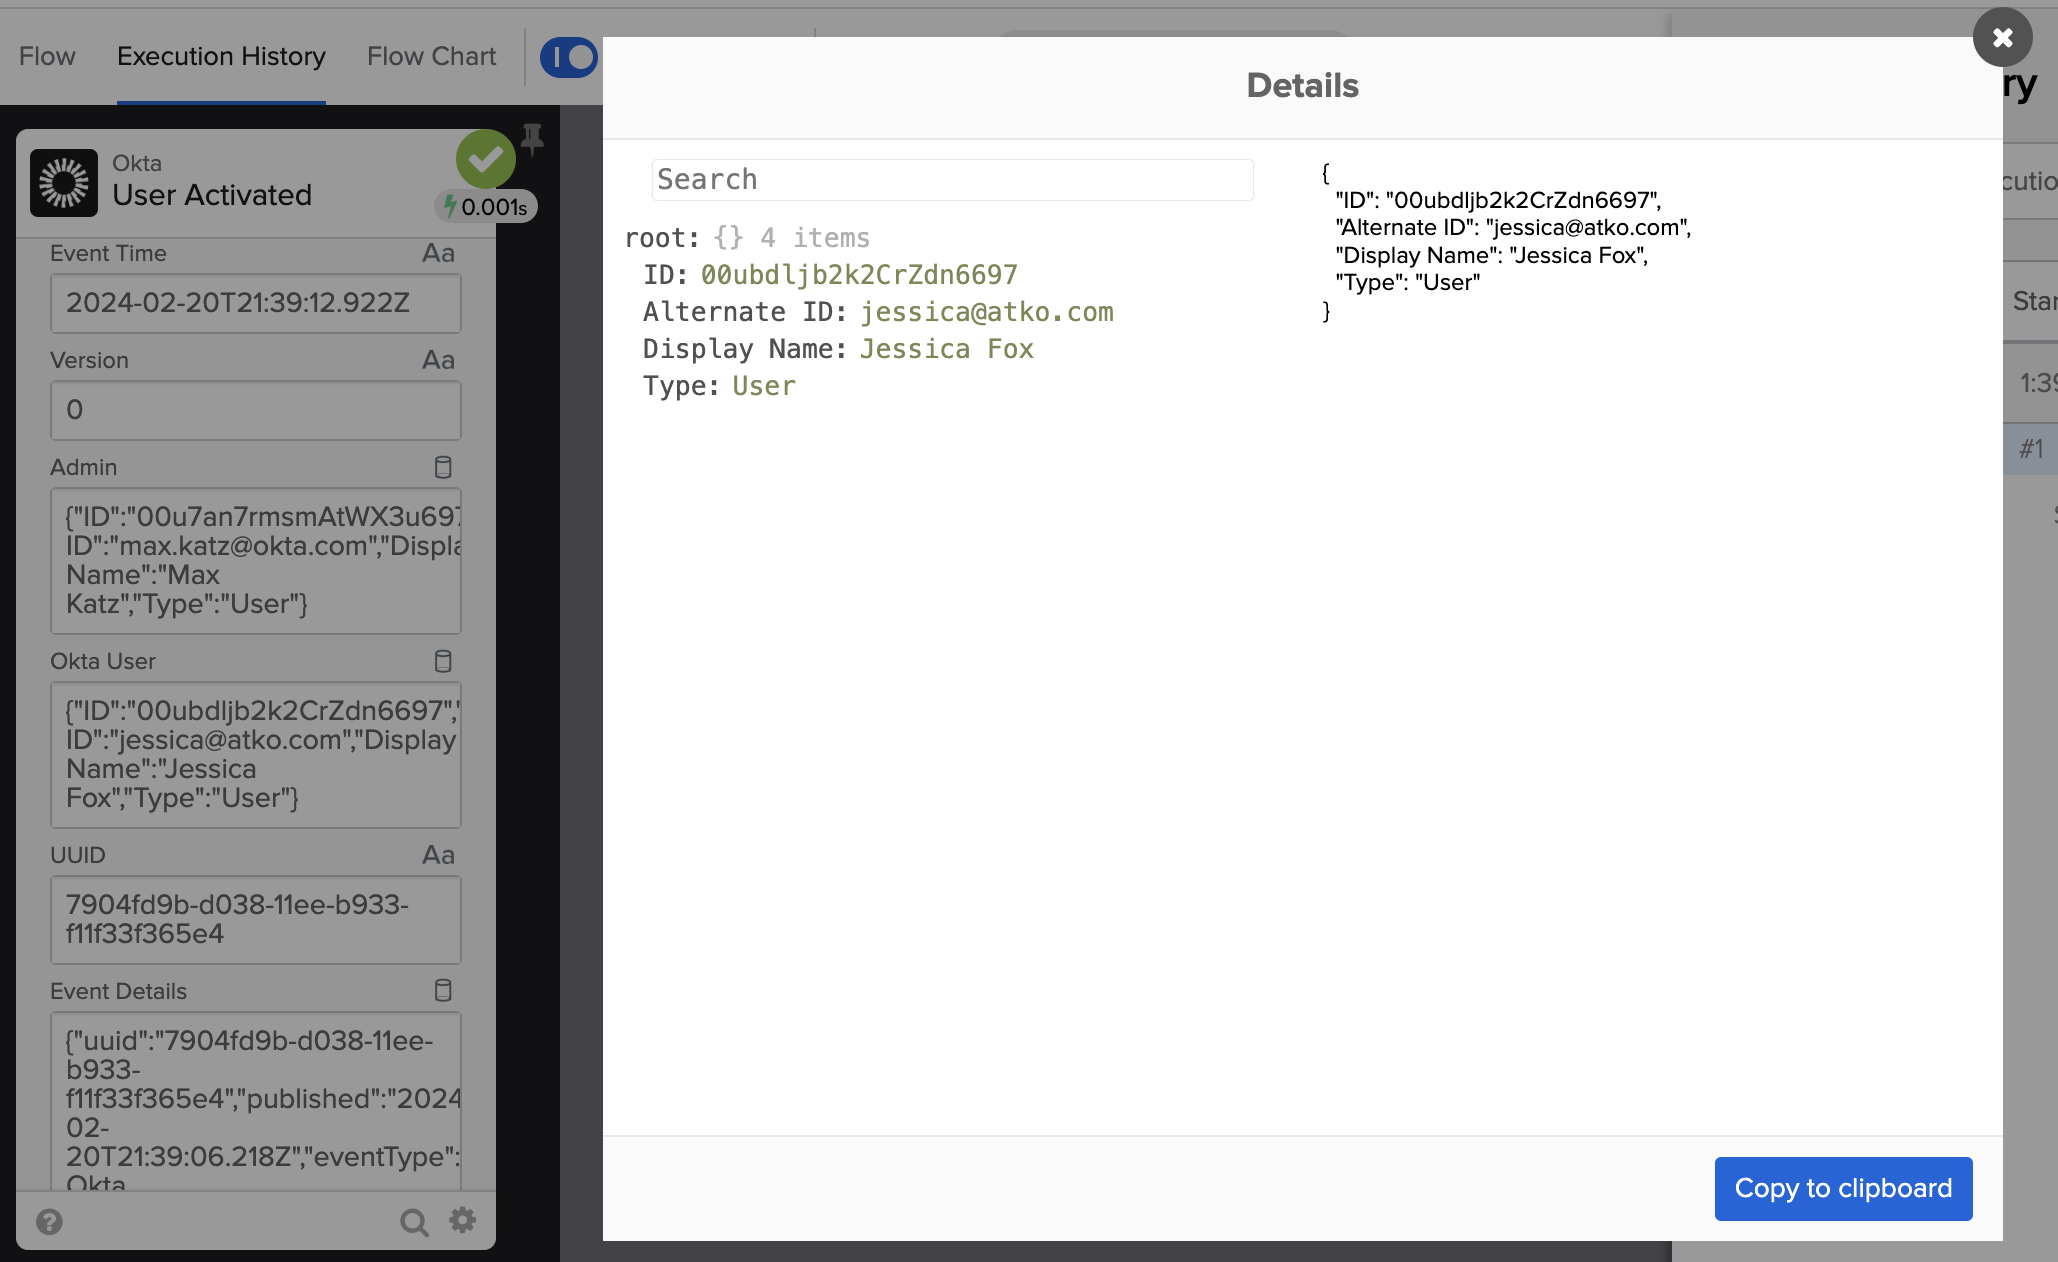
Event JSON information.
This is one JSON object the event makes available:
{
  "ID": "00ubdljb2k2CrZdn6697",
  "Alternate ID": "jessica@atko.com",
  "Display Name": "Jessica Fox",
  "Type": "User"
}
However, there is no information about the user’s login and title.
You will add the Okta – Read User card to get additional information about the user.
Read user information with the Read User card
You will add the Read User card between the two existing cards.
Add the Read User card
- Hover over the + sign between the User Activated and Compose cards.
- Click on the ☁️ to add an app action.
- Select the Okta connector.
- Find and click on the Read User action.
The Okta connection you created earlier will be automatically selected.
Adding the Read User card.
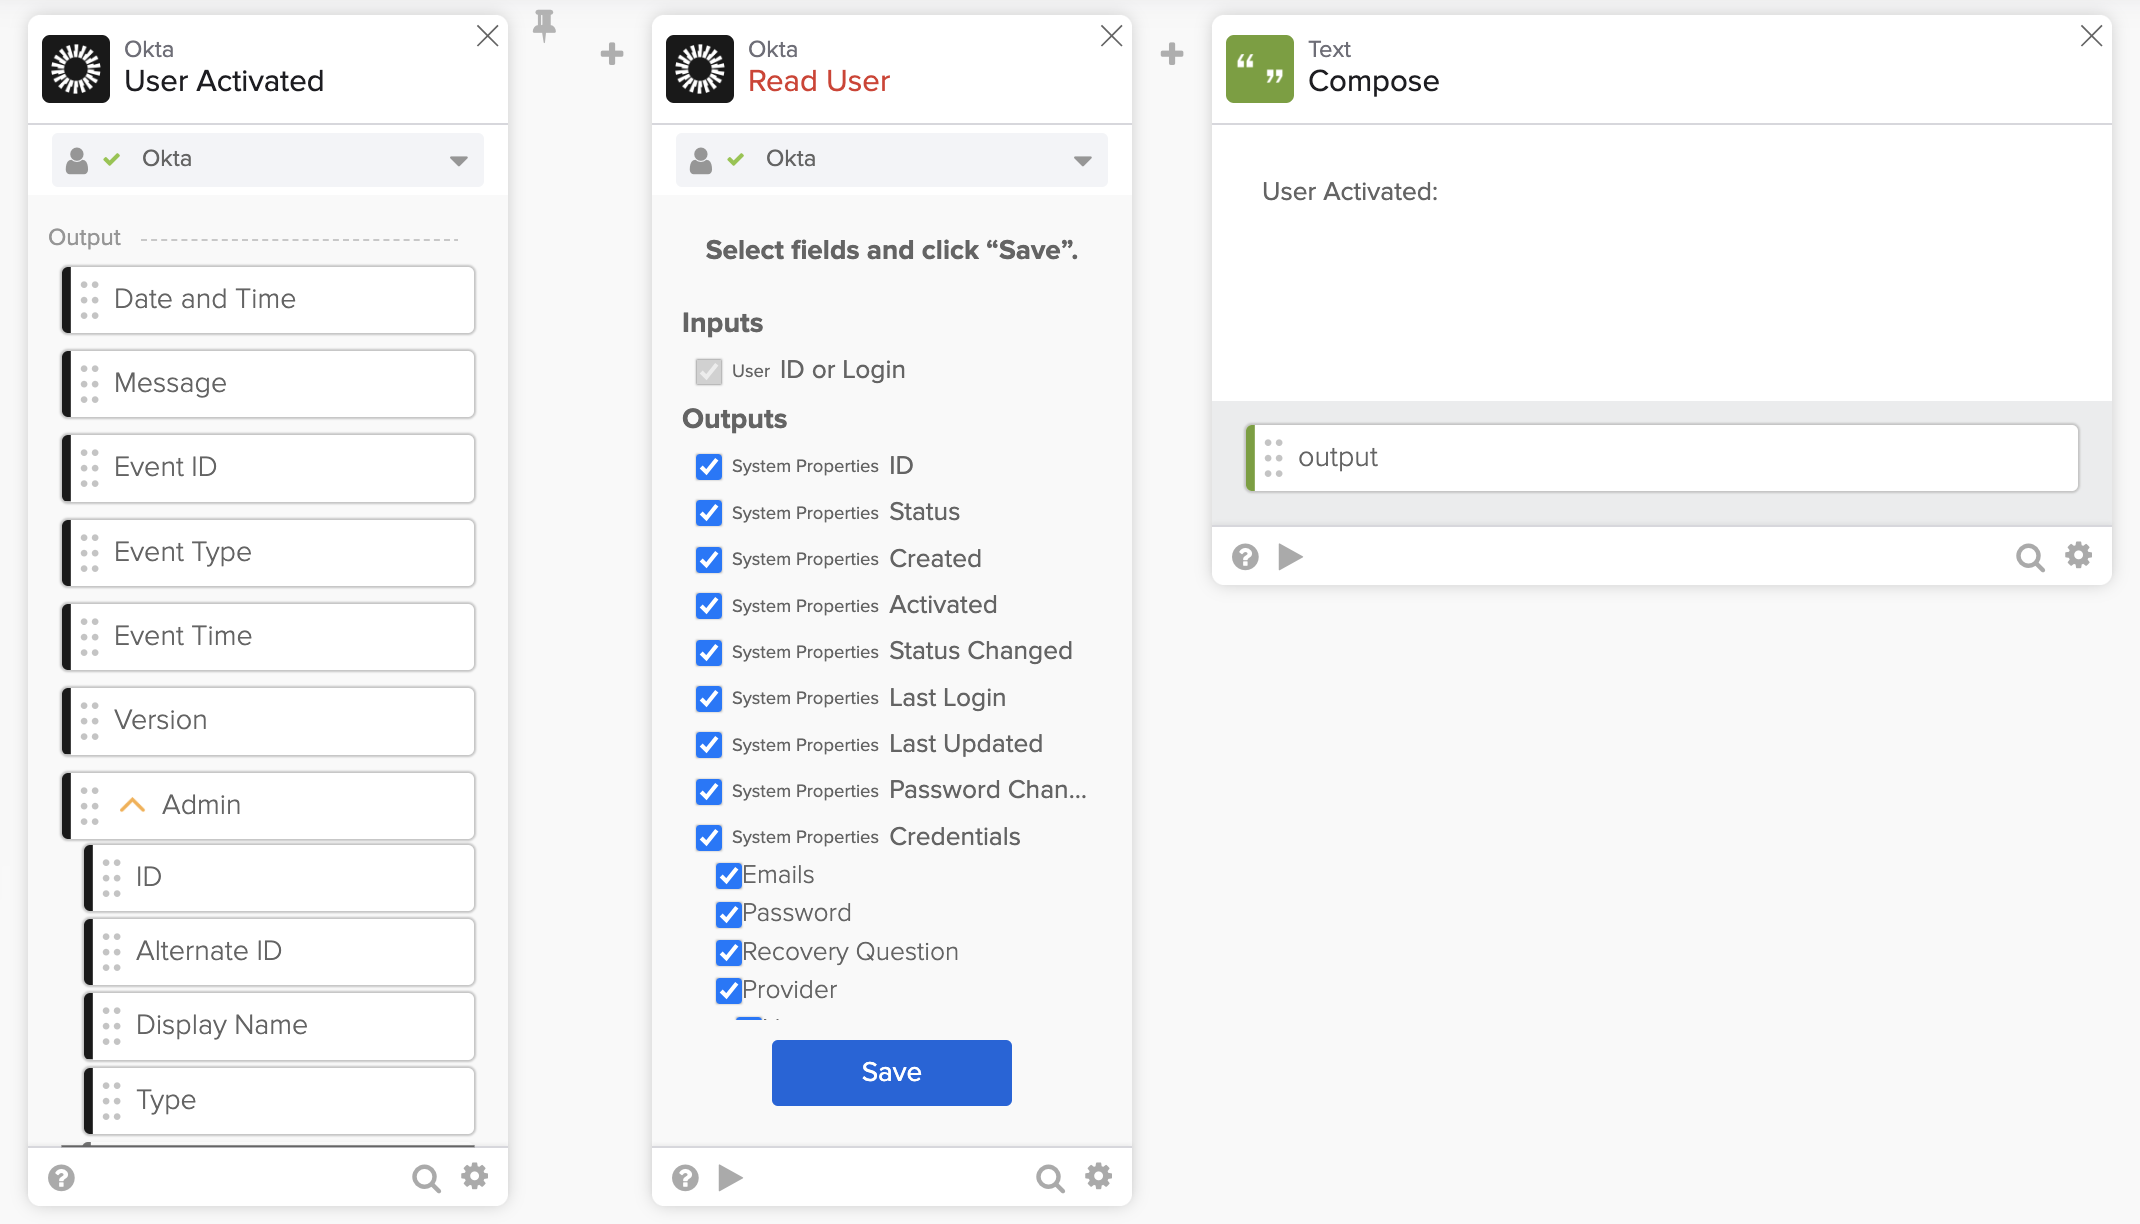
To configure the card:
- You don’t need the output fields selected. Uncheck them all.
- Check the fields you need:
- Username
- First name
- Last name
- Title
- Click Save to save the card’s settings.
To edit a card’s fields, click the ⚙️ > Choose fields.
The Read User card:
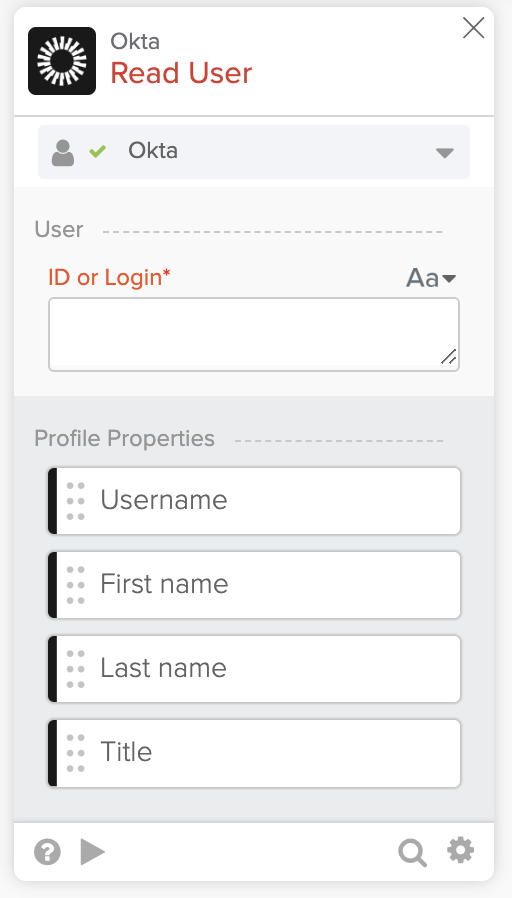
The Read User card.
Pass data to the Read User card
The Read User card requires an ID or Login. The User Activated event has the ID available under the Okta User field.
- Connect the Okta User > ID field to the ID or Login field.
Passing data to the Read User card.
Test the Read User card
It’s a good practice to test individual cards.
To test the card:
- Click ▶️ on the Read User card.
- Use the user ID or Login to test the card.
- To test with the user ID, copy it from the Execution History page. Copy the ID from the Okta User field in the User Activated card.
- To test with Login, enter the user’s email address.
- Click Test to test the card.
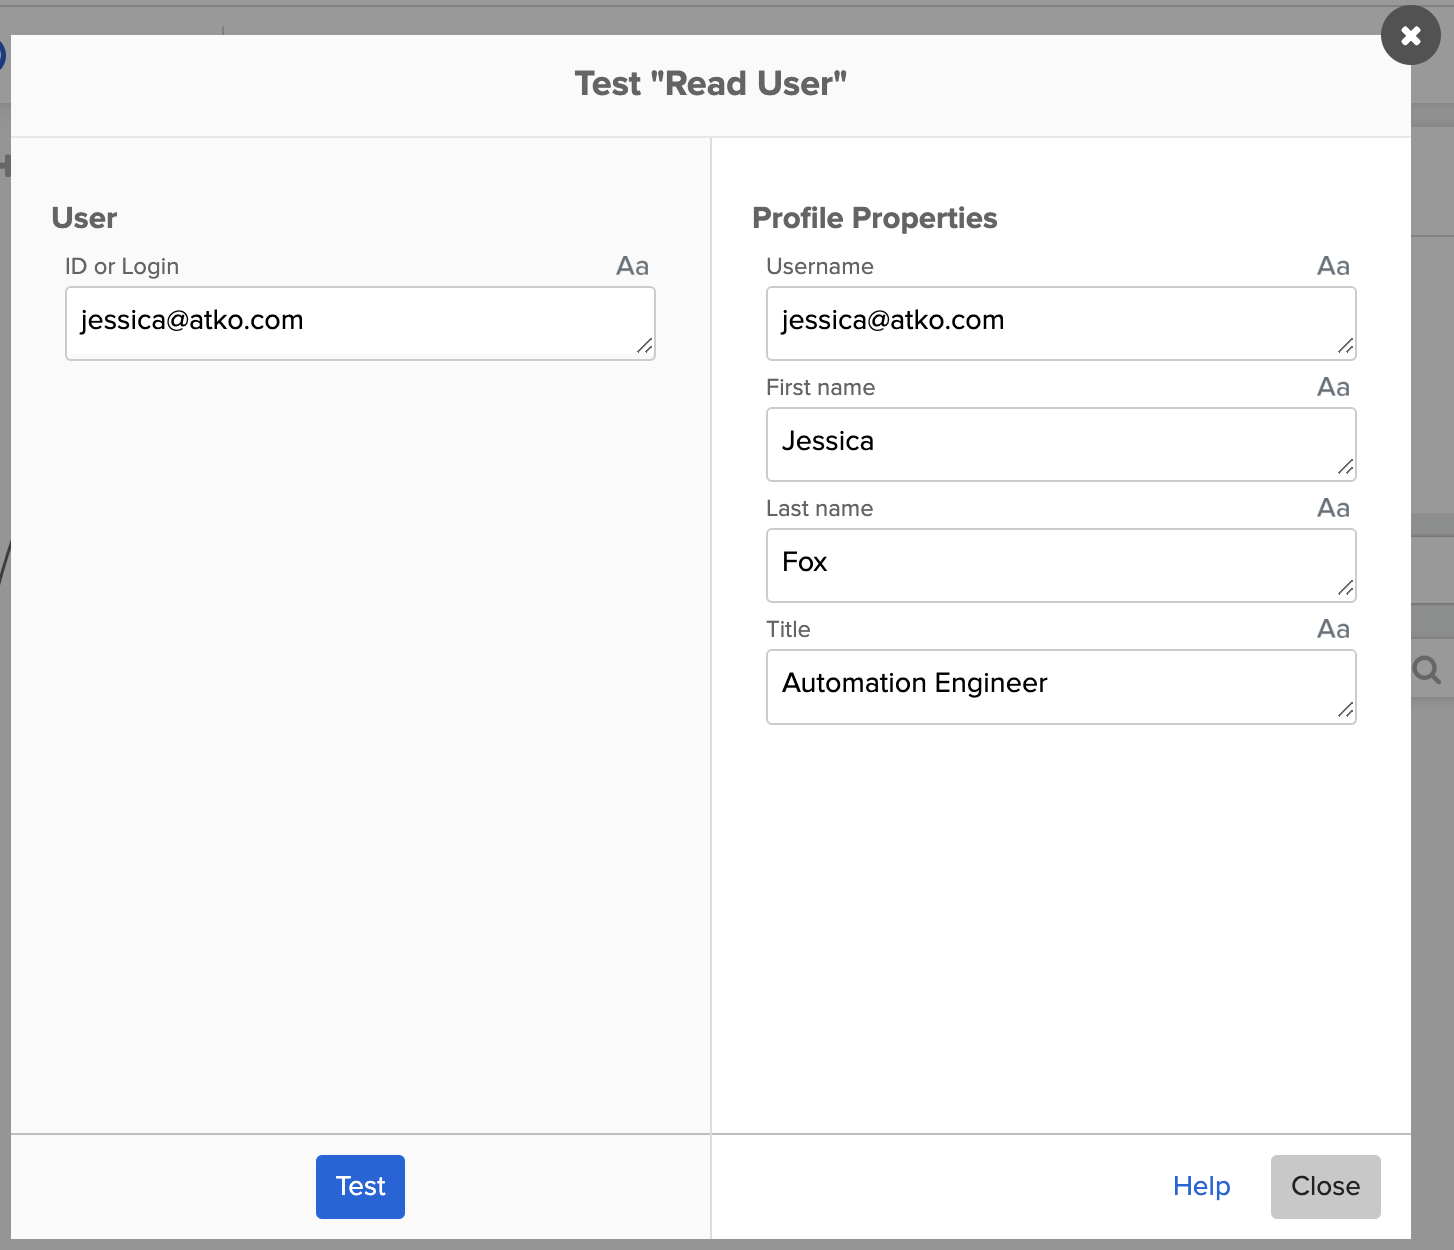
Testing the Read User card.
To set a user’s title, go to Okta Admin console > Directory > People. Select the user. Open the Profile tab and click Edit. Set the title and save.
Finish composing the message
Now you have the information you need to finish the message. Use the fields from the Read User card to create the following message:
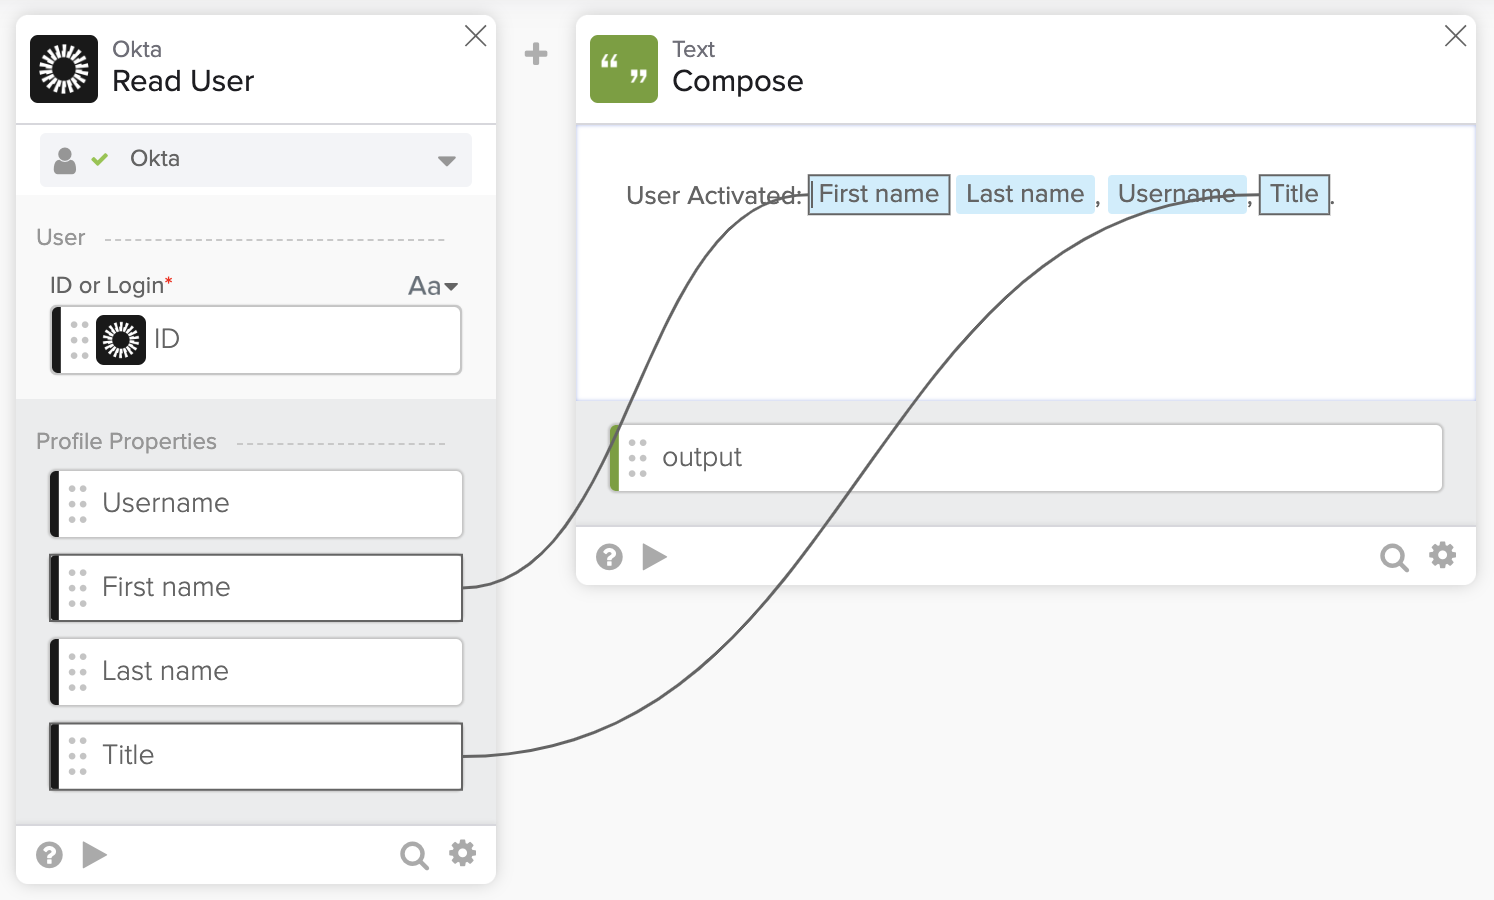
The Compose card with message.
Test the Compose card
If you want, you can test the Compose card. Click ▶️ on the Compose card to test it. Enter the data for the four fields and click Test.
Send a message to Microsoft Teams
To send a message to Microsoft Teams, you will use the Microsoft Teams connector.
- After the Compose card, click Add app action.
- Find and click on the Microsoft Teams connector. You can search for it.
- Select the Send Message to Channel action.
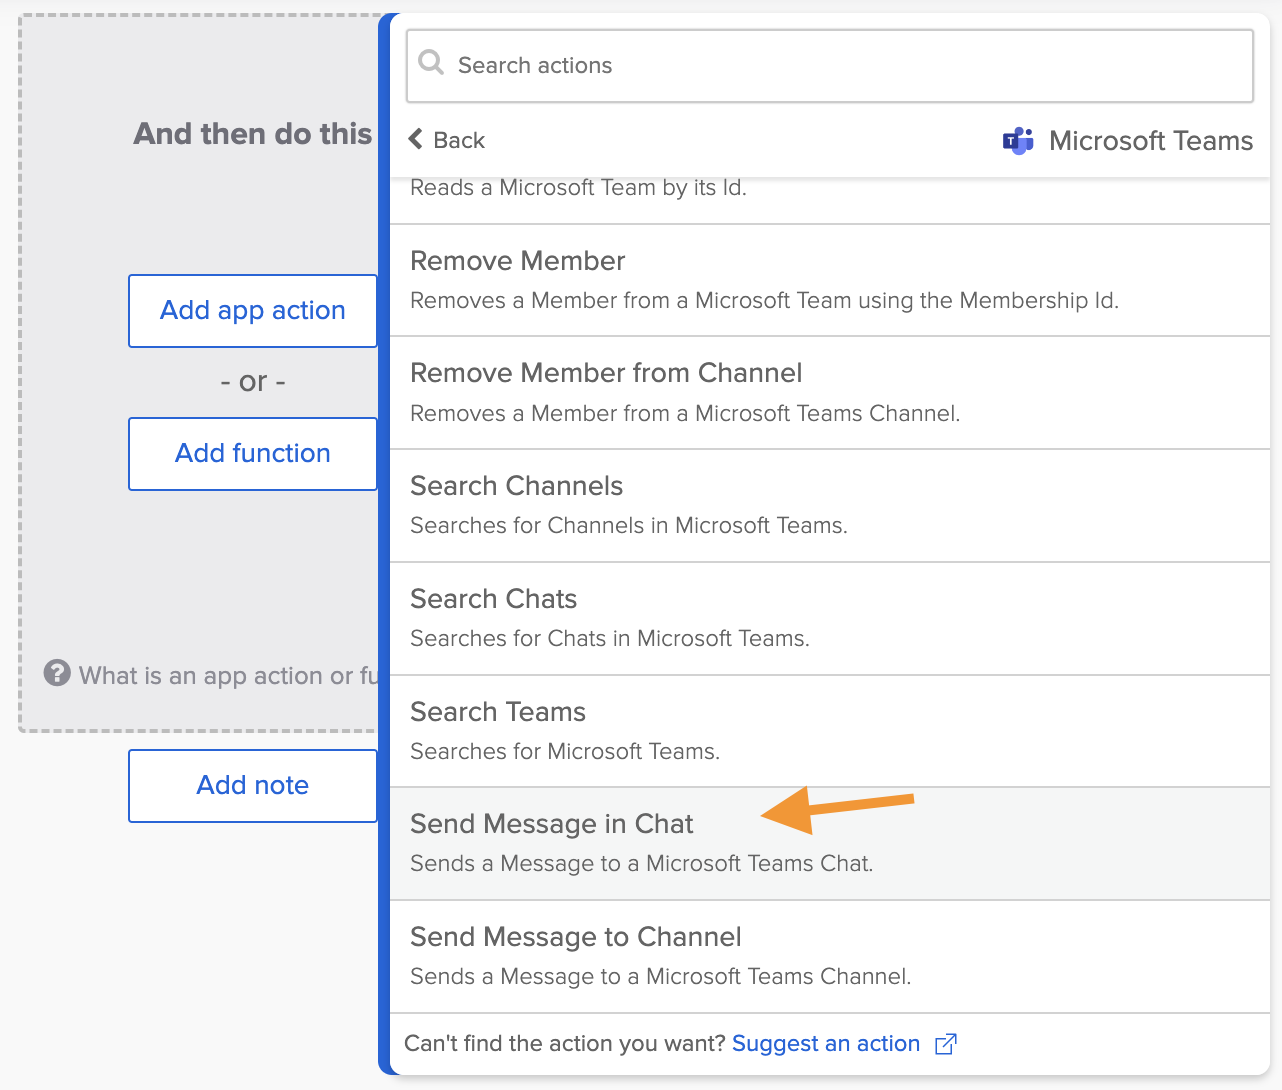
Microsoft Teams – Send Message to Channel action.
Set up the Microsoft Teams connection
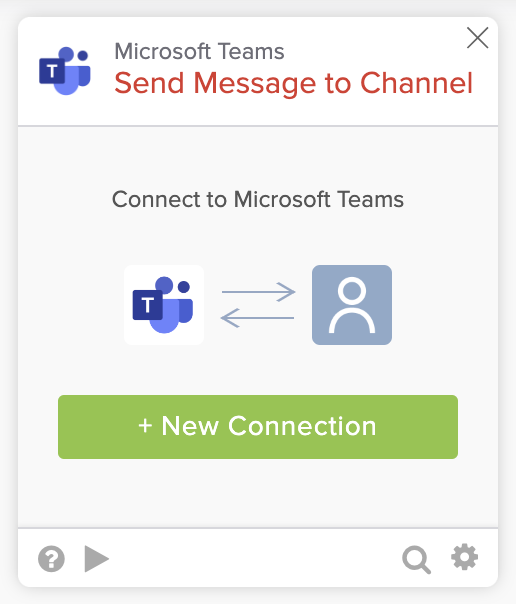
Setting up a new connection.
To set a connection:
- Click on + New Connection to start setting up a connection.
- Keep the default connection name.
- Enter Microsoft Teams connection for the Description field.
- Click Create and follow the steps to create and authorize the connection.
The Send Message to Channel card after creating the connection:
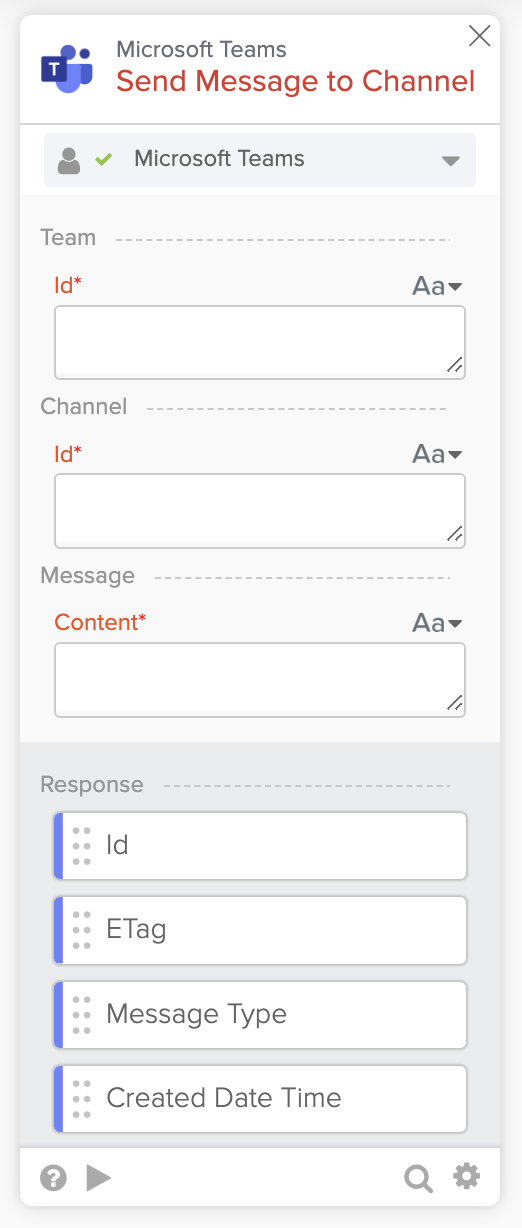
The Microsoft Teams – Send Message to Channel card.
Set inputs for the Send to Message Channel card
You need a channel in Microsoft Teams to use for this automation. The channel has the Team Id and Channel Id information the Send Message to Channel card requires.
- In Microsoft Teams, create a channel you will use for testing (in the Teams tab).
- Place the mouse over the channel name and click on the three dots to access the More options menu.
- Select Get link to channel.
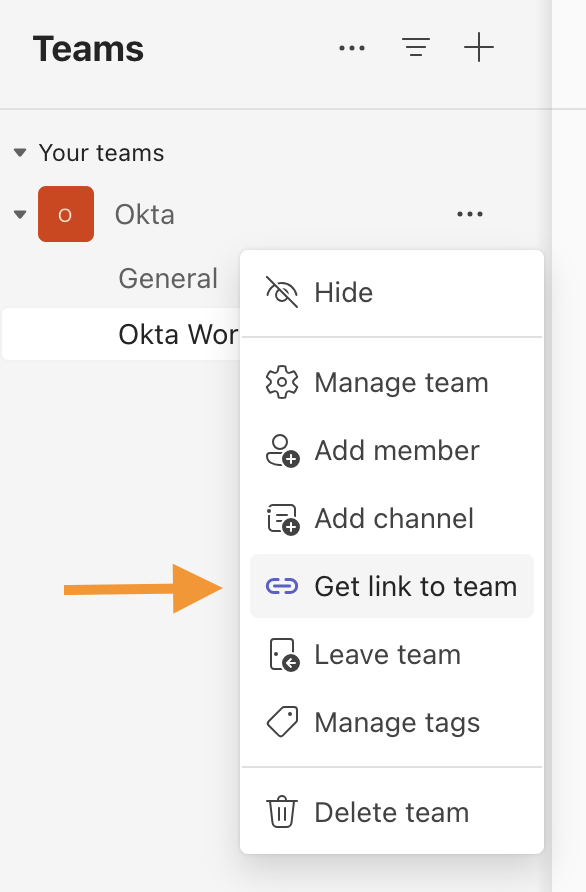
Microsoft Teams channel information.
- Copy the link value.
The link looks like this
https://teams.microsoft.com/l/channel/19%3A5431db0d2cb3436c902a20fd805eb7ee%40thread.tacv2/Okta%20Workflows?groupId=44e28d56-4b86-4cf0-82f6-ac1909cfc9ef&tenantId=d19b035f-2acb-474f-aa3a-661aa181756aUsing the link above:
- Copy the groupId value and paste it into the Team Id field on the Send Message to Channel card.
- Copy and paste the channel ID into the Channel Id filed on the Send Message to Channel card.
For the Content field:
- Connect the output field from the Compose card to the Message Content field on the Send Message to Channel card.
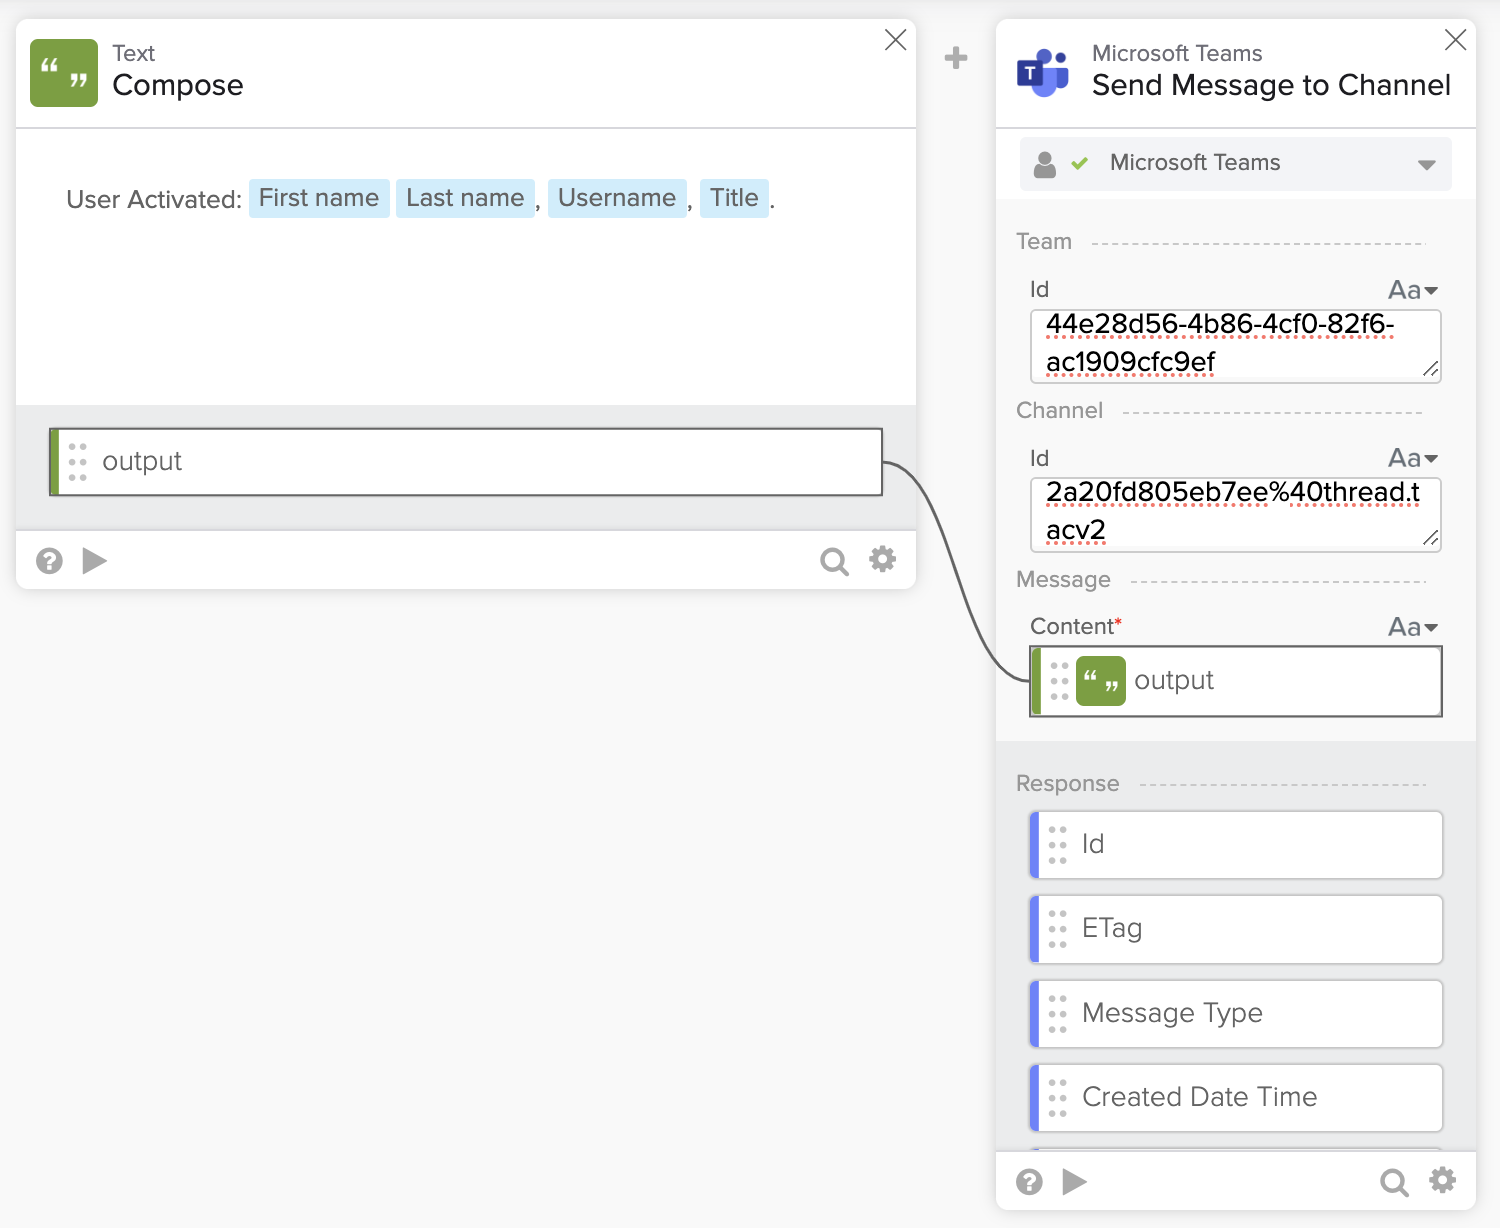
Setting inputs for the Send Message to Channel card.
Test the Send Message to Channel card
To test the card:
- Click ▶️ on the card.
- Enter sample message for Content and click Test.
- Check the message in Microsoft Teams.
In the following section, you will test the flow.
Test the flow
You are ready to test the flow.
- Save the flow.
- Check the flow is on.
- Go to Okta Admin console > Directory and select a user to activate.
- To deactivate a user first:
- Click on a user to deactivate.
- Click More Actions > Deactivate.
- Click Deactivate to confirm.
- To deactivate a user first:
- Click the Activate and Activate again to confirm.
Activating a user.
Check in the Execution History tab to see this flow run when you activated the user (if you don’t see the execution, open the Flow tab and return to the Execution History tab):
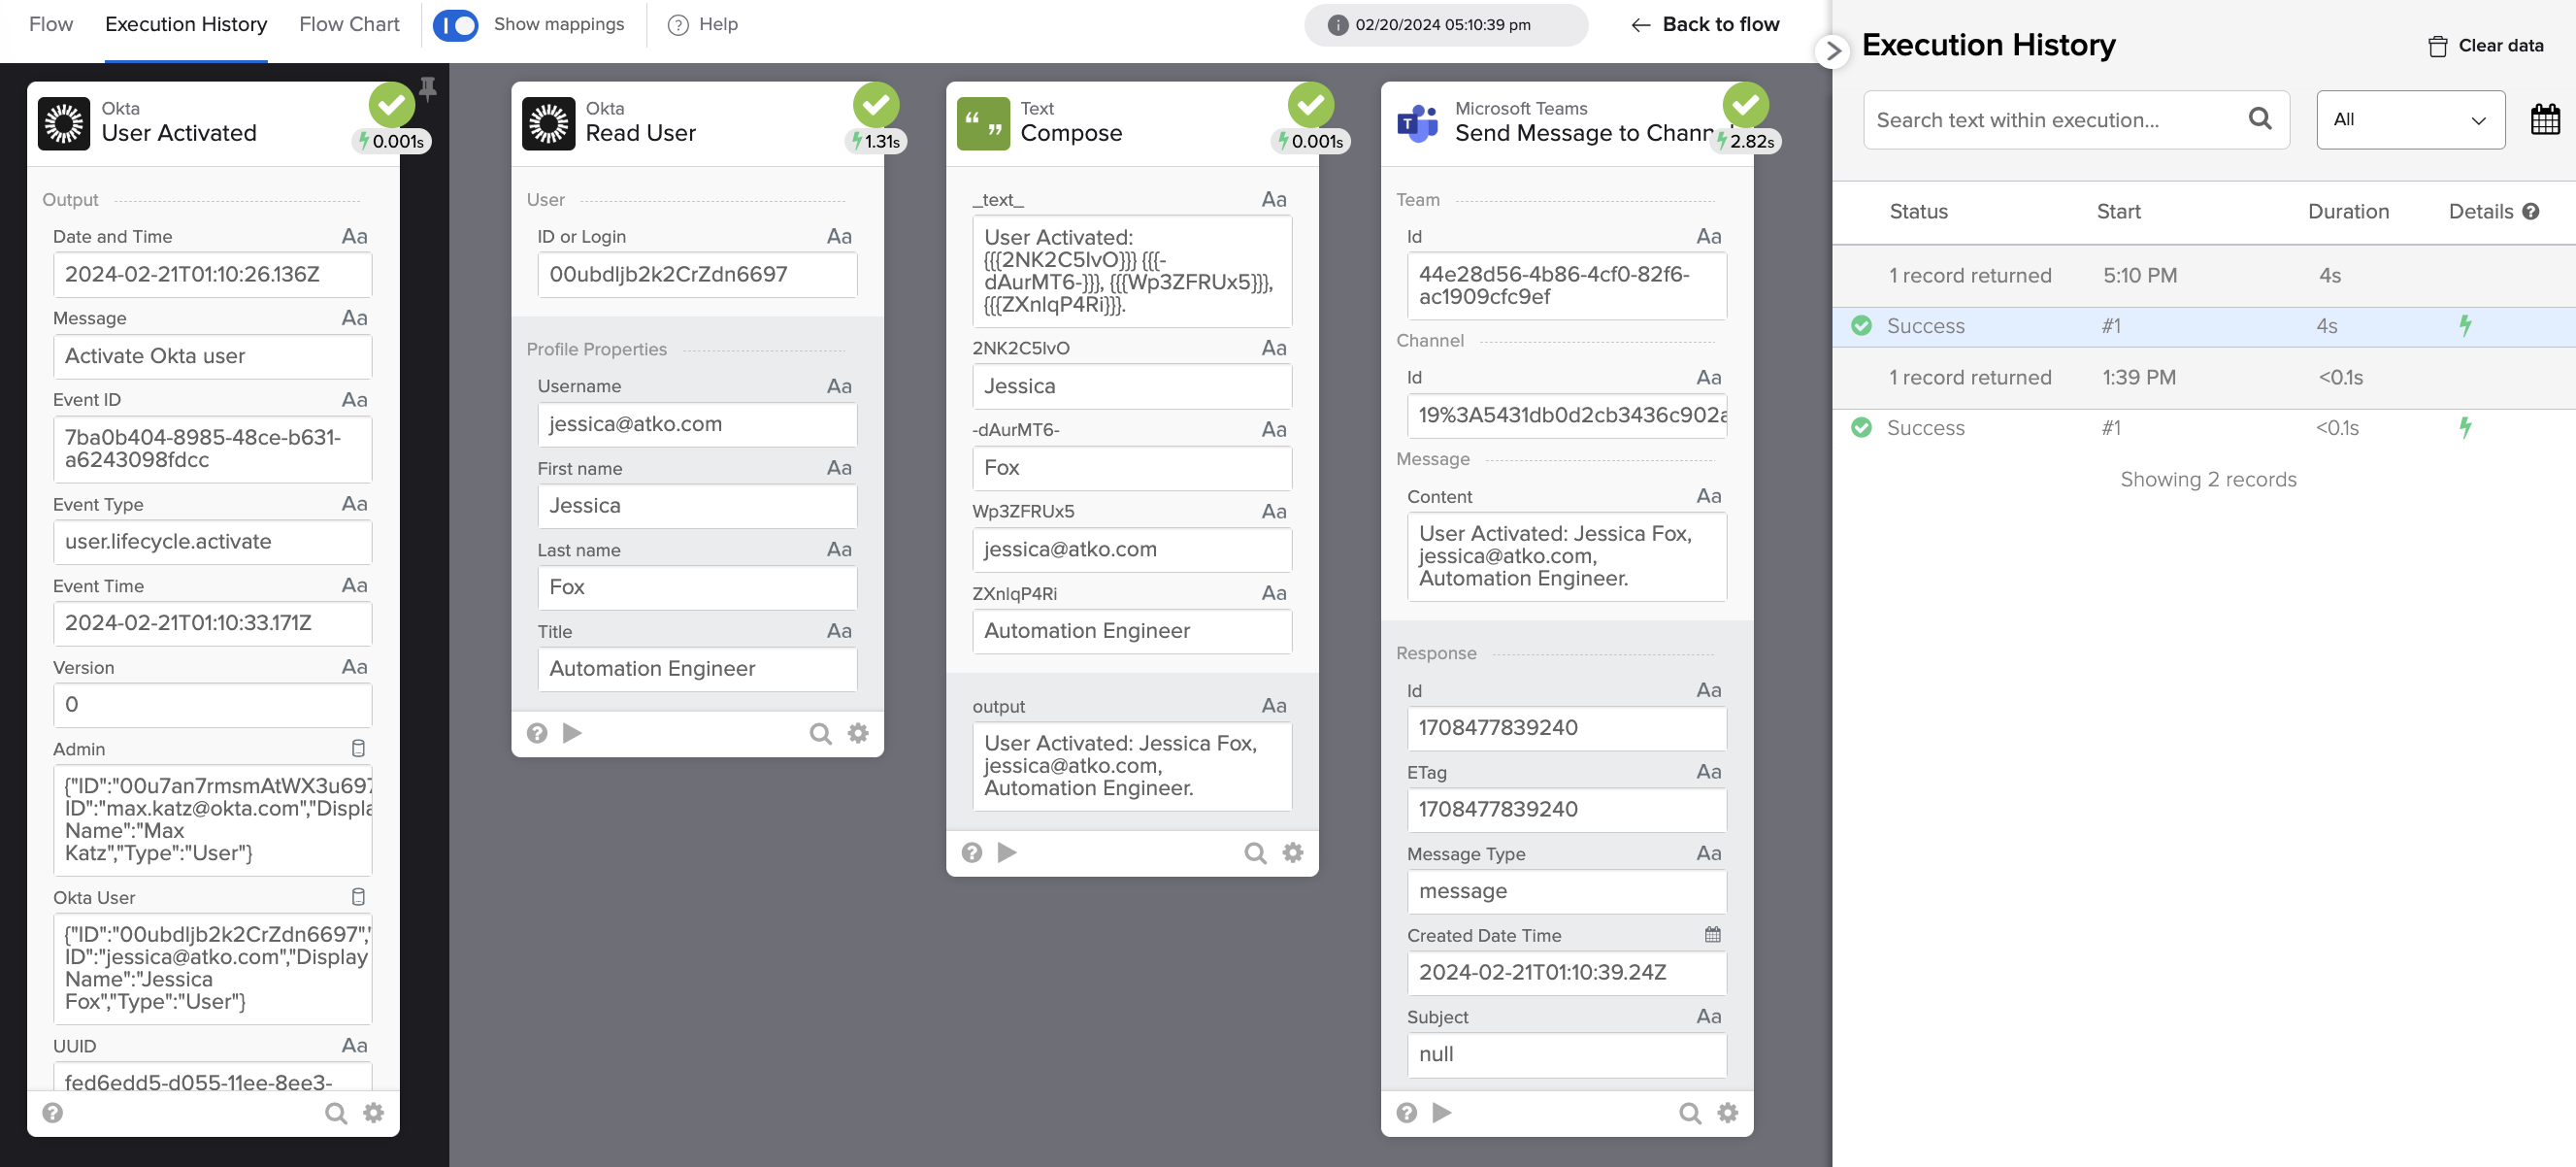
Flow execution history.
Activation message in Microsoft Teams:
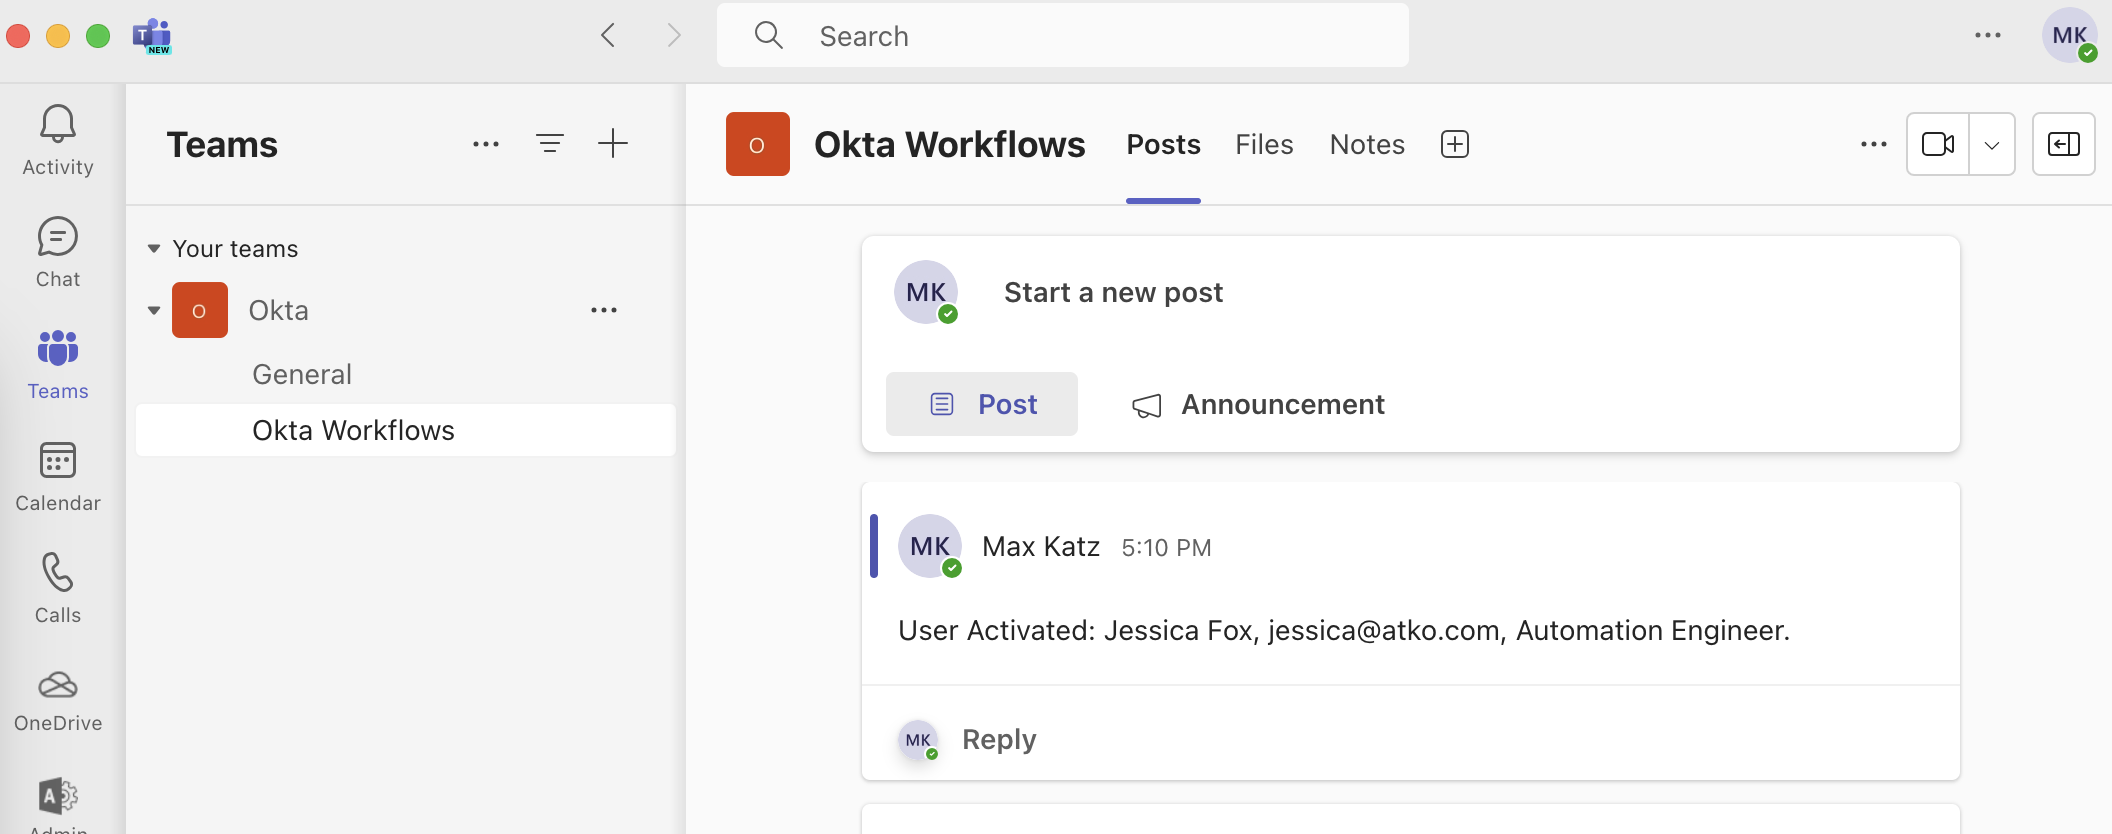
Message in Microsoft Teams channel.
Things you learned
In this tutorial, you created a flow to send event notifications to Microsoft Teams. Things you learned:
- Build a complete flow.
- Trigger a flow on a user-activated event.
- Read user information from Okta.
- Create a message and send the message to Microsoft Teams.
- Test individual steps and the flow.
The flow you built:
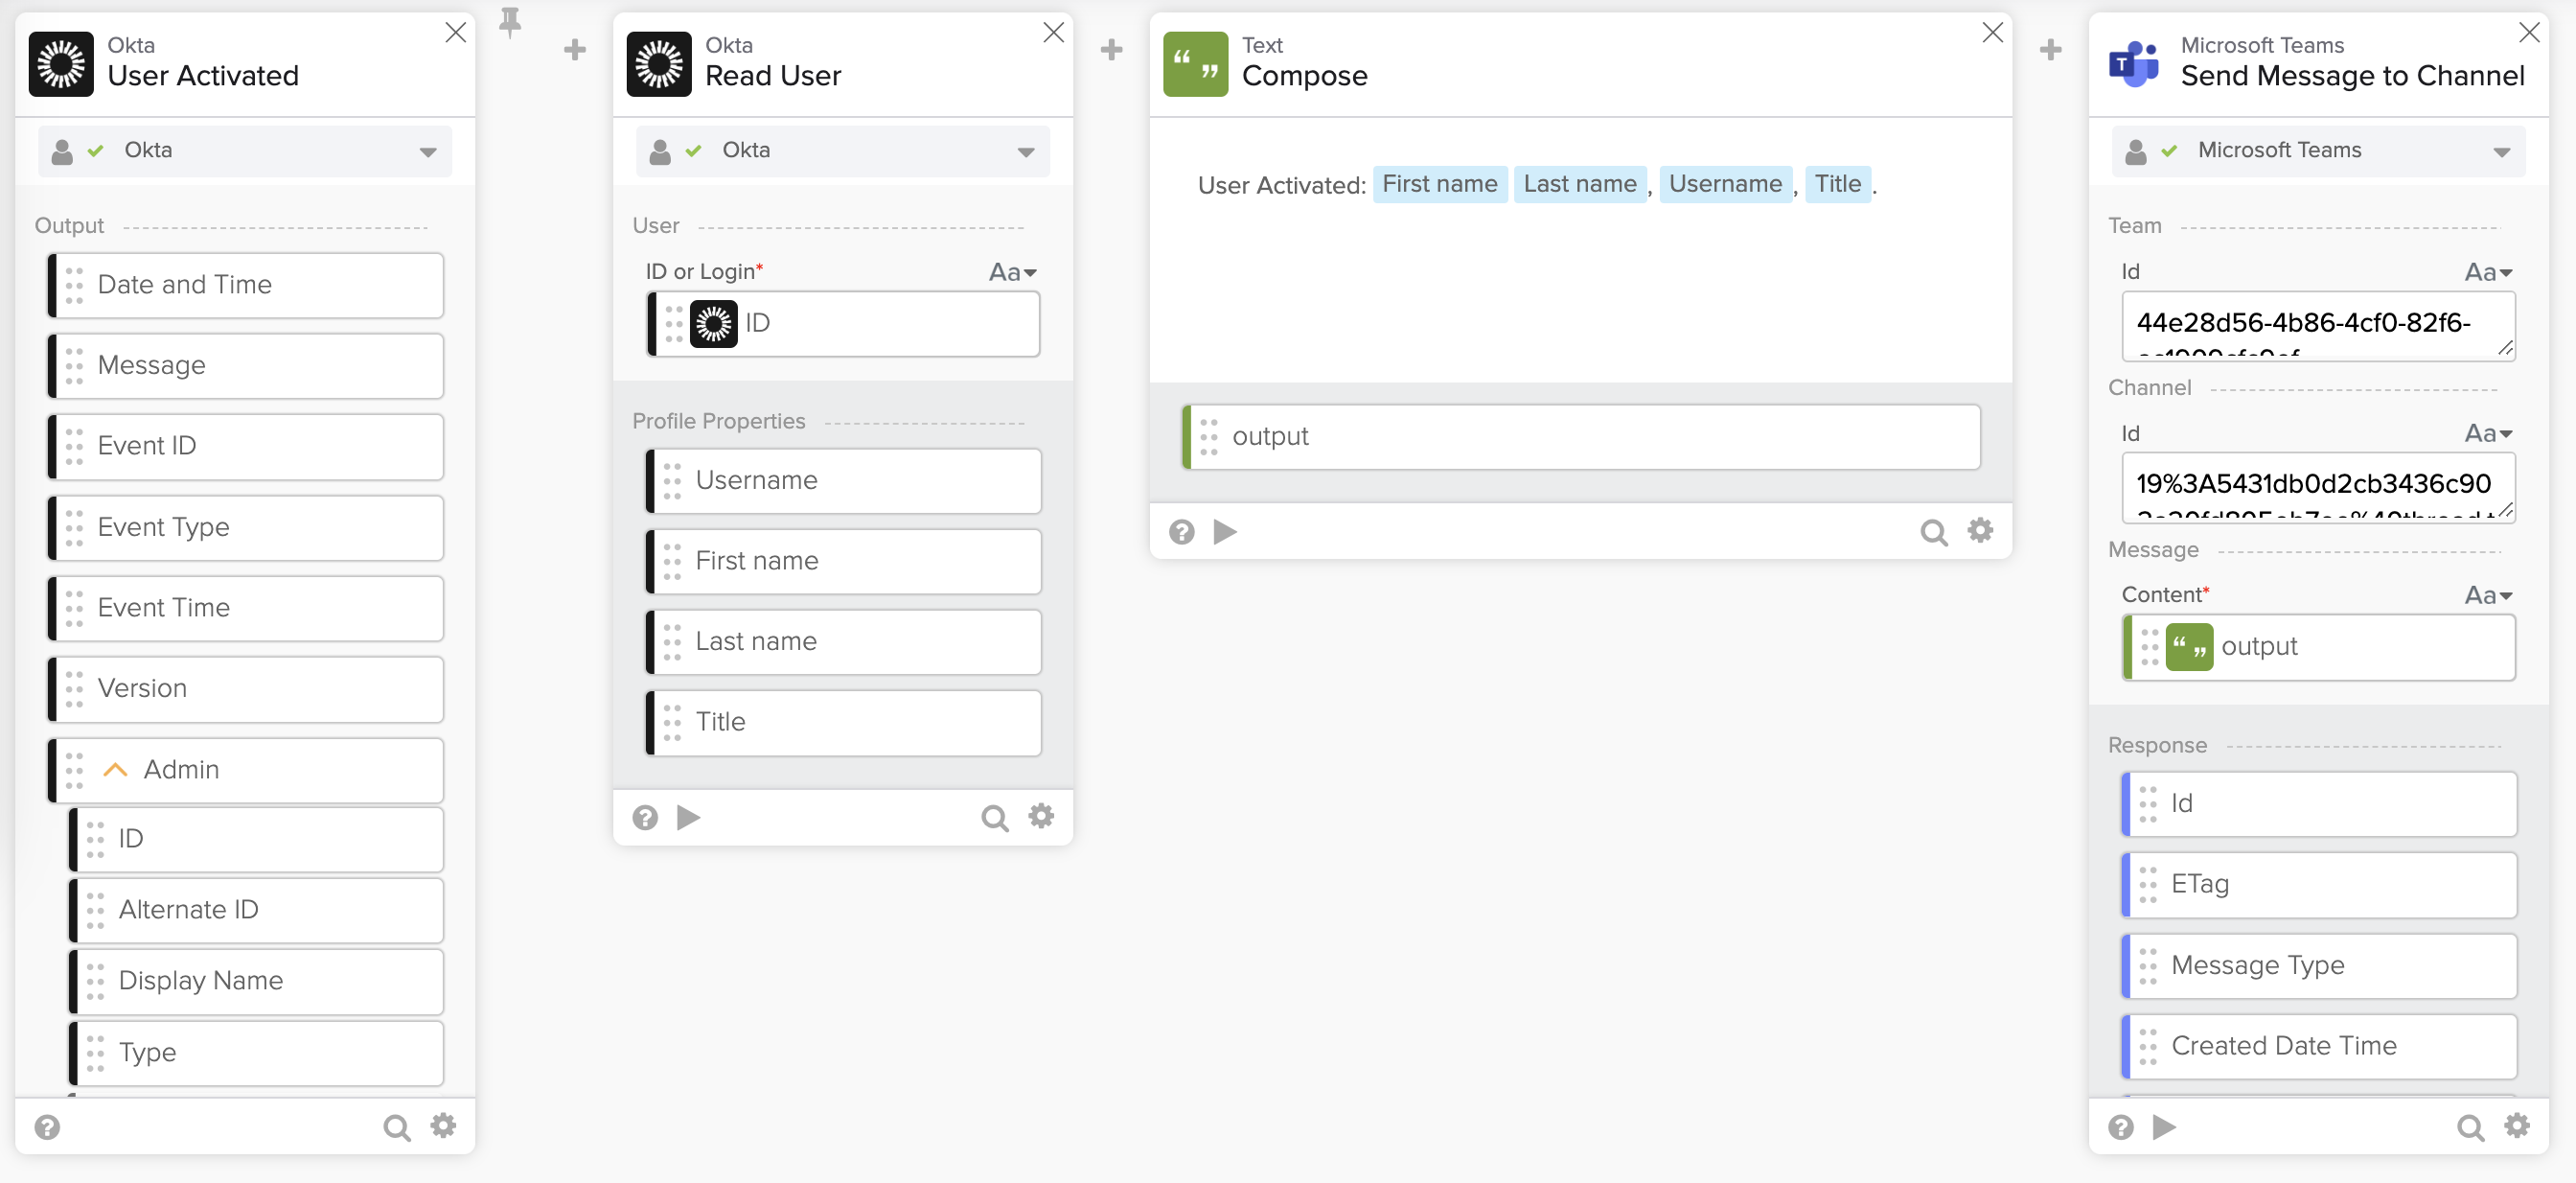
A flow to send event notifications to Microsoft Teams.
This tutorial is part of Okta Workflows with Microsoft series:
- Send an Email Notification for a New Okta Event
- Send a Notification to Microsoft Teams for a New Okta Event
- Send a Rich Message to Microsoft Teams for a New Okta Event Using Microsoft API
Okta Workflows resources
🍫 Get help from Workflows specialists during weekly community office hours.
📺 Learn from Workflows videos.
🛟 Get help from support: discuss a Workflows topic or ask a question.
🙋🏻♀️ Get help from the community: join the #okta-workflows channelon MacAdmins Slack.


