


|
This recipe is part of the series Learn CIAM by example: Four recipes to improve your app’s security and UX. You can learn more about the series by downloading our four recipes in a cookbook format. In this recipe, you learn how to share identities with marketing tools — like your email mkt solution — for personalized user engagement. |
As organizations grow, the number of touchpoints to perform audience outreach and activation becomes exponential.
Understanding the journey of an individual user across your different platforms and channels can be complicated, especially when you don't necessarily have a unified view of all your users.
Why is CIAM important for personalization?
CIAM helps understand how users are using your platform and services. By understanding when users last logged in and from where, or even assessing for inactivity, CIAM gives you data points your marketing and sales teams can use to promote engagement.
When your organization has CIAM, you can give your teams a better understanding of your audience, enabling personalization in many different ways — from your product’s user interface (UI) to marketing emails sent to your users to whether and how sales should perform outreach for conversion.
With a focus on Identity, you can ship insights from your user’s journey to apps, email, and marketing systems, enabling ultra-personalized messaging.
Phase 1: Ask for consent
When it comes to data privacy, CIAM helps draw a dotted line between the information your users consent to and the information you use for personalization, which is vital for regulations surrounding personalization programs.
Before you can collect information about your audience and pipeline, you’re going to need to ask for consent.
Check out our recipe on data privacy compliance to learn how to add consent when someone signs up for your application.
Phase 2: Unify your customer database
With Auth0 by Okta, you can connect your Identity usage with your data lake or marketing automation system of choice, giving you a more complete profile of each customer and your audience as a whole. This data can be used in many different ways — from changing the UI and suggestions in your app to sharing information with marketing for targeted emails to providing analytics for product decisions.
As an example, in this recipe, we'll connect Auth0 with HubSpot, the most popular marketing automation solution for growing businesses. We’ll connect the dots between your users and your brand, and the integrations you use to build those customer relationships.
The integration between Auth0 by Okta and HubSpot is driven by Actions, an orchestration platform that gives you the freedom to add custom logic (and integrations) to any Identity process. You can orchestrate all sorts of processes — from syncing subscription statuses with Stripe to adding Identity-proofing to calling your own APIs.
Recipe
Ingredients
- HubSpot Developer Account
- Auth0 Professional or Enterprise Account
- Auth0 Actions
Configure HubSpot
Create a test environment in HubSpot
- Access your HubSpot admin page as a Developer.
- On HubSpot's home page, click “Testing.”
- Click “Create app test account.”

- Provide a name for your test environment and click “Submit.” The new environment will be created and displayed under the testing page.

- Click the test environment account. You will be redirected to the HubSpot CRM dashboard for your test environment.
Create attributes that will receive Identity data from Okta
Tip: You can create attributes to send any information available from Okta during user login, including the user login frequency, location, device, and social provider, among others. For this example, we will map the login count and city.
- From the Hubspot CRM dashboard, click the gear icon on the top menu.
- On the left bar, expand “Data Management > Objects,” and then click “Contacts.”
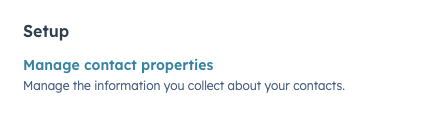
- Click “Manage contact properties.”
- Click “Create property.”
- Enter the following info and click “Next.”
- Object type: Contact
- Group: Contact Activity
- Label: Login Count
- Select “Number” as the field type and click “Next.”
- On rules, make sure all options are unchecked and click “Create.”


- Repeat the previous steps to create the field with the following info:
- Object type: Contact
- Group: Contact Activity
- Label: Login City
- Field type: Single-line text

Create a HubSpot API token
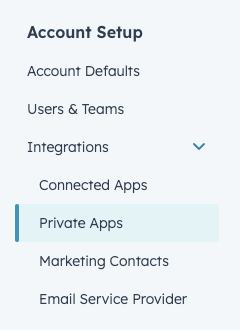
- On the left bar, expand “Account Setup > Integrations,” and then click “Private Apps.”
- Click Create a private app
- Add the following attributes:
- Name: Auth0
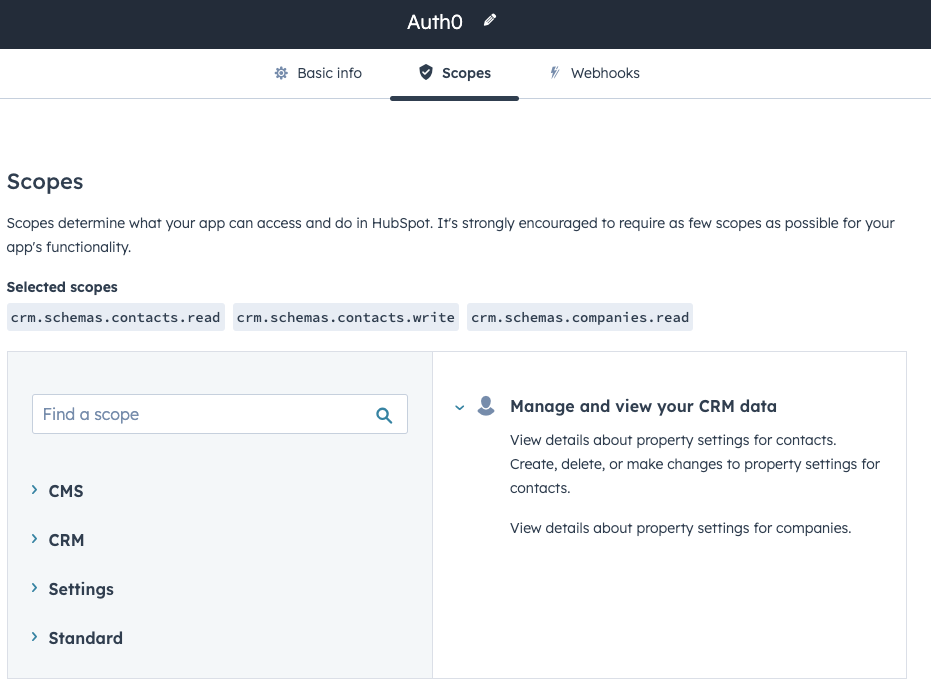
- Scopes:
- crm.schemas.contacts.read
- crm.schemas.contacts.write
- Crm.schemas.companies.read
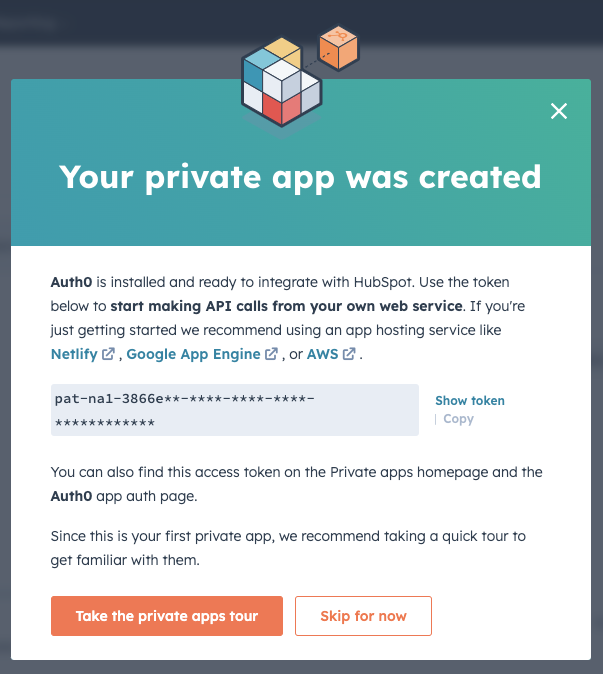
- After creating the app, record the application API token. Auth0 Actions will use this token to send data to Hubspot.
Configure Auth0 by Okta Actions
Actions allow you to modify Identity processes — such as registration and login — with your custom logic.
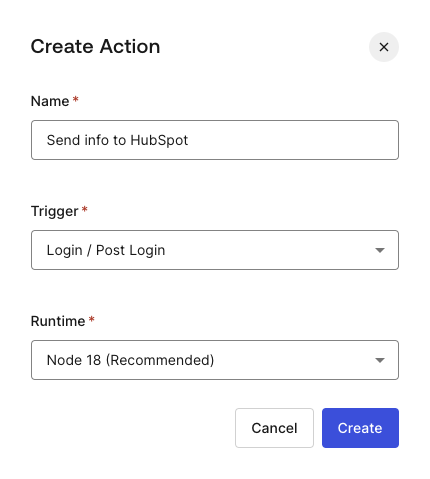
Let’s create a Login Action to send data to HubSpot.
- Navigate to “Actions > Library > Build Custom.”
- Here is the logic required for this example. We’ll be using Axios to make an HTTP call to share our user’s first and last name, login frequency, and location based on their email.


- Add Axios as a dependency.

- Add your HUBSPOT_SECRET, which is your generated HubSpot API token.

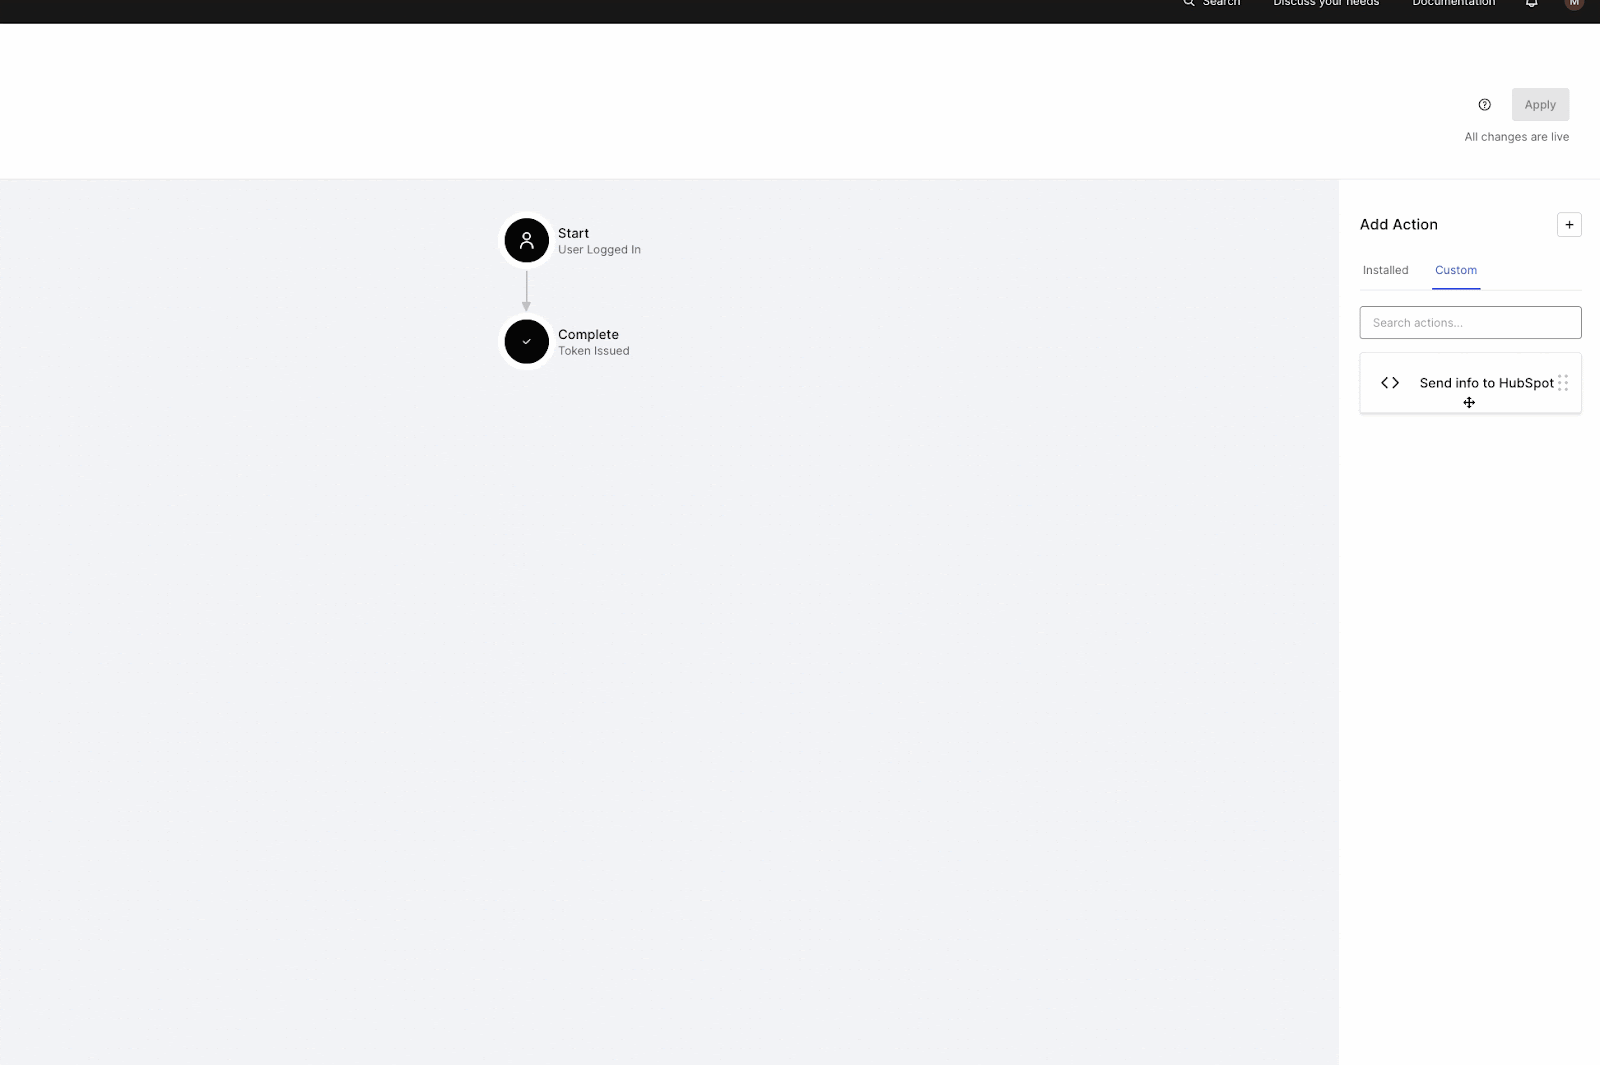
- Deploy your Action to save it, then navigate to “Flows > Login,” and add your Custom Action:
- Upon successful login or signup (or testing your Action in the sandbox), navigate to HubSpot, and go to “Contacts > Contact” to see the fruits of your Action:

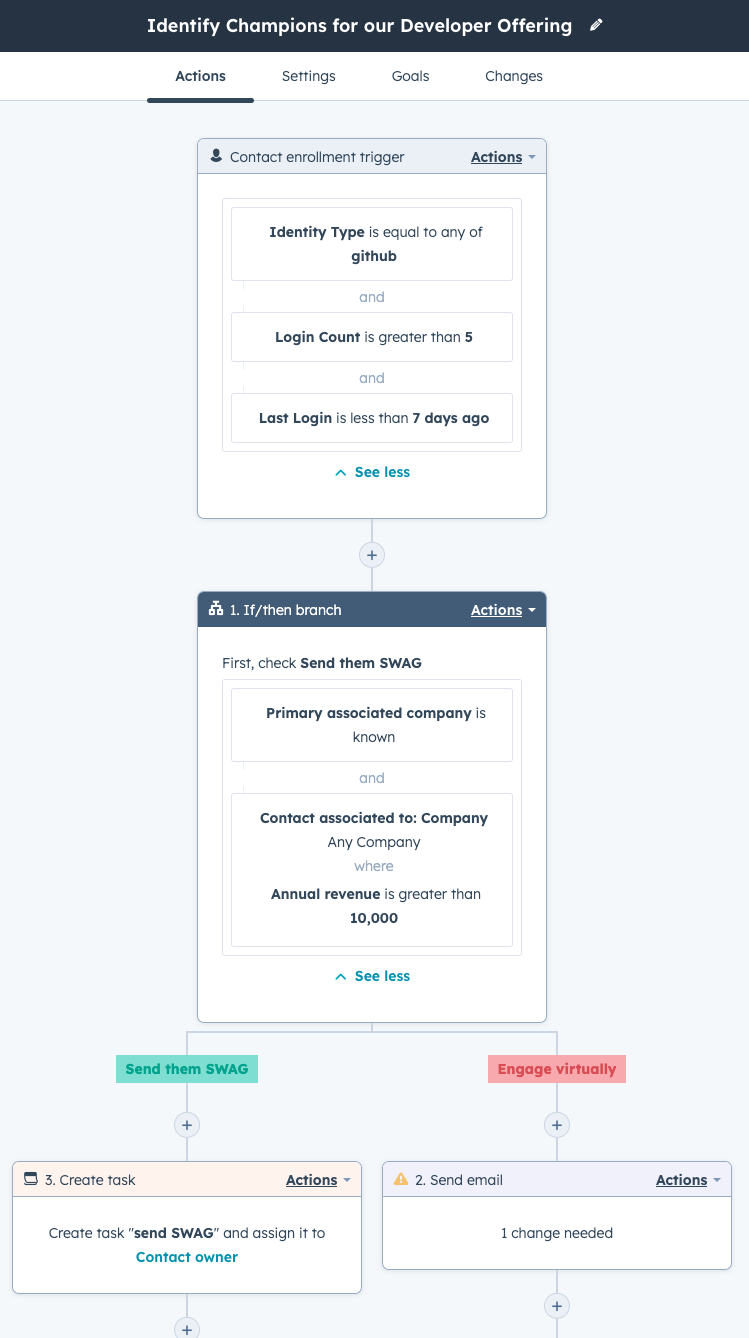
Now, HubSpot can use Identity data — login counts, geo, email, name, etc. — in its marketing workflows to customize sales and marketing tactics. For example, send developers SWAG if they signed up with GitHub, log in with high frequency, and their accounts can be associated with a company, with good revenue:
Phase 3: Ensure your customer contacts are legit
As the influx of fraudulent activity on the web has no end in sight (for now), fake accounts can often derail business operations and skew reporting that contributes to vital assessments for growth.
To ensure your customer contacts are who they say they are, Auth0 by Okta has a number of tools to stop illegitimate traffic at the front door of your applications. Our prevent fraudulent activities recipe shows how to maintain UX for your legitimate customers while keeping bad actors — and bots — out. And if you want to see all recipes in a comprehensive guide, download our cookbook.


