


In the modern data stack, Snowflake is the crown jewel. However, as organizations scale, managing who has access to what and, more importantly, ensuring that access is revoked, becomes a high-stakes game of compliance. If you have relied solely on Okta’s out-of-the-box (OOTB) SCIM connectors, you have likely realized they only take you halfway. They can create a user, but they struggle to manage the complex lifecycle of Snowflake roles and license reclamation.
This guide explores a sophisticated "three-flow" architecture using Okta Identity Governance (OIG) and Okta Workflows (updated as of April 2026) to automate the "last mile" of Snowflake administration.
The problem: Why Okta integration connectors fall short
Standard integration between Okta and Snowflake typically focuses on user provisioning. While this handles the "Is this person a user?" question, it fails on two critical fronts:
- Granular role management: Snowflake access is defined by roles (e.g.,
SYSADMIN, DATA_ENGINEER). Standard connectors don't natively trigger role-specific SQL commands in response to OIG access requests. - Entitlement cleanup: When an OIG request expires or a user is unassigned from an app, the user record often persists in Snowflake. This leads to "zombie" accounts that consume licenses and expand your security attack surface.
The solution is to use Okta Workflows as an orchestration engine that listens to OIG events and speaks Snowflake’s language.
Configuration requirements setup guide
Before we get to the proposed Okta OIG and Workflows solution, we need to make a few configuration changes in Snowflake, OIG, and Slack to use the workflows pack (Snowflake Delegated Flow, Unassigned Entitlements, and User Unassigned Cleanup). You must complete these specific configuration steps across all four platforms. Below is the comprehensive guide to set up the core requirements:
Snowflake requirements
Snowflake serves as the target system for managing roles and users.
- Create a provisioner role: Create a dedicated role (e.g.,
OKTA_PROVISIONER) that Okta will assume to perform actions.
USE ROLE SECURITYADMIN;
CREATE ROLE IF NOT EXISTS OKTA_PROVISIONER;
GRANT CREATE USER ON ACCOUNT TO ROLE OKTA_PROVISIONER;
GRANT CREATE ROLE ON ACCOUNT TO ROLE OKTA_PROVISIONER;
GRANT ROLE OKTA_PROVISIONER TO ROLE SECURITYADMIN;
- Configure SCIM integration: Create a SCIM security integration to allow Okta to communicate with Snowflake.
USE ROLE ACCOUNTADMIN;
CREATE OR REPLACE SECURITY INTEGRATION OKTA_PROVISIONING
TYPE = SCIM
SCIM_CLIENT = 'OKTA'
RUN_AS_ROLE = 'OKTA_PROVISIONER';
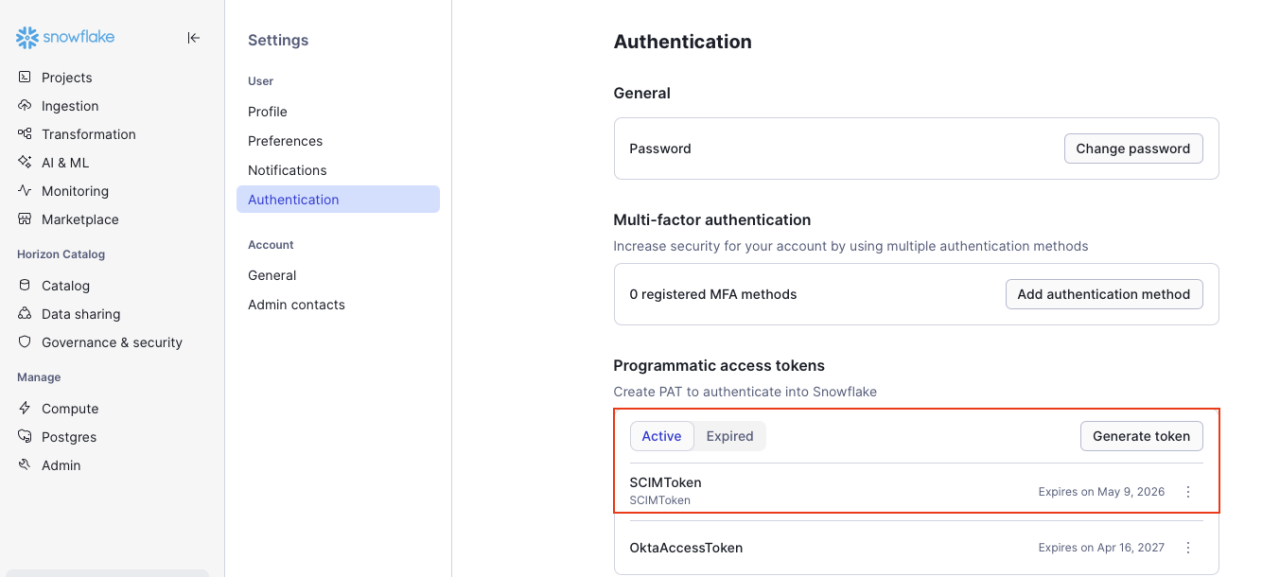
- Generate SCIM token: Generate the authorization token to paste into Okta.
SELECT SYSTEM$GENERATE_SCIM_ACCESS_TOKEN('SCIMToken');
- Network policy: Ensure Snowflake's network policy allows incoming traffic from Okta IP addresses.
-- Step 1: Create a network rule with Okta IP addresses
CREATE OR REPLACE NETWORK RULE MY_DB.PUBLIC.OKTA_INGRESS_RULE
TYPE = IPV4
MODE = INGRESS
VALUE_LIST = ( -- Insert IP addresses list here )
COMMENT = 'Okta IP addresses for inbound access';
-- Step 2: Create a network policy using the rule
CREATE NETWORK POLICY okta_access_policy
ALLOWED_NETWORK_RULE_LIST = ('MY_DB.PUBLIC.OKTA_INGRESS_RULE');
-- Step 3: Activate the policy (account-level)
ALTER ACCOUNT SET NETWORK_POLICY = okta_access_policy;
Okta requirements (core and workflows)
Okta is the central identity provider and the engine running the automation.
Snowflake app SCIM integration
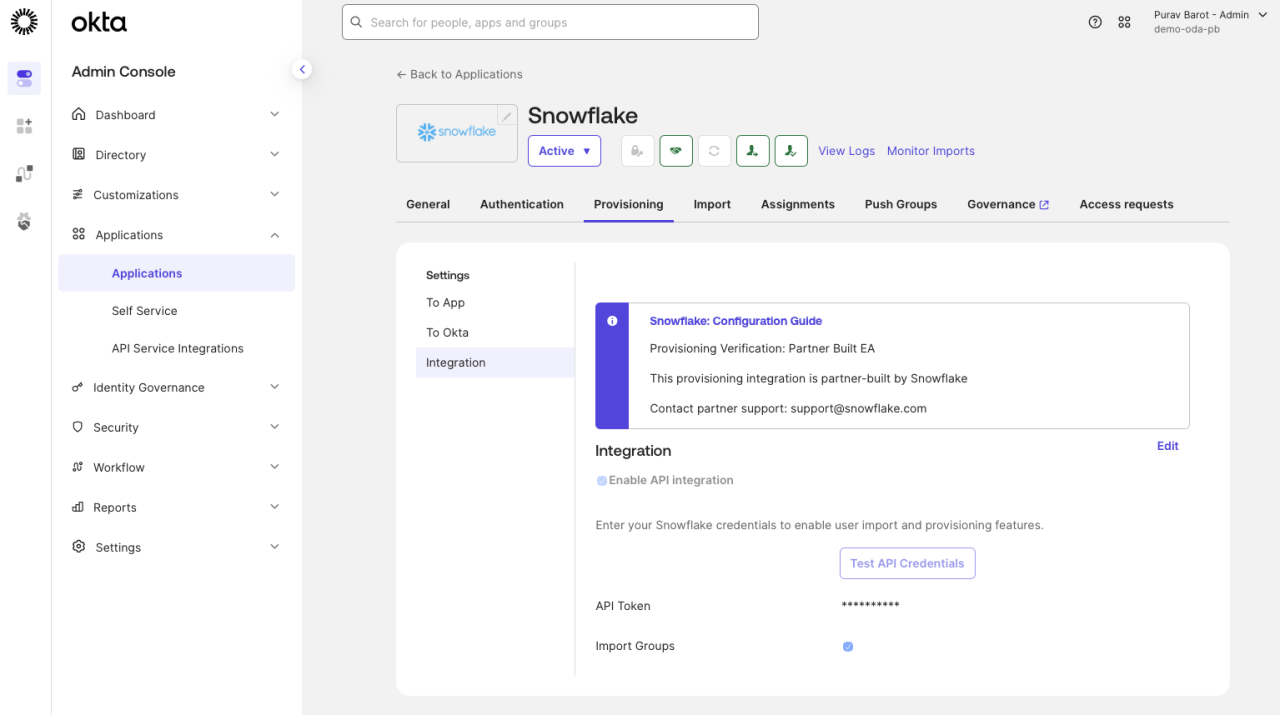
- Add the Snowflake app from the Okta Integration Network.
- In the Provisioning tab, enable API integration and paste the Snowflake SCIM token.
- Enable Create Users, Update User Attributes, and Deactivate Users.
Workflows connector authorization and import
The core of the system relies on two main components: Okta Access Requests and Okta Workflows. Okta Workflows are used to build specific business functions, such as manual provisioning, sending notifications, or creating support tickets. These workflows are configured as Delegated Flows, which can be utilized by Okta Access Requests. Follow these steps to enable these workflows:
1. Authorize access
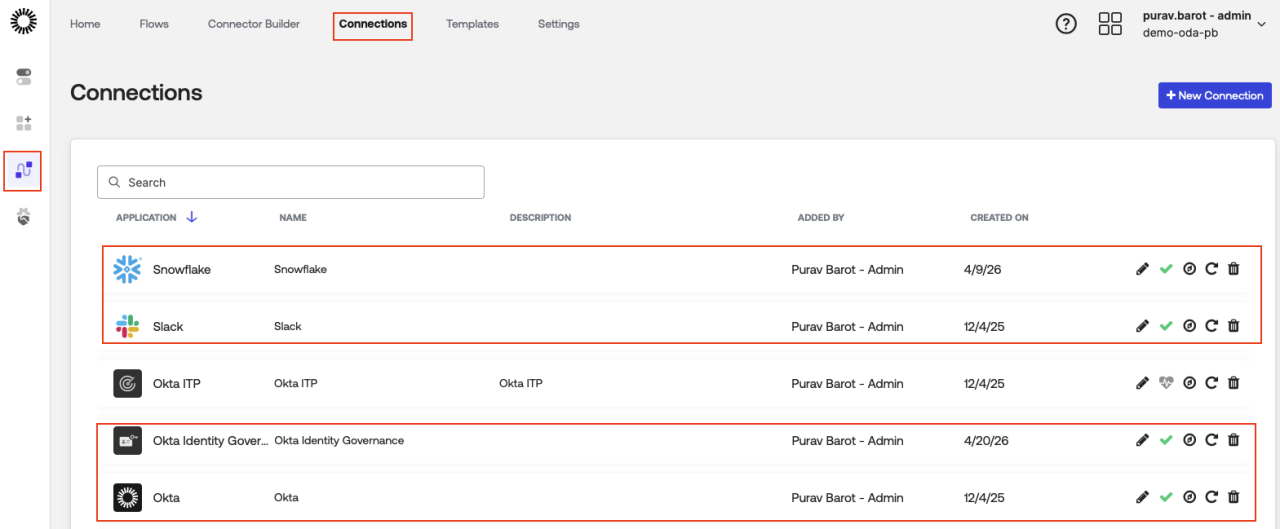
- Authorize the snowflake connector in the workflows console using the access token in the Snowflake application. This will help us make API calls to the snowflake application.
- Okta connector: Ensure the connection is authorized.
- Grant the
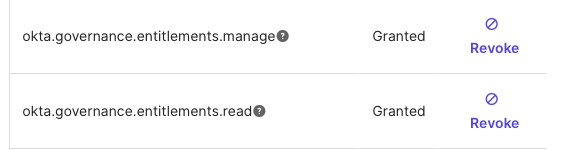
okta.governance.entitlements.managescope to the Okta Workflows OAuth app in the Okta Admin console (Applications > Okta Workflows OAuth app).
2. Import workflows pack
Note: In order to complete this step, you’ll need to download this workflow pack file.
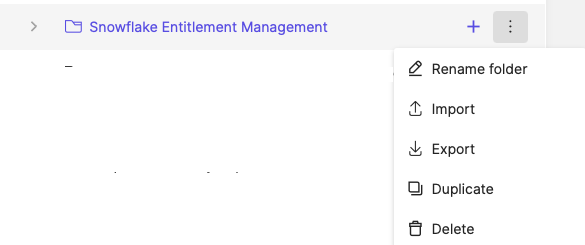
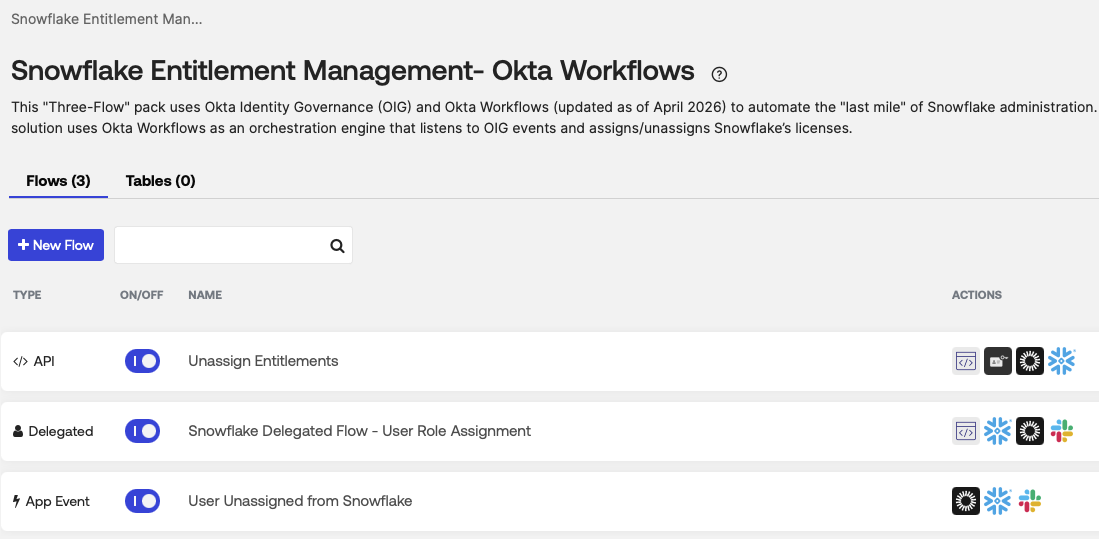
Import the attached workflows pack in Admin Console -> Workflows -> Flows: Snowflake Entitlement Management- Okta Workflows:
- Create a new folder and name it “Snowflake Entitlement Management,” and then select “Import” from the dropdown menu.

There are three main workflows: Snowflake Delegated Flow (Assignment), Unassign Entitlements, and User Unassigned from Snowflake. We will break down what each workflow does in the next section.
Enable these application connections in each of the three flows (e.g., the Snowflake card in the “Unassign Entitlements” flow).
3. Set up delegated flow
To utilize the Snowflake delegated flow, you must first enable Okta Workflows within Access Requests. This ensures that upon approval of an access request for the Snowflake application, the Snowflake delegated flow triggers an API request to assign entitlements.
Enable this under Settings -> Feature -> Okta Workflows actions in Access Requests

- Create a custom role and resource to allow Access Requests to view and run the available workflows.


- Create a resource set and assign Workflows to it.
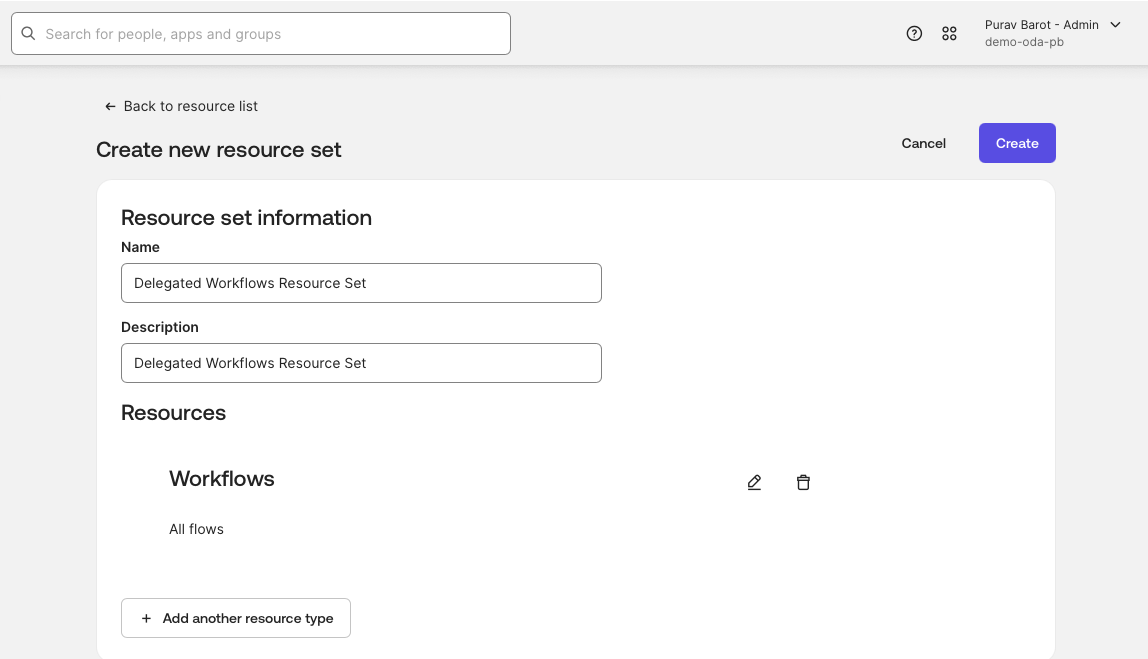
- Go back to the delegated resource set to assign the Admin permissions.

- Under Identity Governance, navigate to Access Requests -> Settings -> Resources -> Workflows to confirm that the delegated workflows are enabled to be run from the access requests. If everything was successfully executed, you will see “delegated workflows” appear.

4. Create an event hook
Set up an event hook to send event data from Okta to the API endpoint in the delegated flow when an OIG event occurs:
Go to the “Event Hooks” tab under “Workflows” to create a new event hook.

Now, ensure that the system logs detect an “updated user’s entitlements in a resource” OIG event and sends it to the API endpoint card by assigning the invoke URL from the unassign entitlements workflow in the Endpoint URL field, and then selecting that event in the event hook:
- Go to the “Unassign Entitlements” workflow -> endpoint settings.

- Copy the endpoint URL and paste it into the “Endpoint URL” of the new event hook.
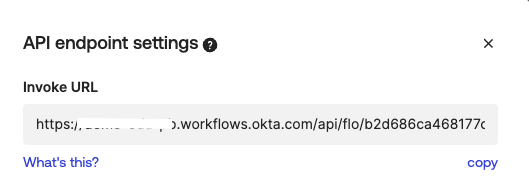
- In the event hook, select “Updated user's entitlements in a resource.”

- Once the event hook is configured, we will be able to test the event hook under the “Preview” tab.

Okta Identity Governance (OIG) requirements
OIG provides the granular entitlement layer used in the synchronization flow.
- Enable governance engine: Ensure the Okta Identity Governance engine is enabled for your organization.
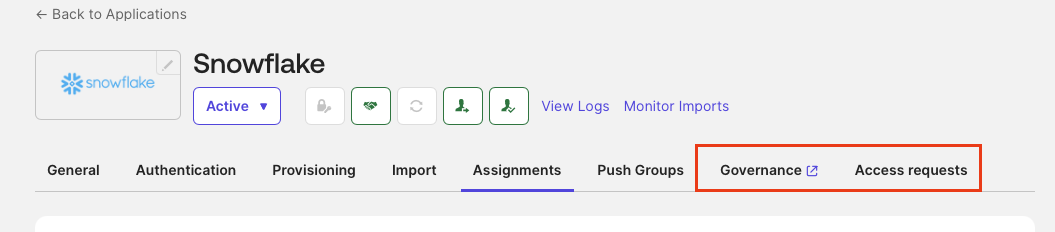
- Enable entitlement management: Go to the Snowflake app in Okta > Governance tab and click “enable entitlement management.” Before enabling or disabling entitlement management, you must first disable provisioning.

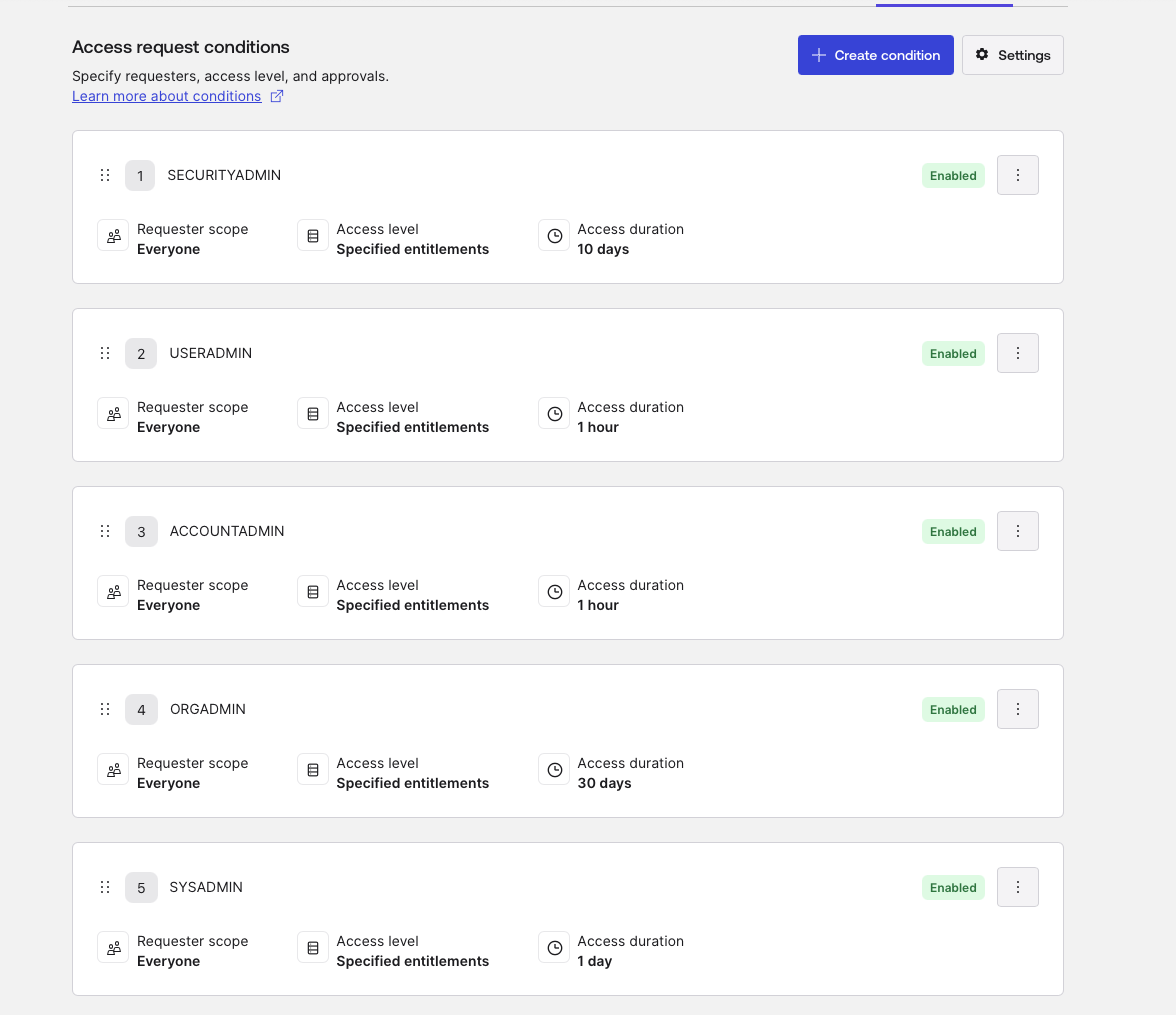
- Set up custom entitlements in Snowflake app -> Governance. As previously mentioned, Snowflake’s entitlements are not automatically populated using Okta's connector. Hence, we will have to set up custom roles and entitlements.
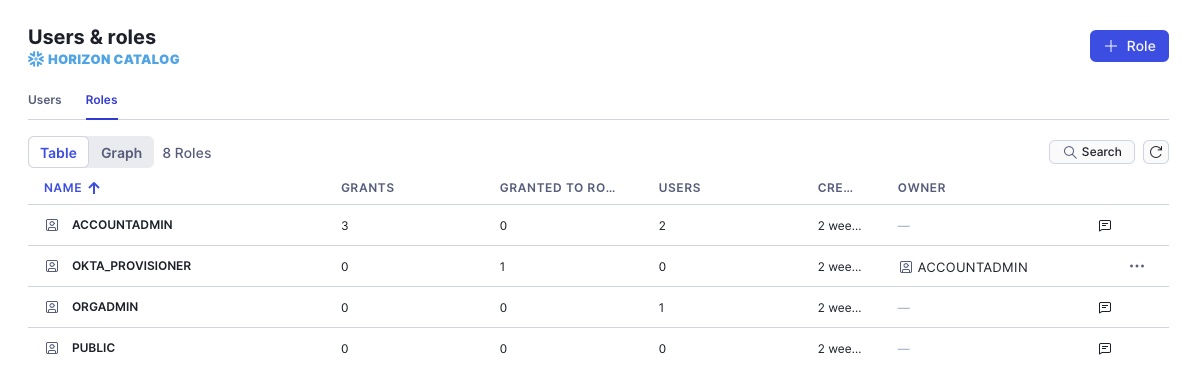
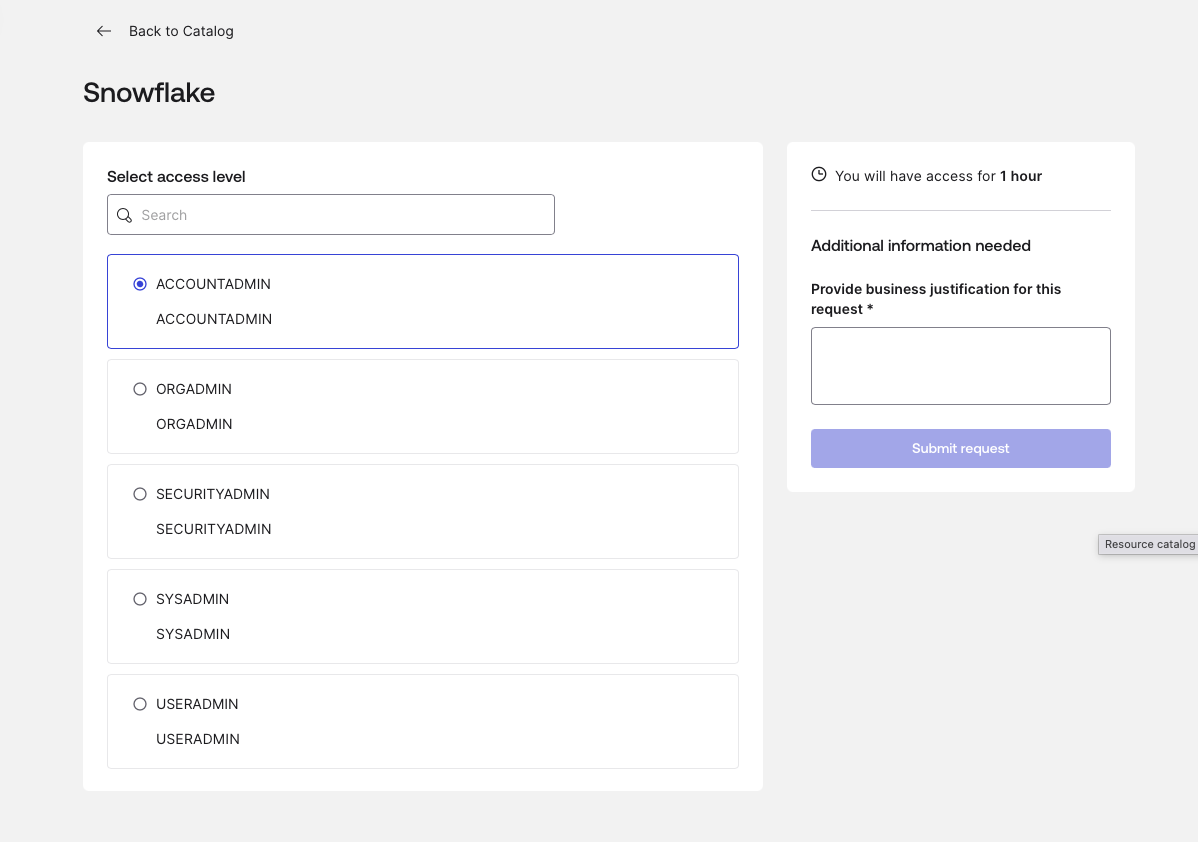
These are the roles that exist in the Snowflake application:
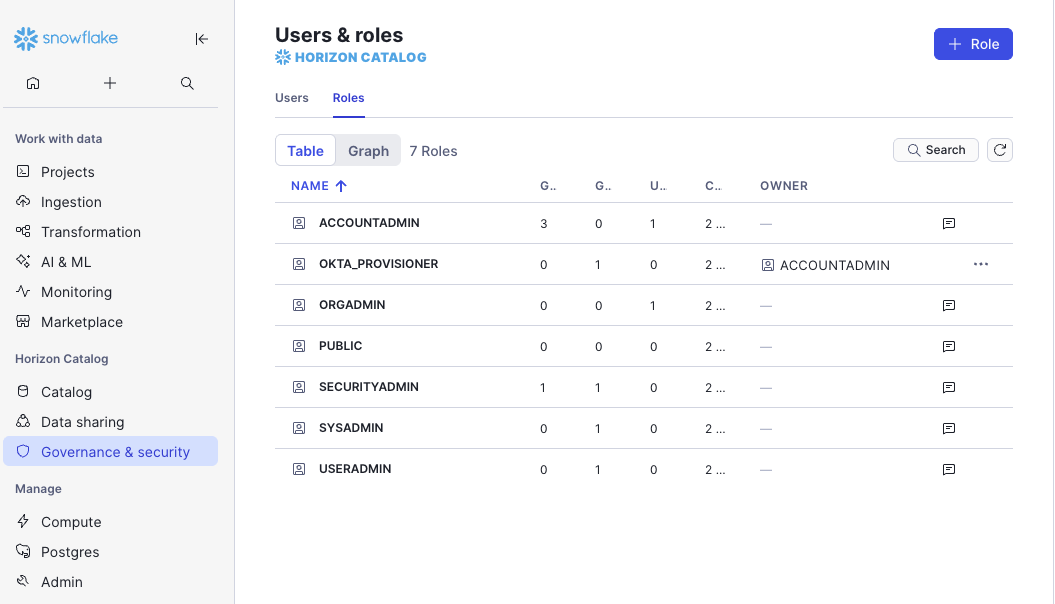
We have to match these roles in the Okta platform: Once matched, these roles (such as ORGADMIN or SYSADMIN) are converted into "requestable" objects, making them visible to users within the Access Request catalog.
- Go to the Governance tab.
- Add entitlement.

- Add an entitlement called “ROLES.”
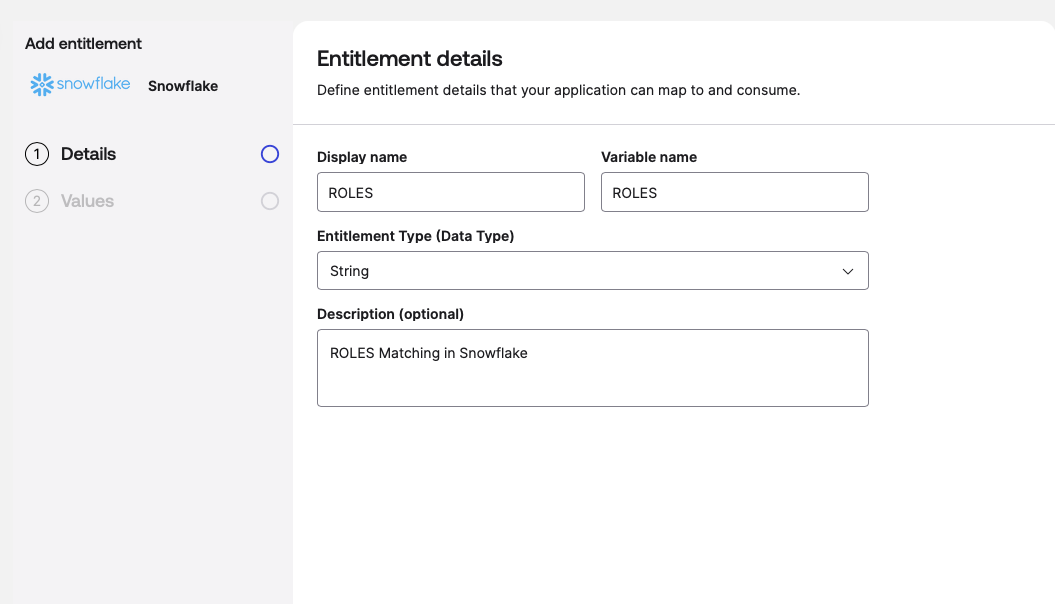
- Add user roles, which we will use in access requests.
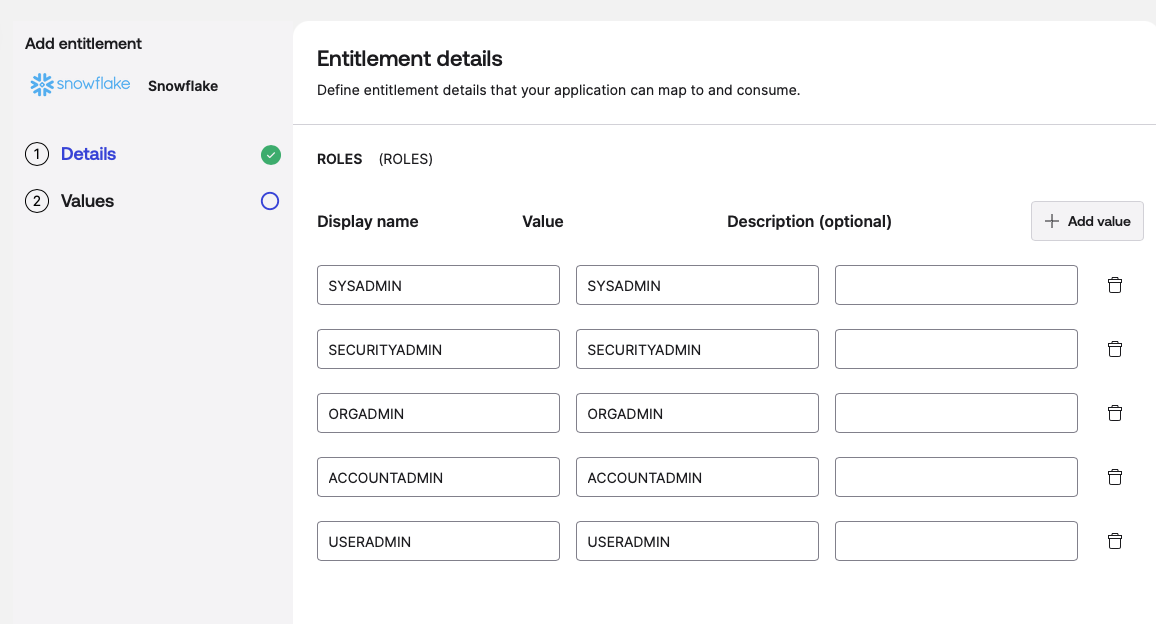
Once created, this is how they’ll look:

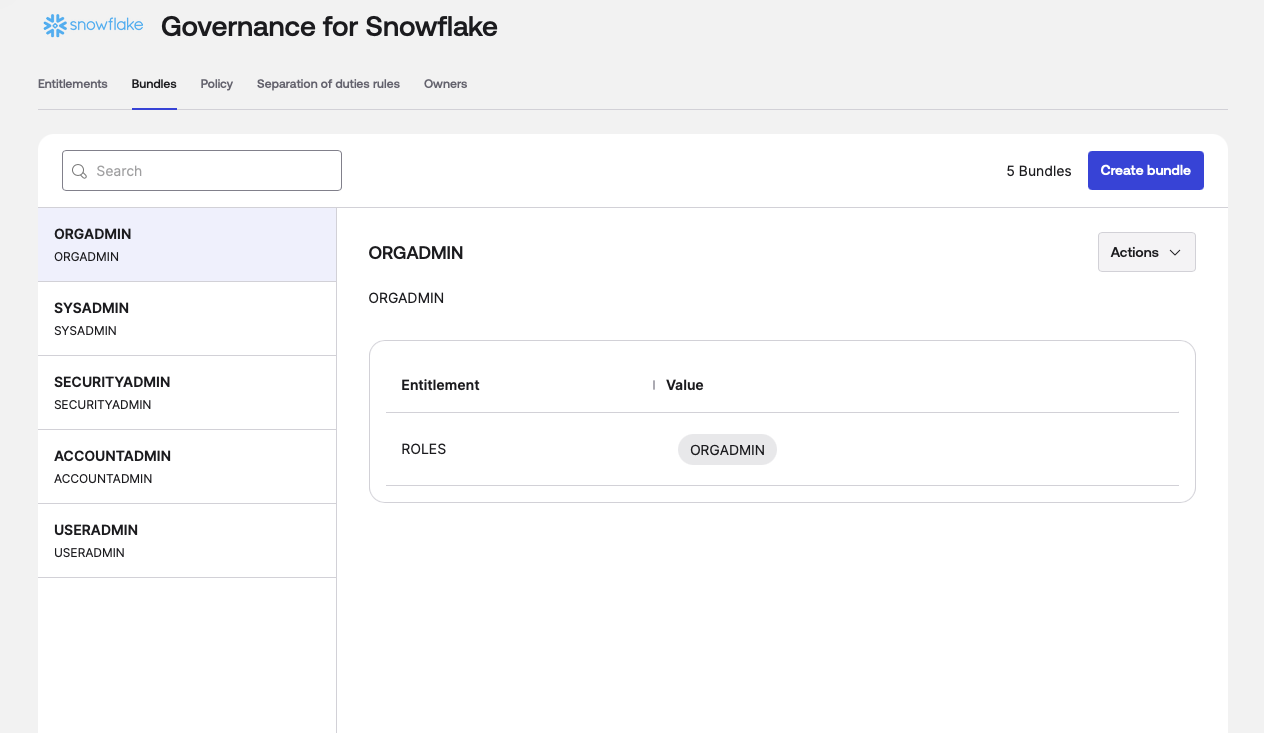
- Create a bundle for each role.

When you’re done creating bundles, this is what it’ll look like:
- Use these bundles to create an access request for each role in the Snowflake app -> Access Requests tab.

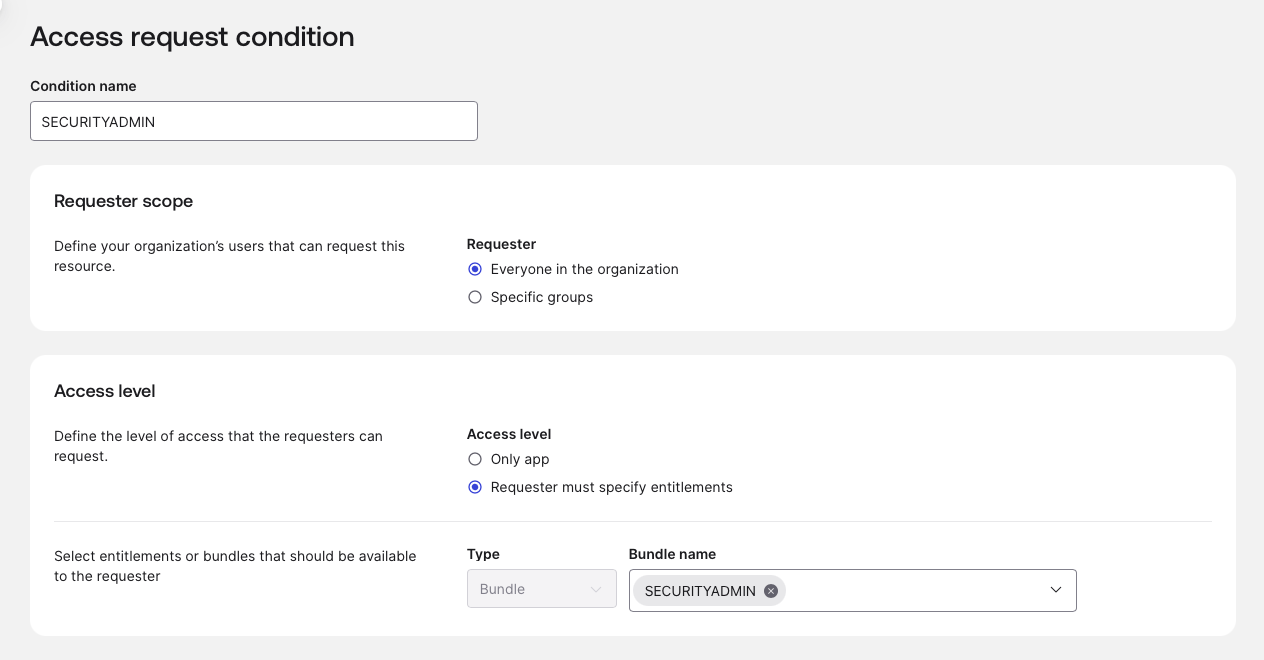
- Scroll down to the bottom and select Approval Sequence -> Select Sequence.

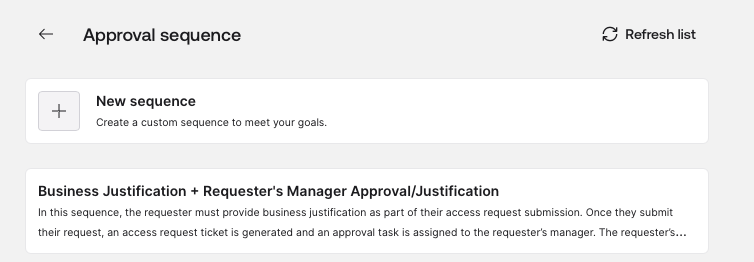
- Edit the “Business Justification” sequence.
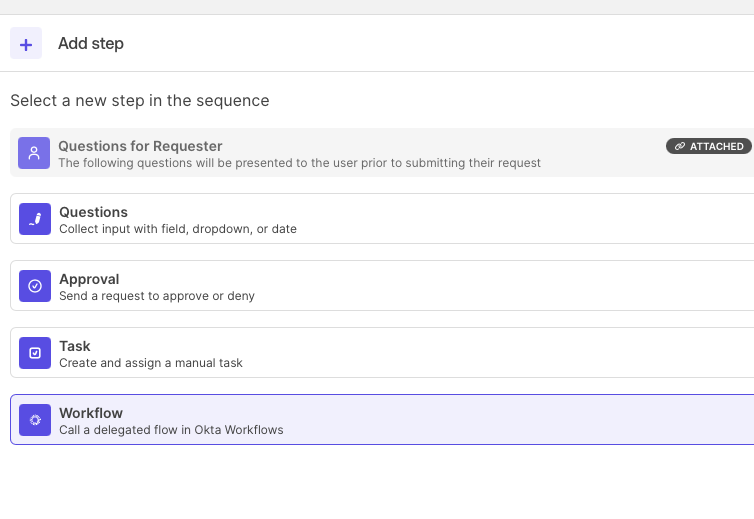
- Immediately below the “Approval for Requester’s manager” step, click “+” to add a new workflow step in the sequence.
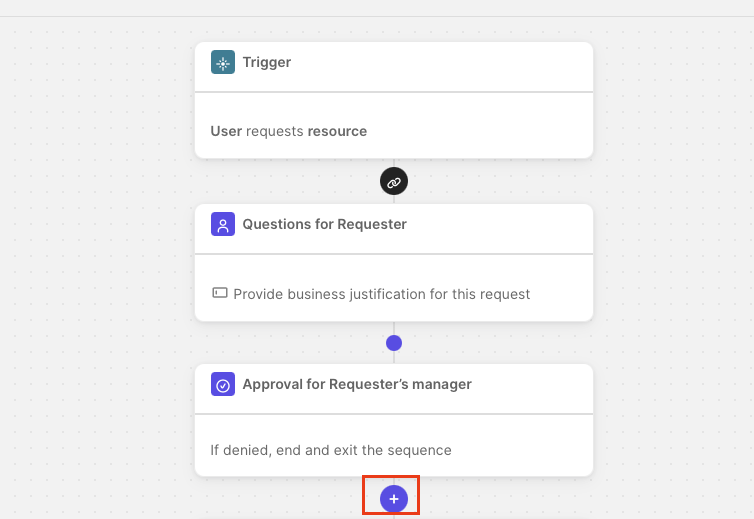
- Add a workflow step and select the delegated workflow we imported from the workflows pack.

- Once added, rename the sequence to “Snowflake Approval Sequence” and save it.

- Select the “Snowflake Approval Sequence” we just saved to call the Snowflake delegated flow during the access request process.

- Enable access requests for each role.
- Go to the end-user dashboard and select Request Access -> Snowflake to perform a final check that the user can request these roles.

- You should see all the roles that users can request listed.
Slack requirements
Slack provides the notification layer for the workflows.
- Scopes and permissions: The user authorizing the Slack connector in Okta Workflows must have permission to add apps to the workspace.
- App authorization: Authorize the Okta Workflows app in your Slack workspace.
- Channel ID: Identify the specific Slack Channel ID (e.g.,
#security-alertsor#it-ops) where the workflow should post messages.
Now that the foundational requirements have been met, we will proceed to unpack the workflows package and detail the architecture setup.
The architecture: A deep dive into the three-workflow solution
In this section, we’ll break down what each of the three main workflows does:
- Snowflake Delegated Flow (Assignment)
- Unassign Entitlements
- User Unassign from Snowflake
Watch: How to use OIG and Workflows to manage roles in Snowflake
This video demonstrates how to use OIG and Workflows to manage Snowflake roles at scale without the limitations of traditional integration connectors. See how this integration automates tasks, secures data, and eliminates the governance gap while reducing the risk of human error.

1. The delegated assignment flow: The "front door"
This flow is designed for delegated administration, allowing admins to trigger role assignments without having to enter the Workflows console.
- Logic and safety gates: The flow begins by taking a
userEmail and a requestedRole. Before acting, it performs areadUsercheck in Okta and agetAssignedUserForApplicationcheck to verify the user’s current state. - The "provisioned" requirement: A “Continue If” card acts as a gatekeeper, ensuring the user’s status in the Snowflake app is specifically PROVISIONED.
- Preventing race conditions: We implemented a five-second "Wait" card. In testing, we found that Snowflake sometimes needs a few seconds to register a new user before it can accept a GRANT ROLE command.
- Execution: Once validated, it uses the Snowflake “Grant Role to User” card and notifies the team via a Slack channel.

Delegated flow: User role assignment cards
START: Delegated Flow Event
Inputs:
requestedRole,userEmail,AccessLevelName.
Okta - Read User
Retrieves user profile details (First Name, Last Name) using the provided email.
String - Concatenate
Combines user names for record-keeping.
Control - Wait
Pauses the flow for 5 seconds to allow upstream provisioning to settle.
Okta - Get Assigned User for Application
Checks the specific user's assignment status for the Snowflake application.
Control - Continue If
Condition: Proceed only if the status is PROVISIONED.
Else: Stop with error "Error granting a role to the user."
Snowflake - Grant Role to User
Executes the role assignment in Snowflake.
String - Concatenate
Builds the success message for Slack.
END: Slack - Send Message to Channel
Posts a confirmation: "[User] was successfully assigned the role of [Role]."
2. Unassigning entitlements: The OIG API integration
This is the "brain" of the operation. It handles the complex task of revoking specific roles when an OIG grant is denied or expires.
- The "Golden Thread" (grantId): When OIG triggers a revocation, it sends a webhook to this flow’s API endpoint. We use an “Object Pick” card to extract the
grantIdfrom deep within the JSON: data.events.0.debugContext.debugData.grantId. - The OIG API callback: The initial webhook often lacks the specific role name. The flow uses a custom API action to call the OIG API:
/governance/api/v1/grants/{{grantId}}?include=full_entitlements. - Parsing nested entitlements: Using “At” and “Get” cards, the flow navigates the returned list to find the exact role name located at values.0.name.
- The "DENY" logic gate: To prevent accidental revocations during approval cycles, a “Continue If” card verifies that the OIG action is exactly DENY.

Unassign entitlements flow cards
START: API Endpoint (Webhook)
Receives body data containing grant and target information.
Object - Get Multiple (Pick)
Extracts the
grantIdand thetargetobject from the event data.
Object - Get
Extracts the
Alternate ID(User ID) from the target object.
Okta - Read User
Retrieves full profile for the identified user.
String - Concatenate
Builds a relative URL for the IGA API:
/governance/api/v1/grants/[grantId]?include=full_entitlements.
Okta IGA - Custom API Action
Performs a GET request to retrieve full details of the specific grant.
Control - Continue If
Condition: Proceed only if the
actionis "DENY" (indicating a removal request).
List - At
Retrieves the specific entitlement from the returned list.
Object - Get
Extracts the role name from the entitlement object.
Concatenate - First name + Last name
Creates a username from the user's first and last name to map in Snowflake.
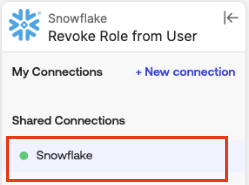
Snowflake - Revoke Role from User
Removes the role from the user in Snowflake.
Concatenate - Slack output
Creates a message to output in Slack.
END: Slack - Send Message to Channel
Posts confirmation: "[User] was successfully unassigned from the role [Role]."
3. Complete offboarding: Dropping the user
When a user is fully removed from the Snowflake application in Okta, revoking roles isn't enough; the user itself should be removed to reclaim the license.
- The trigger: The flow starts when a user is unassigned from the Snowflake application instance in Okta.
- Asynchronous processing: It uses an Async Each loop to process unassignment, calling a helper flow for every user removed.
- The final act: The helper flow executes the
Drop Usercommand in Snowflake. This ensures the user is entirely purged from the Snowflake environment, automating a task that usually requires manual SQL intervention.
Offboarding flow cards
Parent flow
START: Okta - User Unassigned from Application
Monitors
application.user_membership.removeevents for the Snowflake app.
List - For Each (Async Each)
Sends each unassigned user to the Helper Flow for processing.
Helper flow
START: Callable Event
Receives user data from the parent flow.
Object - Expand
Extracts the
Alternate ID(typically the username).
Snowflake - Drop User
Deletes the user account in Snowflake.
END: Slack - Send Message to Channel
Notifies the team that the Snowflake user has been dropped.
Testing the OIG and Workflows setup
Testing the "Access Request-to-Role"
The access request (user action)
- Log in as a standard test user. Navigate to the Okta End User Dashboard > Request access.
- Submit a request for the "Snowflake Role" request type. Select the specific role (e.g.,
USERADMIN). - Check the access request history to ensure the request was created and the correct approver (Manager) was assigned.
Approval and provisioning (admin/manager action)
- Log in as the approver admin and click “Approve.”
- Push the role to Snowflake:
OIG Approval→Okta Assigns Entitlement to User→Okta SCIM. - In Okta, go to the user's profile > Applications > Snowflake to confirm the role appears under "Entitlements."
- Perform similar checks in Snowflake to verify the user has been granted a proper role.
The user should now be able to log into Snowflake and see the assigned role.
Testing the revocation of entitlements
Entitlements revocation (governance action)
There are two ways to revoke the Snowflake role entitlement:
- Navigate to Identity Governance > Access Certifications (or the user's profile).
- Navigate to Applications > Snowflake > Assignments and click on Test_user > Manage Entitlements
Execution flow
- OIG event triggers the
Unassign EntitlementsAPI webhook. - Workflow start: The flow receives the
grantIdandtarget(User). - IGA API call: The workflow calls
/governance/api/v1/grants/[id]to verify theactionisDENY. - Snowflake revoke: The workflow executes the
Revoke Role from the Usercard in Snowflake. - Slack audit: A message is sent to the IT channel.
Verification and success criteria
- Workflows history: Open the Unassign Entitlements flow history.
- Success Check: Every card (Object Pick, IGA API, Snowflake Revoke) should have a green checkmark.
- In Snowflake, run
SHOW GRANTS TO USER "TEST_USER";. The role must be gone. - In Slack, confirm the message:
[User] was successfully unassigned from the role [Role].
Testing the "Drop User" cleanup for offboarding
- Unassign the test user from the entire Snowflake application in Okta.
- Execution flow:
Okta Unassignment→Parent Flow: User Unassigned→Helper Flow: Drop User. - In Okta, confirm the user is no longer in the Snowflake App assignment list.
- In Snowflake, Run
SHOW USERS LIKE 'TEST_USER%';. The user should return no results (dropped). - In Slack, confirm the "Snowflake user has been dropped" notification.
Lessons from automating OIG Workflows
Building this automation revealed several critical nuances in how OIG and Snowflake communicate:
Status and action mapping
One of the most frequent errors we encountered was the flow triggering at the wrong stage of the governance lifecycle. We established a strict mapping for the Continue If gates:
Lifecycle Stage | OIG Action | OIG Status | Expected Outcome |
New grant | ALLOW | ACTIVE | Snowflake role granted |
Revocation/Expiry | DENY | INACTIVE | Snowflake role revoked |
String formatting for Snowflake
Snowflake is case-sensitive and often expects a specific username format. We used Concatenate cards to merge the Okta firstName and lastName to match the Snowflake user_name requirements precisely, for example: JOHNDOE
The wait state
Without the Wait card, the "Delegated Assignment" flow would intermittently fail with a "User Not Found" error from Snowflake, even if the user had just been created. A five-second delay solved 100% of these race-condition failures.
Achieving true identity governance
By moving beyond the standard connector and utilizing the Okta Identity Governance API combined with Workflows, you create a closed-loop system, which offers important identity governance benefits:
- Security: Roles are revoked instantly when grants expire.
- Cost efficiency: Snowflake users are dropped when no longer needed, and licenses are automatically reclaimed.
- Compliance: Every action, from the OIG request to the Snowflake SQL command, is logged and auditable within the Workflow execution history.
Try it for free: Discover the benefits of automating complex identity processes at scale with Okta Identity Governance and Workflows. Start your 30-day free trial.


